
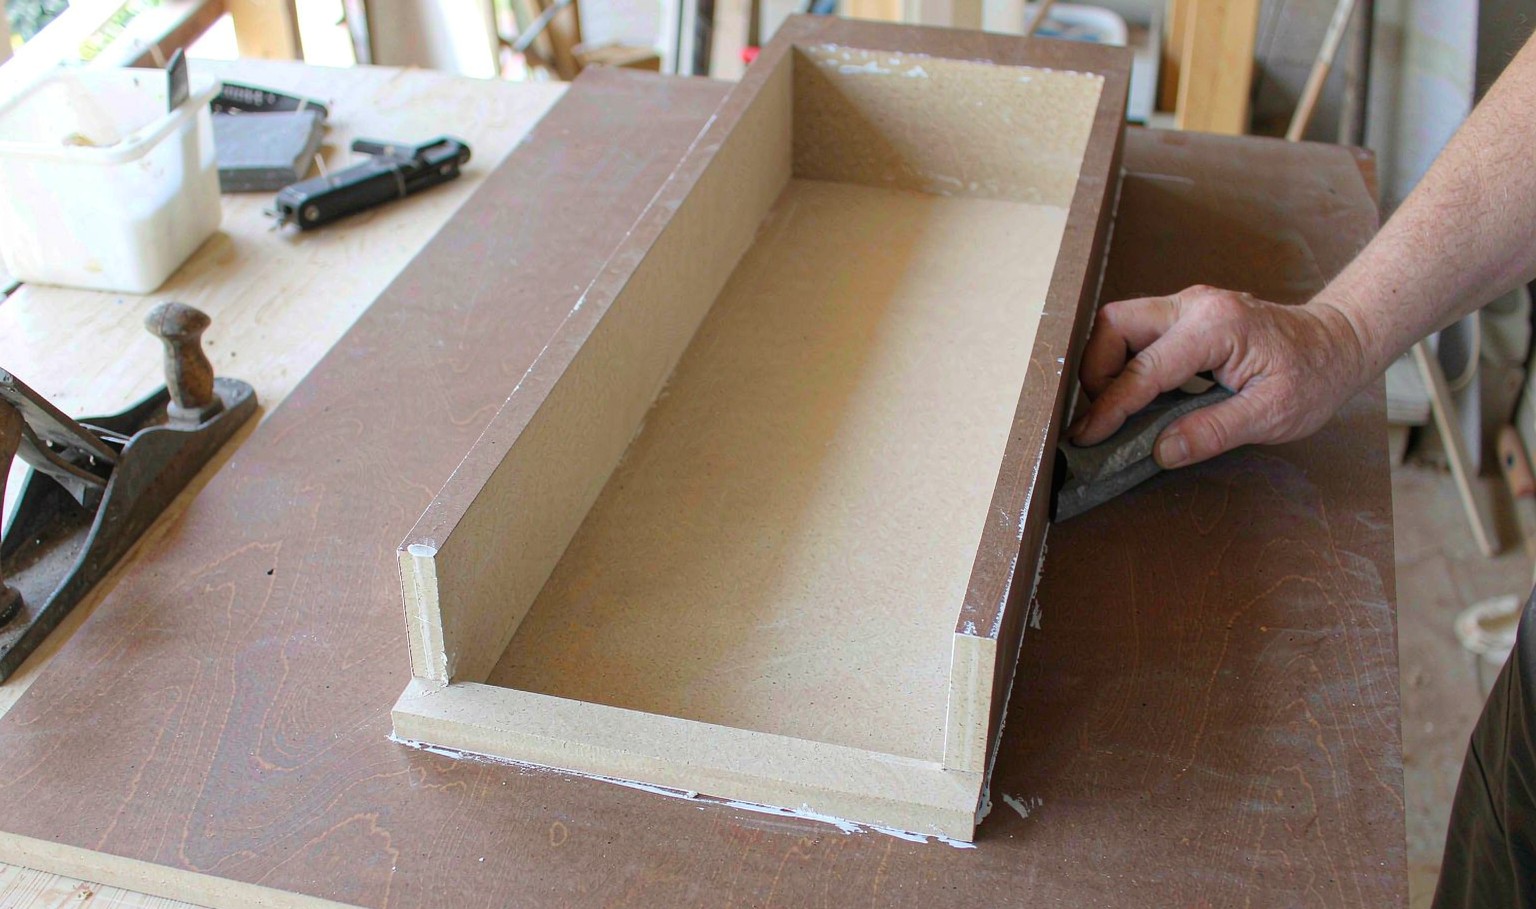
A pattern is not a tool
A vacuum forming tool has to do three things: hold a shape, pass air through itself, and survive being cycled between room temperature and 150 C several hundred times. A wood pattern does the first one well, the second one badly and the third one not at all. That is not a criticism, it is a definition, and most of the confusion in prototype tooling comes from expecting a pattern to behave like a tool.
Measured first-off deviation from drawing, on the same shallow tray geometry: 1.2 mm on a wood pattern, 0.4 mm on a cast epoxy tool and 0.1 mm on machined aluminium. The wood number is dominated by two things that have nothing to do with the drawing: the pattern moves as it takes up and gives off moisture, and the surface compresses slightly every time the sheet is pulled down onto it.
That 1.2 mm is not evenly distributed. It concentrates at the corners and along the long edges, where the sanding was done by hand and where the wood grain runs in different directions on adjacent faces. The centre of a large flat panel is often within 0.3 mm, because nothing there had to be shaped.
Where the wood pattern wins
A wood pattern wins on time and on money, and the margin is large. A pattern for a tray-sized part is a few hundred euros and three to five days, including the CAD, the machining of the blank and the hand finishing. A machined aluminium tool for the same part is several thousand euros and two to three weeks, and it needs a CNC slot in a schedule that is already full.
It also wins on change. A pattern can be sanded, filled, built up with a patch and re-sealed in an afternoon. An aluminium tool that is 2 mm wrong in a pocket is either welded and re-machined or scrapped. In the first two weeks of a program, when the design is still moving, that flexibility is worth more than the tolerance.
And it wins on the parts that never go to production. Jigs, check fixtures, one-off covers, a display unit for a trade show, a trial fit for a customer who has not placed an order: for these the pattern is the finished tooling, and there is no production phase for it to be wrong about.
Where it stops winning
The crossover is not a part count in a table, it is a rate. A wood pattern needs touching up roughly every 500 parts: the surface is re-sealed, the sharp edges are re-sanded, the vacuum holes are cleared. Call it four hours of downtime per 500 parts. An aluminium tool with the same care needs four hours per 20,000 parts.
That gives 40 hours of cumulative repair downtime at 5,000 parts on wood, against one hour on aluminium. If the machine costs 60 euros an hour, the wood pattern has spent 2,340 euros on repairs to save 3,000 euros on tooling. At 10,000 parts the repair bill passes the tooling saving and keeps going.
There is a second limit that arrives before the money does. Wood is hygroscopic, and a pattern in a workshop that swings between 30 and 80 percent relative humidity will change dimension through the year. A part formed in February does not match a part formed in July, and if the customer is doing a fit check across both, the pattern is blamed for a climate problem.

What wood actually does under vacuum
Wood is porous, which sounds like an advantage for a vacuum tool and is the opposite. Air is pulled through the pattern body rather than through the drilled holes, so the sheet is drawn down over the whole surface at once instead of being staged from the centre outwards. The result is trapped air between the sheet and the pattern, and trapped air becomes a shallow blister on the part.
The fix is a sealing coat, and it has to be a real one: two or three coats of a two-pack epoxy or a catalysed lacquer, sanded between coats, with the vacuum holes drilled after sealing rather than before. A pattern sealed only on the outside will still leak along the drilled holes, because the hole walls are bare wood.
Heat is the other problem. A pattern that runs at 120 C for a few cycles per hour dries out and shrinks, and the shrinkage shows up as a pattern that has moved 0.5 mm after a week of trials. Soaking the pattern in a stabilising resin before finishing slows this down; nothing stops it entirely.
| Pattern material | First-off deviation | Repair interval | Best use |
|---|---|---|---|
| Pine or fir, sealed | 1.5 to 2.0 mm | 300 parts | Rough shape check, fit trials |
| MDF, sealed and sanded | 1.0 to 1.3 mm | 500 parts | Prototypes, display parts |
| Birch ply, laminated | 0.8 to 1.0 mm | 800 parts | Larger panels, more stable |
| Tooling board, cast | 0.3 to 0.5 mm | 2,000 parts | Bridge tooling, small series |
| Cast epoxy | 0.3 to 0.4 mm | 5,000 parts | Pre-production runs |
| Aluminium | 0.05 to 0.15 mm | 20,000 parts | 製造 |
Table 1 — Pattern materials against the two numbers that decide the choice
Finishing a pattern so it survives
The difference between a pattern that lasts 200 cycles and one that lasts 800 is almost entirely in the finishing, and the finishing is where prototype work always runs out of time. Six things matter, and they are all cheap.
- Seal the whole body, including the drilled holes, with two-pack epoxy. Bare wood wicks air and moisture.
- Round every edge to at least 1.5 mm. A sharp wood edge crumbles under the sheet and leaves a witness line on the part.
- Fill and sand the end grain separately. End grain absorbs resin differently and shows as a dull patch through a glossy sheet.
- Drill vacuum holes at 1.0 to 1.5 mm, from the back, and clear them with a pin after every run.
- Fit a hardwood or aluminium wear strip where the clamp frame lands, because that is where a pattern dies first.
- Keep the pattern off the floor and out of direct sun. Most pattern failures are storage failures.
A pattern finished this way will hold its shape for a few hundred cycles and will still be 1 mm off drawing. That is the deal, and it is a good deal when the alternative is waiting three weeks for aluminium to answer a question that a part could have answered in three days.
Choosing between pattern, bridge and tool
| Situation | Tool | なぜ |
|---|---|---|
| Design still moving, 20 parts needed | Wood pattern | Cheap to change, days not weeks |
| Customer fit trial, 100 parts | Sealed MDF | Enough parts for a real trial, still fast |
| Pre-production, 2,000 parts | Cast epoxy or tooling board | Tolerance close enough to trust |
| Production, 20,000 parts | Aluminium | The repair curve decides it |
| Display part, one off | Wood pattern | Appearance is the requirement, not tolerance |
Table 2 — Matching the tool to the question being asked
The mistake is to skip the middle step. Programs go from a wood pattern straight to an aluminium tool and then discover a design problem in the aluminium, where the fix costs a re-machine. A cast epoxy bridge tool at 0.4 mm holds enough tolerance to find the design problem, and it costs a fifth of the aluminium.
What to specify
A prototype tooling order should state what the tool is for, because the supplier will otherwise build to the tolerance they build everything to.
- The number of parts expected, not the number hoped for. It picks the material.
- The tolerance that matters, on which features, and the tolerance that does not.
- The forming temperature, because a pattern at 150 C has a different life from one at 110 C.
- Whether vacuum holes are drilled before or after sealing, which decides whether the pattern leaks.
- The storage conditions, if the pattern has to be used again in six months.
Then agree what the first-off part will be measured against. A pattern quoted at 1.2 mm and measured against a 0.2 mm drawing tolerance will fail, and it will fail for a reason that was known before the order was placed.
How accurate is a wood pattern?
About 1.2 mm off drawing on a tray-sized part, worst at the corners and long edges. The centre of a flat panel is often within 0.3 mm.
How many parts can a wood pattern run?
Several hundred with proper sealing and edge rounding, with a touch-up roughly every 500 parts. Beyond that the repair time costs more than an aluminium tool would have.
Why does a wood pattern cause blisters on the part?
Wood is porous, so air is pulled through the body rather than the drilled holes. The sheet is drawn down everywhere at once and traps air. Sealing the body and the hole walls fixes it.
Should vacuum holes be drilled before or after sealing?
After. Holes drilled before sealing have bare wood walls that leak air, which defeats the point of sealing the pattern.
When does aluminium become cheaper than wood?
Around 5,000 to 10,000 parts, depending on machine rate. Wood needs about four hours of repair per 500 parts; aluminium needs four hours per 20,000.
Can a wood pattern be used for a customer fit trial?
Yes, if the trial is about fit and shape rather than a dimension. For a trial that has to prove a tolerance, use a cast epoxy or tooling board pattern at 0.4 mm.
A prototype that has to answer a question this month?
Send the part drawing and the number of parts you actually need. We will tell you whether a pattern, a bridge tool or an aluminium tool is the cheaper way to the answer.




 JA
 EN
 ES
 FR
 DE
 PT
 AR
 RU
 KO
 IT
 NL
 TR
 PL
 ID
