
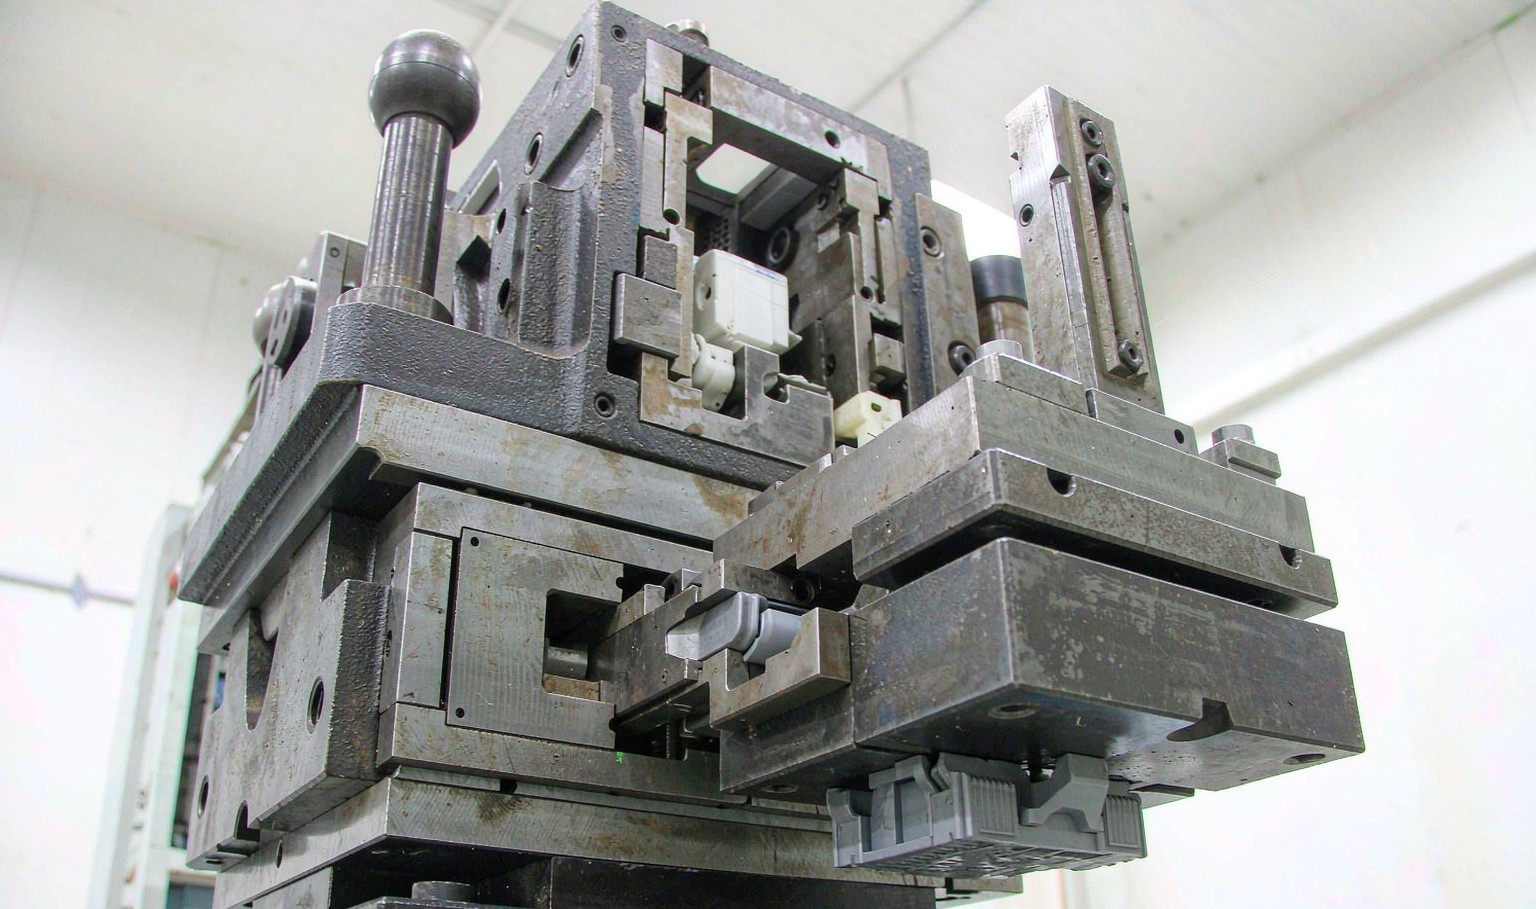
An undercut is a decision, not a defect
A snap fit, a screw thread, a cable channel, a hinge barrel: all of them are undercuts, and an undercut means the part cannot be pushed straight off a core. The part design needs the feature, so the tool has to release it somehow, and there are four ways to do that.
The choice is made at the design review and it is expensive to change afterwards. A slider adds a mechanism to the tool, a lifter adds a moving pin inside it, a collapsible core adds a whole sub-assembly, and a strip release adds nothing at all but only works on a flexible feature with a small undercut.
What makes the decision hard is that the cheapest option at the tool is not the cheapest option at the part. A strip release that works 99 percent of the time on a soft TPE is a scrap rate on a glass filled nylon, and a slider that adds 12 percent to the cycle is still cheaper than a secondary operation that adds a machine, an operator and a queue.
Four ways to release an undercut
A slider, also called a side action or a cam, moves a piece of the cavity sideways before the part is ejected. It is driven by an angled leader pin or a hydraulic cylinder, it is locked by a wedge when the tool closes, and it can release an undercut of any depth on an outside surface. It is the most expensive per feature and the most capable.
A lifter is an angled pin inside the moving half that travels with the ejector plate. As the plate comes forward the pin moves up and sideways at the same time, which releases an internal undercut and ejects the part in one motion. It is cheap, it is compact, and it is limited to an undercut near the edge of the part.
A collapsible core is a segmented core that shrinks inward before ejection. It releases a full internal thread or a deep internal groove, it is the most expensive option, and it needs maintenance because the segments wear against each other.
A strip release is no mechanism at all. The part is pushed off and the undercut deflects out of the way, which works when the feature is flexible, the undercut is under about 5 percent of the diameter and the material has enough elongation. It is free and it is the first thing to try.
| 方法 | Undercut | Cycle cost | Tool cost |
|---|---|---|---|
| Strip release | Small, flexible | None | None |
| Lifter | Internal, near edge | +4 to 8% | 低い |
| Slider | External, any depth | +8 to 15% each | 高い |
| Collapsible core | Full internal thread | +15 to 25% | Very high |
Table 1 — Release methods and what each one costs
Every side action costs cycle
A tool with no side action runs at a cycle time index of 100. One slider takes it to 108, two to 118, three to 131 and four to 147. The cost is not the slider movement itself, which is fast; it is the sequence. The tool cannot open fully until the sliders are back, the sliders cannot move until the wedge is clear, and the ejector cannot come forward until the sliders are confirmed home.
Each of those interlocks is a fraction of a second, and they add up. On a 20 second cycle, index 147 is 29 seconds, which is a 47 percent loss of output for four features. That is the number to put in front of a designer who wants four undercuts on four sides.
There is a second cost that is not in the index: reliability. Every side action is a mechanism with wear surfaces, limit switches and a lubrication point, and a tool with four of them has four times the things that can stop a shift. Most shops would rather redesign one undercut away than add a fourth slider.

Wear shows up as flash
A slider has to slide, so it has to have clearance, and the clearance grows. At 0.01 mm of wear the reject rate is about 0.8 percent; at 0.03 it is 1.6, at 0.05 it is 3.4, at 0.08 it is 7.2, and at 0.12 mm it is 14 percent.
The failure is flash at the parting line the slider makes. That line is a shut-off, and a shut-off with 0.1 mm of clearance is a 0.1 mm flash land. It appears first at the corners where the slider is least supported, then along the whole edge.
The wear is not only sliding wear. A slider is pushed back by the plastic during injection, and the wedge and the heel block are what resist it. A tool with a marginal heel block deflects a few hundredths under injection pressure, the shut-off opens, and the flash appears on a tool that has run for years. It looks like wear and it is actually deflection.
The fix is scheduled, not reactive. Wear plates are replaceable and they are meant to be replaced; a shop that measures slider clearance at every service and replaces the plates at 0.05 mm never sees the 14 percent end of the curve.
Slider design rules that hold
The leader pin angle sets the stroke. A 15 to 20 degree angle is the usual compromise: shallower and the pin has to be long, steeper and the friction and the side load rise. The stroke has to be more than the undercut depth plus 2 mm of clearance, and it is measured along the slide, not along the pin.
The wedge locks the slider against injection pressure and it has to be a real wedge, not a flat face. A slider held only by the leader pin will move under pressure, and the movement is what produces the flash. The heel block behind the wedge takes the load, and it should be sized for the full cavity pressure over the slider's projected area.
Wear plates on the sides and the bottom, grease channels, and a vent. The vent is the one that gets forgotten: a slider traps air in front of it as it comes home, and the air has nowhere to go except into the cavity. A 0.02 mm vent groove on the slider face solves it.
And the safety. A slider needs a positive return, a limit switch that confirms it is home before the tool closes, and a mechanical stop that prevents it from being pushed into the cavity if the switch fails. A slider that is not home when the tool closes is a tool repair measured in weeks.
Lifter design rules, which are different
A lifter moves in two directions at once: up with the ejector plate and sideways by the angle. That means the top of the lifter travels further than the plate, and the part it is pushing is being pushed sideways as well as up. The angle is limited to about 15 degrees for that reason, and 10 to 12 is common.
The lifter needs a guide. A lifter running in a plain hole in the core will wear the hole oval in a few hundred thousand shots and then bind. A guided lifter with a wear bushing, or a lifter on a slide block, is the difference between a tool that runs and a tool that is pulled every month.
The lifter head has to be below the part surface when the tool is closed and it has to clear the undercut when it is forward. On a deep undercut those two conditions conflict, and the answer is a two stage lifter or a slider instead.
The last rule is about the part, not the tool. A lifter pushes on a small area at an angle, so it leaves a mark and it applies a side load. On a thin wall it distorts the part. If the undercut is on a thin wall, the lifter is the wrong answer regardless of how well it is designed.
The checklist before the tool is cut
Every undercut should be listed with its depth, its position and whether it is internal or external. That list is the design review's input, and it is usually assembled from the part drawing by somebody who has done it before.
Then each one gets a method, and the method gets a cost. The cost is the cycle index, the tool cost and the maintenance interval, and it belongs on the same page as the part drawing, because the customer is the one who decides whether the feature is worth it.
| Check | なぜ |
|---|---|
| Undercut depth and position | Sets the method |
| Internal or external | Lifter or slider |
| Material elongation | Strip release possible? |
| Wall thickness at the feature | Lifter distortion |
| Stroke available | Slider length and angle |
| Maintenance access | Wear plate replacement |
Table 2 — What has to be answered before the tool design is released
When can an undercut be stripped instead of using a slider?
When the feature is flexible, the undercut is under about 5 percent of the diameter, and the material has enough elongation at the demould temperature. Soft TPE and PP strip well; glass filled nylon does not.
How much cycle time does a slider add?
Eight to fifteen percent per side action, from the interlock sequence rather than the movement. Four sliders on a 20 second cycle make it 29 seconds.
What angle should a lifter run at?
Ten to fifteen degrees. The top of the lifter travels further than the ejector plate and pushes the part sideways, so a steeper angle distorts the part and wears the guide.
Why is my slider flashing after years of running?
Either wear on the wear plates or deflection of the heel block under injection pressure. Measure the clearance; if it is under 0.05 mm the problem is deflection, not wear.
Do sliders need vents?
Yes. A slider traps air in front of it as it returns, and that air goes into the cavity. A 0.02 mm groove on the slider face is the usual fix.
Can a collapsible core be avoided?
If the internal thread can be a separate insert, or if the thread can be a coarse profile that strips, yes. Otherwise a collapsible core is the only way to mould an internal thread in one shot.
An undercut that needs a mechanism, or a tool that flashes at the slider?
Send the part drawing and the undercut list. We will tell you which method suits each one and what it costs in cycle and in tool.
Continue reading
- Gate Design in Injection Molding: Where the Plastic Enters
- Ejection System Design: Pins, Sleeves, Strippers and the Marks They Leave
- Warpage in Injection Molding: Differential Shrinkage and the Fix
- Injection Cycle Time Reduction: Where the Seconds Actually Are
- Custom Injection Molding: Tooling, Tolerances and Volume




 JA
 EN
 ES
 FR
 DE
 PT
 AR
 RU
 KO
 IT
 NL
 TR
 PL
 ID
