

- 1. Why heating decides the part more than the mold does
- 2. The forming window, defined properly
- 3. Forming temperatures for the common sheet materials
- 4. How infrared heating actually works
- 5. Zone control: the four things that cause an uneven sheet
- 6. Measuring sheet temperature, not oven temperature
- 7. Sag, and what it tells you
- 8. Heating time versus thickness
- 9. Two-sided heating and the top/bottom balance
- 10. Moisture, drying and the bubbles that ruin a run
- 11. Reading the sheet: six symptoms and what they mean
- 12. Frequently asked questions
- 13. Parts forming inconsistently? Send us the material, thickness and the defect photo
On this page
- Why heating decides the part more than the mold does
- The forming window, defined properly
- Forming temperatures for the common sheet materials
- How infrared heating actually works
- Zone control: the four things that cause an uneven sheet
- Measuring sheet temperature, not oven temperature
- Sag, and what it tells you
- Heating time versus thickness
- Two-sided heating and the top/bottom balance
- Moisture, drying and the bubbles that ruin a run
- Reading the sheet: six symptoms and what they mean
- Frequently asked questions
Why heating decides the part more than the mold does
Buyers spend their attention on the mold. Molders spend it on the oven. That asymmetry is not sentimentality — it is because almost every forming defect that is not a mold geometry problem is a heating problem.
Consider what the sheet temperature controls:
- Whether the part forms at all. Below the softening range the sheet will not stretch; it tears or bridges. Above it, the sheet sags into the mold before vacuum is applied and the part is scrap.
- Wall thickness distribution. A hotter sheet stretches more easily everywhere, but the effect is not uniform — hotter areas stretch first and thin more. Temperature variation across a sheet becomes thickness variation in the part.
- Surface quality. A sheet that is too cold produces chill marks where it touches the mold. A sheet that is too hot produces a glossy, mottled surface and can pick up mold texture unevenly.
- Warpage. Uneven heating leaves differential shrinkage built into the part, which reveals itself as warpage hours or days after forming.
- Mechanical properties. Overheating degrades the polymer — in PVC it releases HCl and yellows the sheet; in PC it reduces molecular weight and impact strength. A part can look perfect and fail a drop test.
All of that is set before the sheet ever reaches the mold.
The forming window, defined properly
Every thermoplastic sheet has a temperature range in which it can be formed. Outside it, the process fails in one direction or the other. The width of that window, and where it sits, is the single most useful piece of process knowledge for a given material.
| Zone | What happens | Symptoms |
|---|---|---|
| Below Tg (glass transition) | Sheet is rigid and elastic | Will not form, springs back, cracks |
| Tg to Tg + 20 °C | Softening begins, high elastic recovery | Partial form, heavy spring-back, webbing |
| Forming window | Rubbery, low elastic recovery, high elongation | Clean form, good thickness distribution |
| Above window, below degradation | Low viscosity, sags under its own weight | Sag, sheet touching mold before vacuum, thin corners, sheet marks |
| Degradation range | Polymer chains break down | Yellowing, bubbles, smell, brittle parts |
The forming window is not a single number — it is a band, and the optimum sits near the upper-middle of it, not at the top. Running at the top of the window buys easier forming at the cost of thickness control.
A working definition: the forming window is the temperature band in which the sheet's elongation at the forming rate exceeds the draw ratio, while its sag over the oven dwell time stays within what the frame can support. Both halves matter. A material can be perfectly soft and still unusable because it sags into the mold before the vacuum comes on.
Forming temperatures for the common sheet materials
The table below is the range we work to on production machines, measured as sheet surface temperature with an infrared pyrometer immediately before the sheet leaves the oven.
| Materiaal | Tg | Forming range (surface) | Optimum | Upper limit before damage |
|---|---|---|---|---|
| PS (general purpose) | ~100 °C | 140 – 175 °C | 155 – 165 °C | 190 °C |
| HIPS | ~100 °C | 140 – 175 °C | 150 – 165 °C | 190 °C |
| ABS | ~105 °C | 150 – 185 °C | 165 – 175 °C | 200 °C |
| PVC (rigid) | ~80 °C | 120 – 165 °C | 140 – 155 °C | 175 °C — HCl release |
| PETG | ~80 °C | 130 – 170 °C | 145 – 160 °C | 185 °C |
| APET / CPET | ~78 °C | 120 – 160 °C | 135 – 150 °C | 175 °C — crystallisation |
| PP | ~−10 °C | 150 – 190 °C | 165 – 180 °C | 210 °C |
| HDPE | ~−120 °C | 140 – 180 °C | 155 – 170 °C | 200 °C |
| PC | ~147 °C | 180 – 220 °C | 195 – 210 °C | 230 °C — must be dry |
| PMMA (acrylic) | ~105 °C | 150 – 190 °C | 165 – 180 °C | 200 °C — bubbles |
| PMMA (cast) | ~105 °C | 160 – 195 °C | 170 – 185 °C | 205 °C |
| CPVC | ~110 °C | 150 – 185 °C | 165 – 175 °C | 195 °C |
| PPSU / PES | ~220 °C | 240 – 290 °C | 255 – 275 °C | 310 °C |
Values are for sheet surface temperature, not oven air temperature. Oven air is typically 20 – 60 °C above the target surface temperature and is a poor control variable — see the measurement section below.
Careful with "the data sheet says": resin suppliers quote forming temperatures for their grade at their recommended thickness. A 6 mm sheet of the same material needs a longer dwell, not a higher temperature, and a heavily oriented thin sheet forms at the lower end of the range because orientation reduces the temperature needed to stretch it. Always confirm on your own sheet, at your own thickness.
How infrared heating actually works
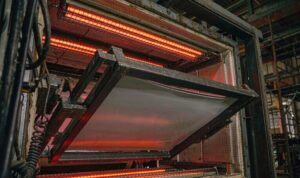
Almost all thermoforming ovens are infrared. That matters because infrared heating is not the same as heating in a hot-air oven, and the difference explains most of the odd behaviour people attribute to "the material".
Infrared heaters come in three wavelength bands, and the band determines how deeply the radiation penetrates the sheet:
| Emitter type | Peak wavelength | Penetration in plastic | Behaviour |
|---|---|---|---|
| Short wave (quartz halogen, T3) | 1.0 – 1.6 µm | Deep — several mm | Fast, penetrates, heats the body of the sheet; can overheat the core |
| Medium wave (quartz tube, ceramic) | 2.0 – 4.0 µm | Moderate — 1 – 3 mm | The general-purpose choice for most sheet |
| Long wave (panel, wire) | 4.0 – 8.0 µm | Shallow — surface only | Slow, surface-heavy; good for thin sheet, poor for thick |
For thick sheet (above 4 mm) short-wave emitters are the only practical way to heat the core in a reasonable time; for thin sheet long-wave panels give gentler, more uniform heating without risk of overheating.
Two consequences follow, and they explain a lot of production behaviour:
- A sheet can be at temperature on the surface and cold in the middle. With long-wave emitters on a 6 mm sheet, the surface reaches 170 °C while the core is still at 110 °C. The sheet forms, but the core resists, and the part springs back or thins unevenly. The cure is a soak period — hold the sheet at temperature with the heaters reduced — or a switch to medium/short wave.
- Colour changes everything. Carbon black absorbs infrared strongly and heats fast. White and light colours reflect much of it and heat slowly. A mold running black and white versions of the same part needs different heating times — often 20 – 40 % different. This is one of the most common causes of "the same setup works for one colour and not the other".
Practical rule: black sheet heats roughly 25 – 40 % faster than natural or white sheet of the same material and thickness under the same heater setting. If you are switching colours without changing the heat profile, you are forming black sheet too hot and white sheet too cold.
Zone control: the four things that cause an uneven sheet
A sheet that is uneven in temperature produces a part that is uneven in thickness. There are four independent causes, and they need four different fixes.
1. Heater-to-sheet distance variation
Infrared intensity falls with the square of distance. A heater bank that is 10 % further from one edge of the sheet delivers about 17 % less energy there. On a large machine, a sagging heater frame or a sheet that is not centred in the clamp produces a cold band that never forms properly.
Fix: check the heater frame for sag at service intervals, and centre the sheet in the frame by measurement rather than by eye.
2. Element ageing
Infrared elements lose output as they age. A bank of elements installed together will drift together, which is manageable, but elements replaced one at a time create hot spots. The symptom is a repeating pattern of thickness variation that matches the element pitch.
Fix: replace elements in banks, not individually, and log element hours.
3. Edge effects
The edges of a clamped sheet lose heat to the frame and gain heat from the sides of neighbouring elements. The result is usually a cold edge band on heavy-gauge machines and a hot edge band on thin-gauge roll machines. Either way, the perimeter of the sheet forms differently from the centre.
Fix: shadow the edges with a mask, or accept that the trim allowance at the edge has to be wider. On heavy gauge, a 30 – 50 mm edge allowance is normal for this reason alone.
4. Deliberate profiling
Not all unevenness is a fault. Most production molds benefit from a deliberately profiled heat pattern — hotter where the draw is deepest, cooler where the sheet should stay stiff. On a deep female cavity, the centre of the sheet needs to be hotter because it stretches most. On a male mold, the perimeter needs more heat because it forms the walls.
| Geometry | Where to add heat | Where to reduce heat |
|---|---|---|
| Deep female cavity, centred | Centre — the deepest draw | Perimeter, which stays as flange |
| Male mold, tall part | Perimeter and corners — the walls | Centre, which becomes the flat top |
| Long narrow part | Along the long axis, uniformly | Short ends |
| Multiple cavities | Each cavity centre | Between cavities |
| Twin-sheet | Both sheets equally; no profiling | — |
Profiling is done with zone-controlled heater banks, with masks, or with a screen printed with a heat-absorbing pattern. On older machines with a single-zone oven, profiling is limited to physical masking.
Measuring sheet temperature, not oven temperature
Oven temperature is nearly useless as a control variable. It tells you what the air is doing, and the air is not what heats the sheet. Sheet surface temperature is the variable that predicts the part.
| Methode | Nauwkeurigheid | Snelheid | Best use |
|---|---|---|---|
| Infrared pyrometer, handheld | ±2 – 5 °C | Instant | Setup, spot checks, troubleshooting |
| Contact thermocouple / surface probe | ±1 – 2 °C | 2 – 5 s per point | Calibration, verifying the pyrometer |
| Fixed IR sensor array | ±3 °C | Doorlopend | Closed-loop control on production machines |
| Thermal imaging camera | ±2 °C | Instant, whole sheet | Finding uneven heating — the best diagnostic tool there is |
| Optical / non-contact scanner (in-oven) | ±1 – 2 °C | Doorlopend | Automated lines, closed loop |
Emitted radiation depends on emissivity, which varies with material and surface. A pyrometer set for 0.95 reads low on a glossy or metallic sheet. Verify against a contact probe on each new material.
The single most useful investment for a forming shop is a thermal imaging camera. One image of a sheet leaving the oven shows every cold band, every hot spot and every edge effect at once, and it converts a week of guesswork into an afternoon of adjustment.
Measure at the moment of forming, not in the oven. The sheet cools between the oven and the mold — typically 5 – 15 °C in 2 – 4 seconds on thin gauge, less on heavy gauge. The temperature that matters is the one when the sheet touches the mold, so measure there, or measure in-oven and apply a known offset.
Sag, and what it tells you
Sag is the sheet deflecting under its own weight in the oven. It is not a defect in itself — a controlled sag is a useful indicator and, in some processes, a deliberate pre-stretch. But uncontrolled sag causes real problems.

- Sag can touch the mold before vacuum. The sheet then cools against the mold in the wrong place, and the part has a flat spot or a mark exactly where it touched.
- Sag changes the effective draw. A sagged sheet has already used up some of its elongation before forming starts, so the walls come out thinner than a flat sheet would give.
- Sag is thickness and temperature dependent. Doubling the thickness increases sag by a large factor because stiffness scales with the cube of thickness while weight scales linearly — but the sheet is also softer at the same temperature, so the net effect is strong.
Reading sag as a diagnostic:
| Observed sag | Interpretation | Actie |
|---|---|---|
| None, sheet still flat and stiff | Under-heated | Increase dwell or heater output; expect tearing if formed |
| Slight, even, 5 – 15 % of span | Correct for most materials | Form |
| Deep, even, 20 – 30 % of span | At or above the top of the window | Reduce temperature; check for thin corners |
| Uneven — one side sags more | Uneven heating or sheet gauge variation | Thermal image the sheet; check gauge across the sheet |
| Sagging rapidly, sheet touching mold | Badly over-heated or wrong material | Reduce temperature immediately; check material identity |
Sag is measured as a percentage of the unsupported span between clamps. On a 1,000 mm span, 10 % is 100 mm of droop.
On heavy gauge, sag is often used deliberately. A controlled pre-sag lets the sheet start closer to the mold and shortens the draw. On twin-sheet forming, sag control is essential because the two sheets must meet symmetrically.
Heating time versus thickness
Heating time does not scale linearly with thickness. Radiation heats the surface, and conduction carries heat inward, so the time to reach a uniform temperature rises roughly with the square of thickness for conduction-dominated heating, and closer to linear for deeply penetrating short-wave radiation.
| Sheet thickness | Typical heat time (medium wave) | Typical heat time (short wave) |
|---|---|---|
| 0.5 mm | 8 – 15 s | 5 – 10 s |
| 1.0 mm | 15 – 30 s | 10 – 18 s |
| 2.0 mm | 35 – 60 s | 20 – 35 s |
| 3.0 mm | 60 – 100 s | 35 – 55 s |
| 5.0 mm | 130 – 200 s | 70 – 110 s |
| 8.0 mm | 280 – 420 s | 140 – 220 s |
| 10.0 mm | 400 – 600 s | 200 – 320 s |
Times are for a sheet reaching forming temperature throughout, not just at the surface, with heaters at 350 – 450 mm distance. Double-sided heating roughly halves these; single-sided heating roughly doubles them.
Practical implications:
- On heavy gauge, heating is the cycle. A 6 mm sheet may take 3 minutes to heat and 20 seconds to form. Every minute saved in heating is a minute off the cycle, which is why heavy-gauge machines use short-wave, double-sided ovens with high installed power.
- On thin gauge, heating is a small part of the cycle. Heat time may be 3 seconds out of an 8-second cycle, so the cooling and transfer dominate. Optimising the oven on a thin-gauge line yields less than optimising the mold cooling.
- Never shorten heat time by raising temperature. It is the most common shortcut and the most reliable way to produce degraded material, bubbles and warped parts. Raise power density or add heaters instead.
Two-sided heating and the top/bottom balance
Heating from both sides roughly halves the time to a uniform temperature and, more importantly, removes the through-thickness gradient that single-sided heating creates. On sheet above about 3 mm, two-sided heating is effectively mandatory.
The two banks are almost never set to the same output, for two reasons:
- The mold is usually below. The underside of the sheet is the face that meets the mold, so it needs to stay soft slightly longer. A 5 – 15 % higher bottom output is common.
- Convection asymmetry. Hot air rises, so the top surface loses less heat to the surrounding air and gains from the rising plume. On tall ovens this can be worth 10 °C.
The balance is set by forming trials, not by calculation. The test is simple: form a part, cut it in half, and measure wall thickness at the top and bottom of a vertical wall. If the top of the wall is thinner than the bottom, the top of the sheet was hotter than the bottom.
| Symptom | Interpretation | Adjustment |
|---|---|---|
| Top of wall thinner than bottom | Top surface hotter | Reduce top bank output 5 – 10 % |
| Bottom of wall thinner than top | Bottom surface hotter | Reduce bottom bank output 5 – 10 % |
| Both thin, middle thick | Surface over-heated, core cold | Longer dwell at lower output — a soak |
| Uniformly thin walls | Sheet too hot overall, or draw ratio too high | Reduce temperature; consider plug assist |
A cut-and-measure section is the only reliable way to set the top/bottom balance. It takes 20 minutes and it is worth doing on every new mold.
Moisture, drying and the bubbles that ruin a run
Some sheet materials absorb moisture from the air, and that moisture turns to steam at forming temperature. The result is bubbles, silver streaking or a frosted, cloudy surface — and once a sheet is wet, no amount of oven adjustment will fix it.
| Materiaal | Moisture sensitivity | Drying condition |
|---|---|---|
| PC (polycarbonate) | Very high | 120 °C for 2 – 4 h, or 100 °C overnight |
| PMMA (acrylic) | Hoog | 80 °C for 1 – 2 h per mm of thickness |
| PET / PETG | Hoog | 65 – 70 °C for 4 – 6 h |
| ABS | Matig | 80 °C for 2 – 4 h if stored in humid conditions |
| PA (nylon) | Very high | 80 – 100 °C under vacuum, 4 – 8 h |
| PS / HIPS | Laag | Usually none |
| PP / PE | None | None |
| PVC (rigid) | Laag | None, but store flat and dry |
Drying times are for sheet stored in a normal workshop. Sheet stored in an unheated warehouse in a humid climate needs longer.
Three practical rules that prevent most moisture problems:
- Store hygroscopic sheet in a dry cabinet or in sealed bags with desiccant. This is cheaper than drying and it removes the variable entirely.
- Dry immediately before forming. A dried sheet re-absorbs moisture in hours in a humid shop. Drying on Friday for a Monday run is not drying.
- Watch the sheet, not the clock. A properly dried PC sheet is clear. A wet one has a faint haze before it even goes in the oven. Reject it there rather than after forming.
Reading the sheet: six symptoms and what they mean
| Symptom on the formed part | Most likely heating cause | First adjustment |
|---|---|---|
| Bubbles or blisters in the wall | Moisture in the sheet, or surface over-heated | Dry the sheet; reduce peak surface temperature, extend dwell |
| Chill marks / flow lines where sheet meets mold | Sheet too cold at touchdown, or mold too cold | Increase sheet temperature 5 – 10 °C; raise mold temperature |
| Webbing between features | Sheet too hot in the web area, or too much material available | Profile heat away from the web zone; increase draw rate |
| Thin corners, thick flats | Heat concentrated at the centre, not profiled for the draw | Profile heat toward the deep draw; add plug assist |
| Warpage after 24 h | Uneven heating left differential shrinkage | Thermal image the sheet; balance top/bottom; check edge effects |
| Glossy mottled surface, loss of texture | Sheet over-heated — surface flowing | Reduce surface temperature 10 – 15 °C |
| Yellowing or a faint smell | Degradation — usually PVC or PC | Reduce temperature immediately; purge and check for a hot element |
The first question to ask of any forming defect is "what was the sheet temperature at touchdown, and was it even?" — before touching the mold.
Frequently asked questions
What temperature should I form plastic sheet at?
It depends on the material. PS and HIPS form at 140 – 175 °C, ABS at 150 – 185 °C, PVC at 120 – 165 °C, PP at 150 – 190 °C, PC at 180 – 220 °C and acrylic at 150 – 190 °C. These are sheet surface temperatures, measured as the sheet leaves the oven — not oven air temperatures.
How long does it take to heat a plastic sheet for forming?
Roughly 15 – 30 s per mm of thickness with medium-wave infrared heaters at 350 – 450 mm distance, single-sided. So a 1 mm sheet takes 15 – 30 s and a 6 mm sheet takes 90 – 180 s. Double-sided heating roughly halves that; short-wave emitters cut it by 40 – 50 %.
Why does my sheet sag before forming?
The sheet is at or above the top of its forming window, or it has been in the oven too long. Some sag is normal and even useful; sag that brings the sheet into contact with the mold before vacuum is applied means the sheet is over-heated or the oven dwell is too long.
Why do I get bubbles in polycarbonate?
Moisture. Polycarbonate absorbs water from the air and releases it as steam at forming temperature. Dry it at 120 °C for 2 – 4 hours immediately before forming, and store it in a dry cabinet or a sealed bag with desiccant. Once bubbles appear, the sheet cannot be recovered.
Does sheet colour affect heating time?
Significantly. Carbon black absorbs infrared strongly and heats 25 – 40 % faster than natural or white sheet of the same material and thickness. If you switch colours without changing the heat profile, black will be over-heated and white under-heated.
Should the top and bottom heaters be at the same setting?
No. A 5 – 15 % higher bottom output is common, because the mold is below and the underside needs to stay soft slightly longer. Set the balance by forming a part, cutting it in half and measuring wall thickness at the top and bottom of a vertical wall.
What is a heat soak and when do I need one?
A soak is holding the sheet at forming temperature with reduced heater output so heat conducts through the thickness and the core catches up with the surface. It is needed on sheet above about 4 mm, and on any material with low thermal conductivity. Without it the surface is at temperature, the core is not, and the part springs back or thins unevenly.
Can I form a sheet that is too cold?
You can try, and it will sometimes look acceptable. The part will have high internal stress, poor thickness distribution and a tendency to crack or warp later. Cold forming is one of the main reasons a part passes first article and fails in service.
How do I check whether my oven heats evenly?
Clamp a sheet, heat it with no forming, and image it with a thermal camera as it leaves the oven. Cold bands, hot spots and edge effects are immediately visible. Failing a thermal camera, heat a sheet, let it cool, and look for the gloss variation — hotter areas cool glossier.
Why does the same setup produce good parts in the morning and bad parts after lunch?
Usually ambient temperature and humidity. A workshop that warms by 8 °C over the day changes the sheet's starting temperature, the oven's losses and the mold's temperature. Shops that run tight tolerances compensate by adjusting dwell time by a few percent between morning and afternoon, and by logging shop temperature alongside the process settings.
Parts forming inconsistently? Send us the material, thickness and the defect photo
We will tell you whether it is a heating profile, a mold geometry issue or a material problem, and what to change first. Most forming problems are diagnosed from one photograph and one temperature reading.




 NL
 EN
 ES
 FR
 DE
 PT
 AR
 RU
 JA
 KO
 IT
 TR
 PL
 ID
