
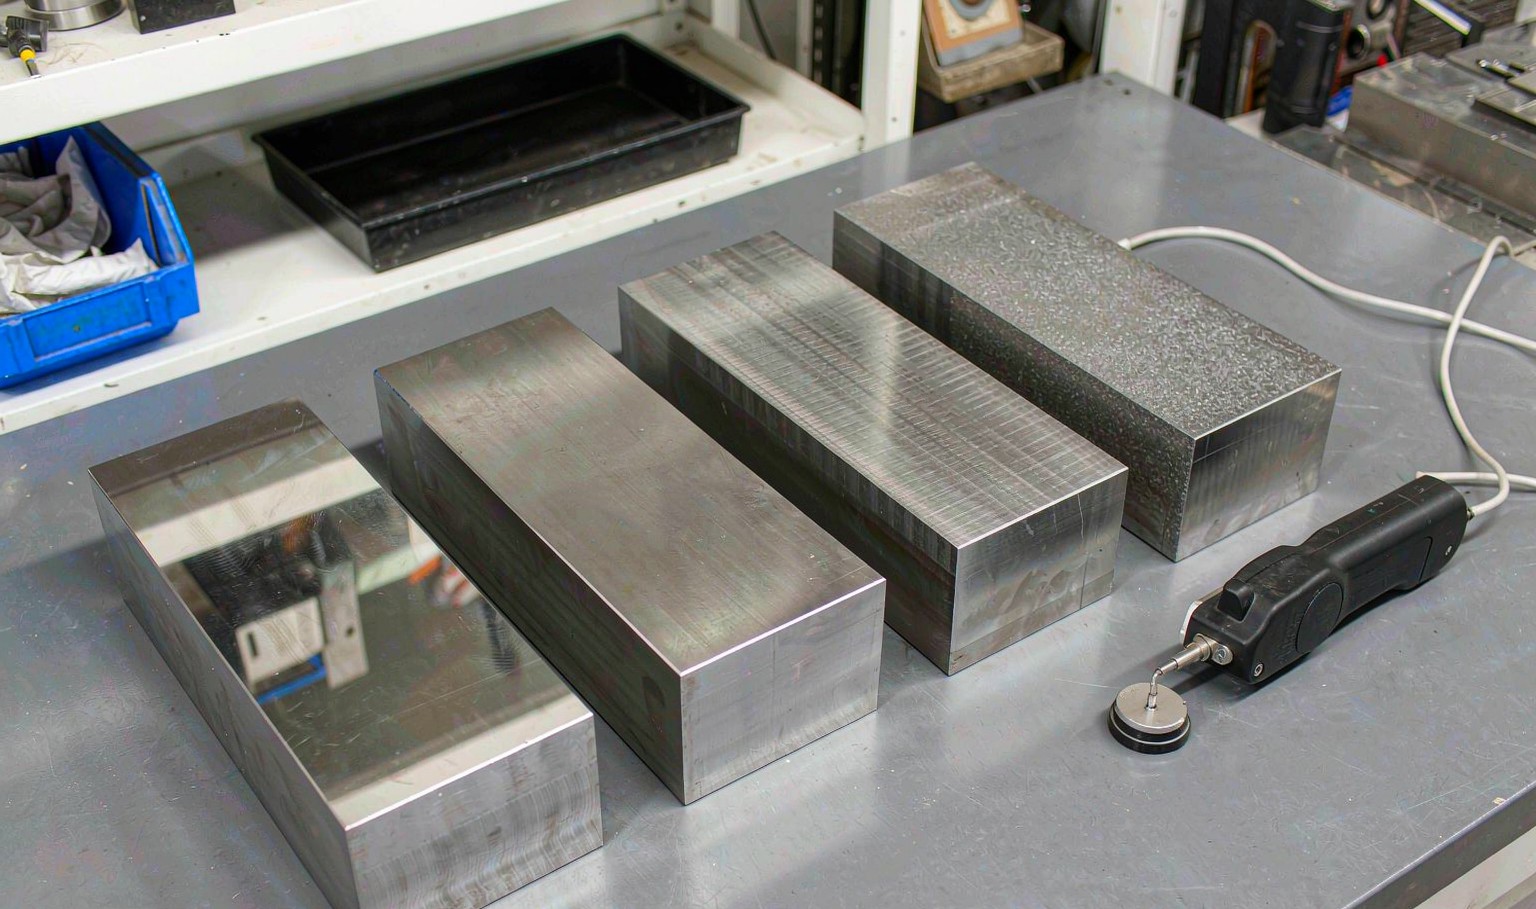
The SPI grade is a roughness number
Mould surface finishes are specified by SPI grade, a letter and a number from A1 to D3. The letter describes the method and the number the degree, and the whole system exists because a verbal description of a finish is not a specification.
In roughness terms, A1 is 0.012 micrometres, A2 is 0.05, A3 is 0.10, B1 is 0.30, B2 is 0.45, C1 is 0.90 and D1 is 3.20. That is four orders of magnitude from the top to the bottom of the scale, which is why the grade has to be on the drawing and not assumed.
The A grades are polished. A1 is a diamond paste polish on a hardened tool steel and is used for optical parts and clear lenses. A2 and A3 are the normal grades for a visible glossy part, and most consumer products live there.
The B and C grades are produced by stone or by a fine EDM finish. The D grades are produced by EDM or by sandblasting and are used where the texture is functional, for release or for hiding marks, rather than decorative.
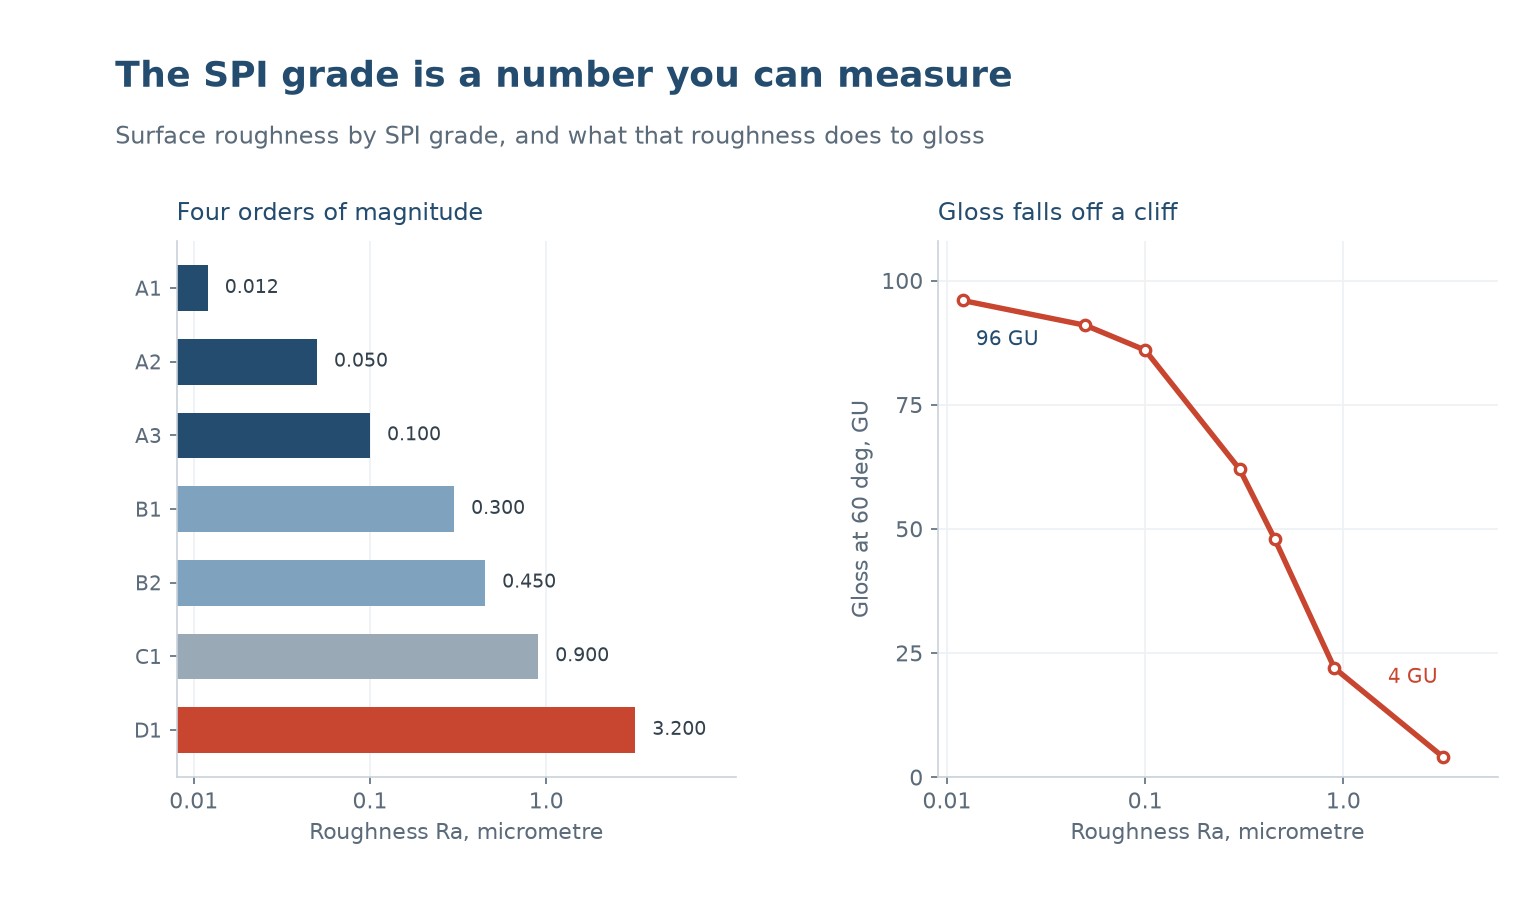
Gloss falls off a cliff, and not where you expect
Gloss is a measure of how much light is reflected at the specular angle rather than scattered. A surface that is smooth compared with the wavelength of light reflects specularly; a surface that is rough compared with it scatters. The transition happens over a narrow roughness band.
On a measured set, gloss at 60 degrees was 96 units at 0.012 micrometres, 91 at 0.05, 86 at 0.10, 62 at 0.30, 48 at 0.45, 22 at 0.90 and 4 at 3.20. Between A3 and B1 the gloss drops 24 units for a roughness change of 0.2 micrometres, which is the steepest part of the curve.
That cliff is why a part that is almost A3 and a part that is almost B1 look completely different, and why a tool that is repolished from B1 to A3 changes the product. It is also why the grade has to be agreed before the tool is cut, not after the first samples.
The second consequence is that the eye is more sensitive than the instrument at the top of the range. Between 86 and 96 gloss units the difference is visible as a haze in a reflection; the instrument reads a 10 unit change and the customer sees a different product.
How each finish is actually made
A polished finish is made by grinding, then stoning, then polishing with progressively finer diamond paste. The direction of the polish matters: a polish that is not cross-hatched leaves directional marks that show up as a streak in the part.
An EDM finish is made by spark erosion and consists of a matt surface with a recast layer. The roughness is set by the current and the electrode, and the recast layer has to be removed before polishing or it will spall and leave a pit in the part.
A texture is made by chemical etching through a resist, or by laser. Etching produces a random, rounded texture that releases well; laser produces a more regular pattern that can be sharper and harder to release. A textured tool is etched once and then maintained by cleaning, not by re-etching.
The method matters for the finish's life. A polished tool holds its finish until it is scratched; a textured tool polishes down at the peaks and its gloss rises slowly. A tool that has run 100,000 shots is not the tool that was measured.
| Grade | Ra | الطريقة | Typical use |
|---|---|---|---|
| A1 | 0.012 | Diamond polish | Optical, clear lenses |
| A2 | 0.05 | Fine polish | Glossy visible parts |
| A3 | 0.10 | Polish | General glossy |
| B1 | 0.30 | Stone | Semi gloss |
| B2 | 0.45 | Stone | Satin |
| C1 | 0.90 | Fine EDM or blast | Matte, functional |
| D1 | 3.20 | EDM or blast | Heavy texture, release |
Table 1 — SPI grades, roughness and what they are for
What transfers, and what does not
The part replicates the tool only where the melt touches it, at pressure, before it freezes. On a flat face that is everywhere. In a corner, on a deep rib, or on a face opposite the gate, the melt may never reach full contact pressure and the finish there will be duller than the tool.
That is why a glossy part can have a matte corner from a tool that is uniformly A2. The corner froze before the pack pressure arrived. The fix is a higher pack pressure, a hotter mould or a gate position that lets the corner fill last at pressure.
The second non-transfer is texture depth. A 20 micrometre etch on the tool gives less than 20 micrometres on the part, because the polymer shrinks away from the texture as it cools. The loss is 10 to 30 percent depending on the material, and it has to be allowed for in the etch depth.
The third is gloss drift over the tool's life. A polished tool picks up a film of degraded material and condensed volatiles, and the gloss falls. Cleaning restores it, and the cleaning interval becomes a quality variable that nobody writes down.
| Where | Finish vs tool | السبب |
|---|---|---|
| Flat face at the gate | Matches | Full contact pressure |
| Far from the gate | Duller | Pressure drop |
| Inside a corner | Much duller | Froze before packing |
| On a deep rib | Duller | Poor contact |
| Textured face | 10 to 30% shallower | Shrinkage away from the tool |
| After 100k shots | Glossier | Peaks polished down |
Table 2 — Where the part and the tool disagree
Texture costs draft and release
A textured surface is a surface with undercuts at a microscopic scale. The polymer has to slide out of each pit, and that adds friction. The practical consequence is that a textured wall needs more draft than a polished one.
The rule of thumb is one degree of draft per 0.025 mm of texture depth, on top of the minimum for the material. A 25 micrometre texture therefore needs about one extra degree, and a 100 micrometre texture needs four. A deep texture on a zero-draft wall is a part that stays in the tool.
The second cost is ejection force. A textured core grips the part and needs more ejector area, or a stripper plate, or both. A part that ejects cleanly from a polished core can be distorted by the same ejection from a textured one.
The third is cleaning. A texture holds mould release residue, degraded material and dust, and it takes more than a wipe to remove. A production tool with a deep texture needs a scheduled cleaning interval that a polished tool does not.
Specifying and inspecting a finish
A finish specification should carry the SPI grade, the area it applies to, the material and the acceptance method. The area matters: a tool can be A2 on the visible face and D1 on the non-visible one, and the drawing should say which is which.
The acceptance method should be a comparator or a roughness measurement, not a photograph. A comparator plate held against the part under a defined light is the fastest check and it is what most inspection benches use. A portable roughness tester on the tool is the objective check.
The inspection point matters. A finish measured on the tool before it runs is not the finish the part sees after 50,000 shots. The check should be on the part, at the start of a run and at the end, against the comparator.
The last item is the repair rule. A tool that is scratched in service has to be repolished, and a repolish changes the grade unless it is done to the same specification. Writing the repair rule into the drawing prevents a tool that comes back from maintenance at a different gloss.
What does SPI A2 mean in roughness?
About 0.05 micrometres Ra, produced by a fine polish. A1 is 0.012 and A3 is 0.10, so the A grades span a factor of eight.
Which grade gives a glossy part?
A2 or A3 for most visible parts, which measure 91 and 86 gloss units. A1 is for optical parts and is expensive to produce and maintain.
Why is the corner of my part duller than the face?
The melt never reached full contact pressure there before it froze. It is a filling and packing problem, not a tool finish problem.
Does texture depth transfer exactly?
No. The part is 10 to 30 percent shallower than the tool because the polymer shrinks away from the texture as it cools, so the etch depth has to allow for the loss.
How much draft does a texture need?
About one degree per 0.025 mm of texture depth on top of the material minimum. A 100 micrometre texture needs roughly four extra degrees.
How do I inspect a finish?
A comparator plate under defined light for the part, and a portable roughness tester on the tool. Check at the start and end of a run, because the finish changes with tool life.
A part whose surface does not match the sample that was approved?
Send the SPI grade on the drawing, the material, the gate position and a photo under raking light. We will tell you whether it is the tool, the fill or the pack.




 AR
 EN
 ES
 FR
 DE
 PT
 RU
 JA
 KO
 IT
 NL
 TR
 PL
 ID
