
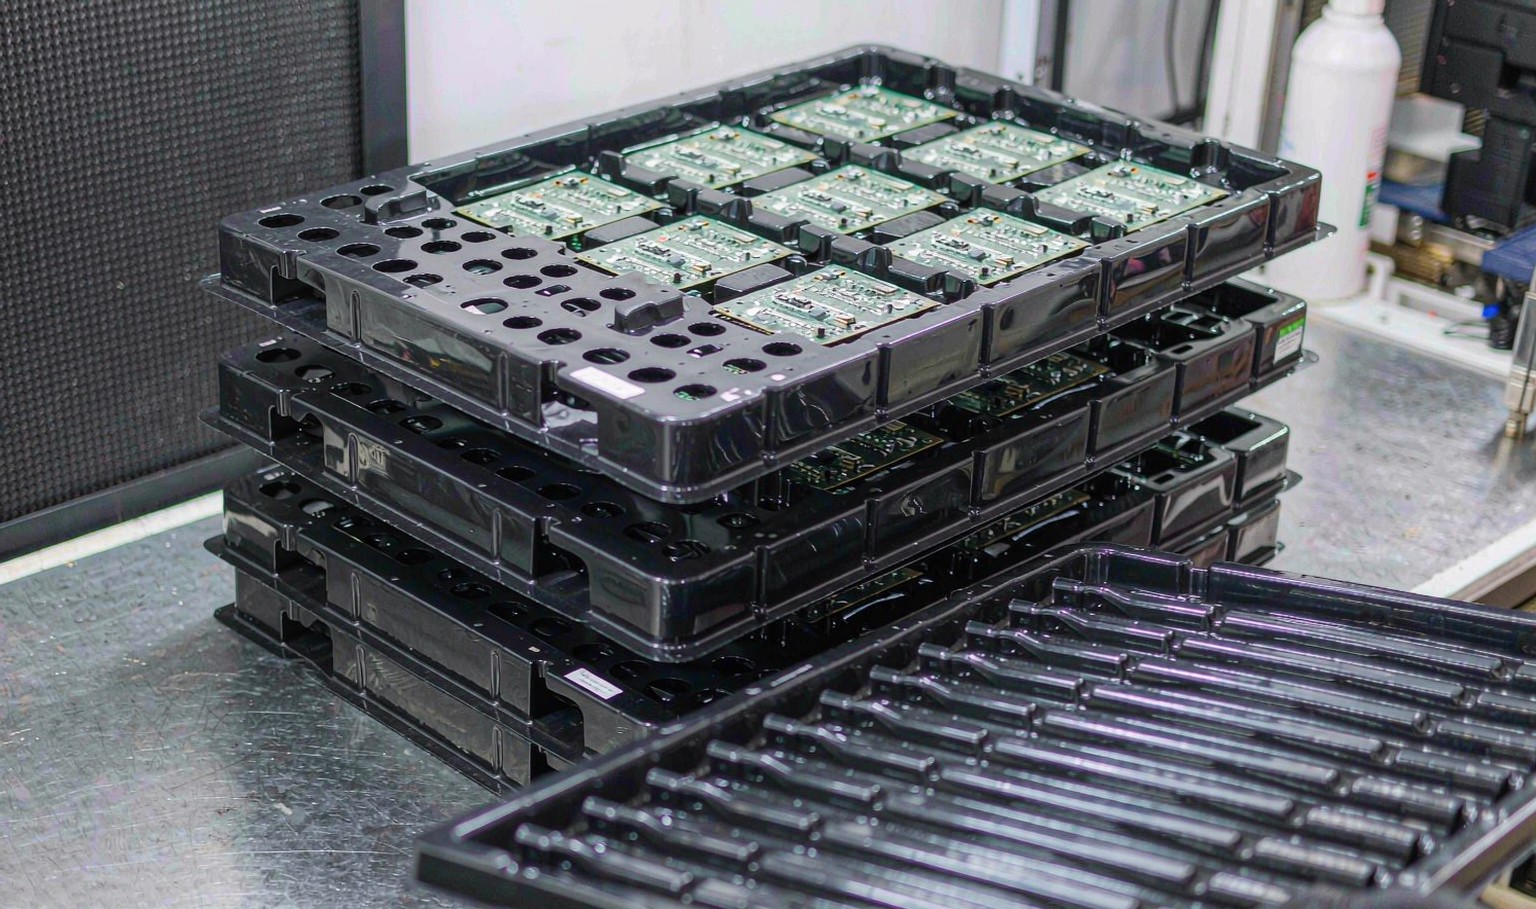
ESD is a surface, not a material
A tray protects a board from electrostatic discharge by being conductive enough to bleed charge away slowly, and not so conductive that it discharges it fast. The first requirement is a surface resistivity low enough to dissipate; the second is a resistivity high enough that the discharge current is limited.
The bands are logarithmic. Conductive is 10 to the 2 to 10 to the 5 ohm per square, dissipative is 10 to the 5 to 10 to the 11, and insulative is above 10 to the 11. A tray for a bare board is usually specified in the dissipative band, around 10 to the 6 to 10 to the 9, because that is where charge drains in a second or two without a spark.
Because it is a surface property, it is also a property that changes. Handling, cleaning, abrasion and humidity all move it, and a tray that measured 10 to the 7 when it was new can measure 10 to the 11 after a year of use. That is why the specification is a range and the incoming inspection is a routine, not a one-off.
Carbon black drops it by decades
The conductivity comes from carbon black loaded into the sheet. At zero loading the surface resistivity is 10 to the 16, which is an insulator. At 2 percent it is 10 to the 11, at 5 percent 10 to the 7.2, at 10 percent 10 to the 4.9, and at 15 percent 10 to the 4.2.
The curve is steep in the middle and flat at both ends, which is the signature of percolation. Below about 3 percent the carbon particles are isolated and the resistivity barely moves; between 3 and 8 percent they form a continuous network and the resistivity falls by decades; above 10 percent the network is complete and more carbon does nothing electrical except make the sheet brittle.
That is why 5 percent is the usual loading. It lands at 10 to the 7.2, comfortably inside the dissipative band, with enough margin that a batch variation of half a percent does not take it out. Loading to 15 percent to be safe puts the tray at 10 to the 4.2, which is conductive rather than dissipative, and costs impact strength.

Pocket clearance is a handling tolerance
A pocket that is too tight jams the board. A pocket that is too loose lets it tilt, and a tilted board is a board a vacuum cup cannot pick. The pick success against clearance is a curve with a peak: 88 percent at 0.2 mm, 95 at 0.3, 99 at 0.5, 97 at 0.8 and 90 at 1.2.
Half a millimetre is the optimum for a board handled by a vacuum cup, and the reason is that it is a compromise between two failure modes. Below 0.3 mm the board binds on the pocket wall when the tray has any warp at all. Above 0.8 mm the board can sit at an angle and the cup lands on an edge.
The tolerance on the pocket is a thermoforming tolerance, not a machining tolerance. A formed pocket on a 0.8 mm sheet holds about plus or minus 0.25 mm, and the shrinkage of the sheet after forming adds to that. Specifying a 0.5 mm clearance with a 0.1 mm tolerance is asking a process for something it cannot hold.
Nesting and stack height
A tray is stacked on the one below it, and the stack is what the automation handles. That makes the stacking pitch a functional dimension: the distance between the top of one tray and the top of the next has to be constant, or the robot's Z height drifts across the stack and the last tray is picked at the wrong depth.
The pitch is set by the nesting feature, usually a rib or a shoulder that lands on the tray below. It has to be a moulded feature and not a formed one, because a formed shoulder springs back and the pitch varies with the sheet temperature at forming.
Stack stability is the other half. A stack of thirty trays is a column, and a column that is 400 mm tall on a 300 mm footprint will lean if the nesting is loose. The lean is not a cosmetic problem: a leaning stack changes the pick position and the robot starts missing.
The ribs do double duty. They stiffen the tray so it does not sag under the weight of the stack, and they give the nesting feature somewhere to sit. A tray with a flat base and no ribs will bow in the middle of a stack of twenty, and a bowed tray mis-picks.
Automated handling
A vacuum cup picks a board by sealing against its top face. That means the board has to be flat, clean and presented at a known height. Every one of those is a tray design constraint: flat means the pocket floor is flat, clean means the tray does not shed, and known height means the nesting pitch is constant.
A gripper picks the board by its edges, which needs access. A pocket with a deep wall and a tight clearance gives a gripper nowhere to go, so a tray designed for a vacuum cup is not a tray designed for a gripper. The handling method has to be decided before the pocket is drawn.
Tray warp is the most common cause of a mis-pick in a line that was working. A tray that has been through a reflow oven or sat in a warm store warps, the pocket floor tilts, and the cup seals on one edge. The tray specification needs a flatness number, and it is usually missing.
There is also the question of what happens when the pick fails. A line with no presence sensor retries until it jams; a line with one stops and asks. That is a control decision, but it is made easier by a tray that presents the board at a consistent height, which is the whole point of the nesting pitch.
Materials and what to specify
Conductive polystyrene is the default. It is cheap, it forms easily, it holds a pocket dimension well, and it is brittle, which is its weakness: a PS tray dropped on a corner cracks. Polypropylene is tougher and more chemical resistant and slightly harder to form to a tight pocket. PETG is used where a cleanroom or a transparency is needed, and polycarbonate where impact strength matters more than cost.
The specification needs the surface resistivity as a range with a test method, the pocket clearance with a realistic tolerance, the nesting pitch, the flatness, the stack height at full load and the handling method. A drawing with the pocket dimensions and nothing else will produce a tray that forms correctly and does not work in the line.
| Materiał | Resistivity | Toughness | Note |
|---|---|---|---|
| Conductive PS | 10^6-10^9 | Niski | Default, cheap, brittle |
| Conductive PP | 10^6-10^9 | Wysoki | Chemical resistance, tougher |
| Conductive PETG | 10^6-10^9 | Średni | Cleanroom, clearer |
| Conductive PC | 10^5-10^8 | Very high | Impact, expensive |
| Conductive ABS | 10^6-10^9 | Średni | General purpose |
Table 1 — Tray materials and what each one is good at
| Parametr | Typical | Why it matters |
|---|---|---|
| Surface resistivity | 10^6-10^9 ohm/sq | Dissipative, not conductive |
| Pocket clearance | 0.5 mm +/- 0.25 | Peak pick success |
| Nesting pitch | Constant, moulded | Robot Z height |
| Flatness | +/- 0.5 mm | Vacuum cup seal |
| Stack height | State the count | Column stability |
Table 2 — The numbers an ESD tray drawing needs and usually lacks
What surface resistivity should an ESD tray have?
10 to the 6 to 10 to the 9 ohm per square for a dissipative tray handling bare boards. Conductive, 10 to the 2 to 10 to the 5, is for different applications and can discharge too fast.
How much carbon black is needed?
About 5 percent by weight, which lands at 10 to the 7.2. Below 3 percent the particles are isolated and nothing happens; above 10 percent the sheet gets brittle and the resistivity barely moves.
What pocket clearance is best?
Half a millimetre for a vacuum cup pick, which gives 99 percent success. Below 0.3 mm the board binds, above 0.8 it tilts and the cup lands on an edge.
Why does my tray mis-pick after a while?
Usually warp. A tray that has been through an oven or a warm store bows, the pocket floor tilts and the cup seals on one edge. Specify flatness, not just pocket dimensions.
Can an ESD tray be recycled?
The polymer can be, but the carbon black loading makes it a single grade stream. Regrind in a tray changes the resistivity and the colour, so most trays are made from virgin sheet.
How tall can a stack be?
It depends on the nesting and the rib design, but a 300 mm footprint tray is usually limited to twenty to thirty high before the column leans enough to affect the pick. State the count and the tray is designed for it.
A tray that forms well but mis-picks in the line?
Send the board, the handling method and the stack height. We will tell you the clearance, the nesting pitch and the flatness the tray needs.




 PL
 EN
 ES
 FR
 DE
 PT
 AR
 RU
 JA
 KO
 IT
 NL
 TR
 ID
