
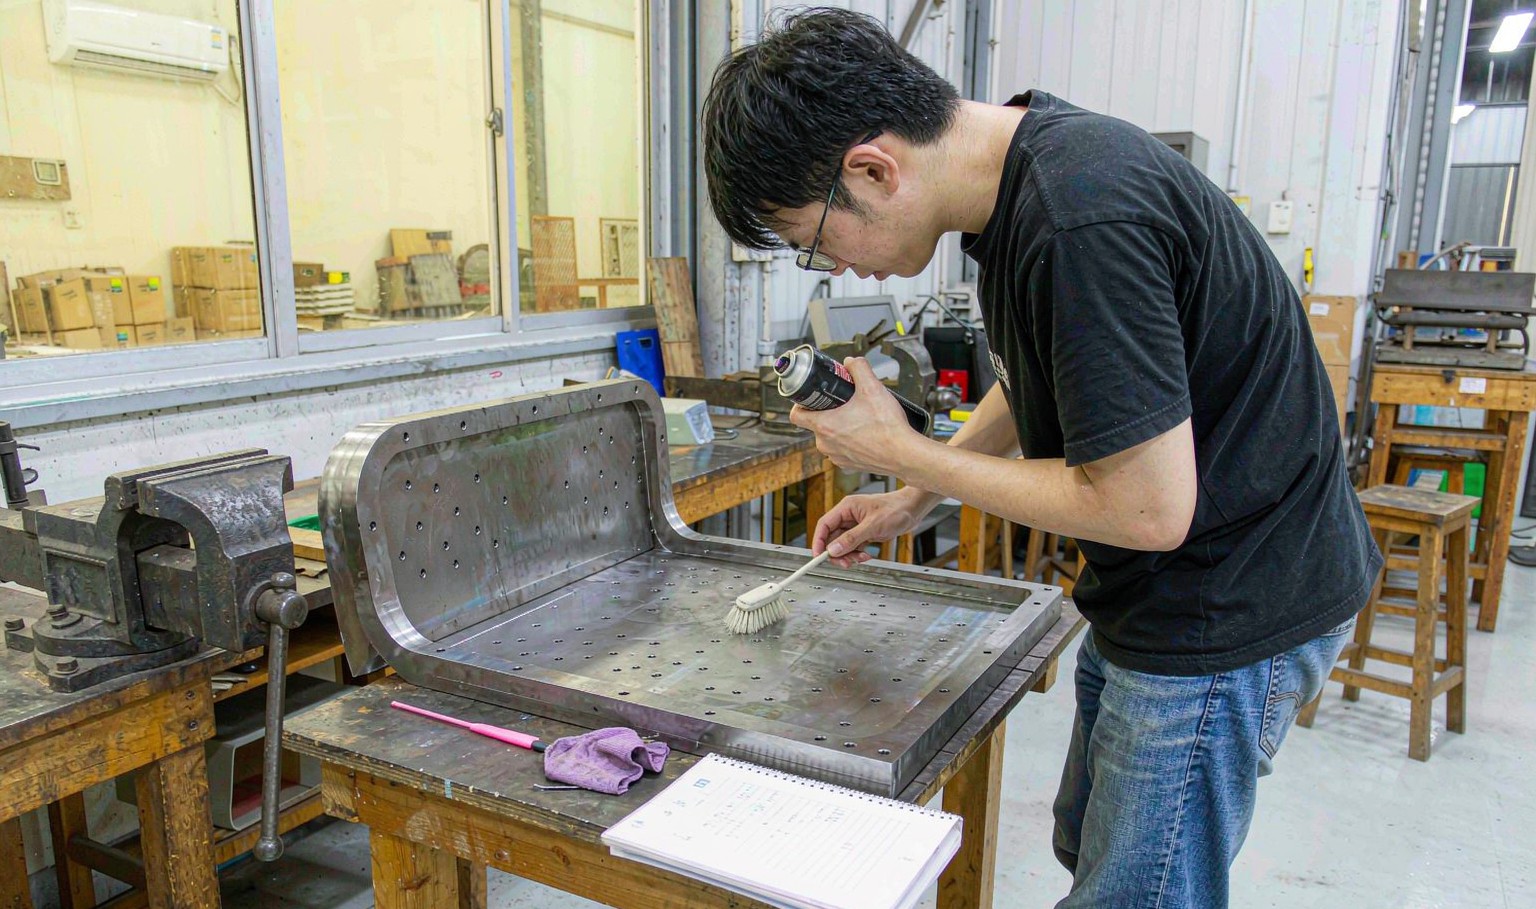
The tool does not wear out, the vents clog
A vacuum forming tool has no moving parts, no gate and no ejector, so there is very little to wear. What it does have is a set of small holes that have to pass air, and those holes are the part of the tool that fails first.
Every cycle pulls a little dust, a little plasticiser and a little condensate through the vent. Most of it passes; some of it stays. Over a few hundred cycles the vent's effective area drops, and the vacuum at the tool face drops with it: from 0.85 bar absolute when clean to 0.82 at 50 hours, 0.76 at 100, 0.65 at 200 and 0.48 at 400.
That fall is quiet. There is no alarm, no fault code and no visible change in the tool. What changes is the part: the draw gets shallower, the corners get softer, and the detail stops transferring. By the time it is obvious, the tool has been producing marginal parts for a shift.
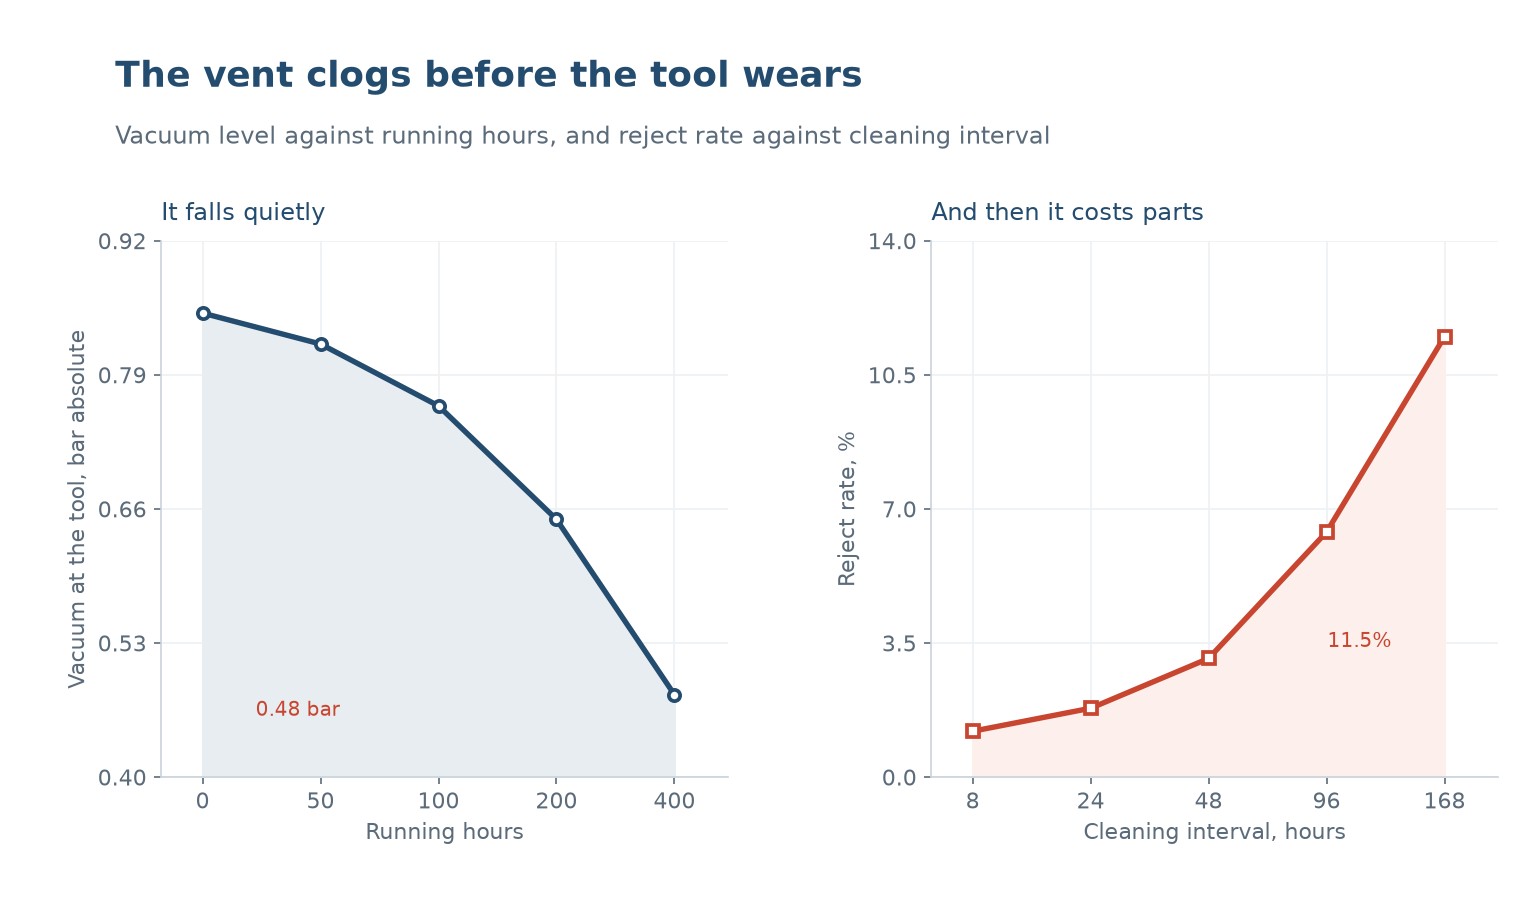
What the interval costs
Cleaning a tool takes minutes and costs almost nothing. Not cleaning it costs parts, and the cost curve is steep. At an 8-hour cleaning interval the reject rate is 1.2 percent; at 24 hours it is 1.8; at 48 hours 3.1; at 96 hours 6.4; at a week 11.5.
The arithmetic is straightforward. If a tool makes a hundred parts an hour, the difference between 1.2 and 6.4 percent reject is five parts an hour, which is more than the cleaning time costs at any reasonable rate. And the rejects are not only scrap: they are parts that may have shipped.
The reason the interval stretches is that cleaning is not on anyone's schedule. It happens when somebody notices, and nobody notices until the parts look wrong, which is well past the point where the tool should have been cleaned. A written interval is the whole fix.
A schedule that actually holds
The interval should be set from the material and the sheet, not from a general rule. A filled or dusty sheet clogs a vent faster than a clean one, and a sheet with a high plasticiser content leaves a film. Start at eight hours, measure the vacuum at the tool at the start and end of each interval, and lengthen or shorten it from the data.
The daily clean is a brush and air. The weekly clean is a solvent wipe and a check that every vent passes air, which can be done with a low-pressure air line and a feel at the face. The monthly check is a dimensional check of the cavity and a look at the texture, because both drift slowly.
The annual check is where the tool gets re-textured or repaired. A texture that has worn to 60 percent of its depth is a texture that is no longer producing the approved part, and that is a planned stoppage rather than a surprise.
| Interval | Task | What it prevents |
|---|---|---|
| Every 8 hours | Brush and air the vents | Vacuum loss, shallow draw |
| Weekly | Solvent wipe, air-check every vent | Blocked vents, patchy detail |
| Monthly | Cavity dimension, texture check | Drift, worn texture |
| Quarterly | Seal and hose inspection | Vacuum leaks |
| Annually | Re-texture or repair | Out-of-spec parts |
Table 1 — A forming tool maintenance schedule
Repairing what does wear
The things that do wear are the edges, the texture and the vacuum connections. A tool edge that has been trimmed against, or knocked during handling, gets a burr that transfers to every part. A burr is a five-minute fix with a stone and a week of rejects if it is not found.
Texture wear is the slowest and the most expensive. A grain that has rounded off produces a part that is glossy where it should be matte, and the change is gradual enough that it is only visible against a retained master sample. Keeping a master sample is the cheapest quality tool available.
Vacuum connections fail at the hose and at the seal, not at the tool. A perished hose or a hardened O-ring gives a leak that looks exactly like a clogged vent, and the diagnosis is to measure the vacuum at the tool rather than at the pump. If the pump is at 0.85 and the tool is at 0.6, the loss is in the line.
Storage is part of maintenance
A tool that is taken out of service and stored badly comes back worse than it went in. Dust settles in the vents, moisture corrodes an aluminium face, and a tool stacked under another one gets a dinged edge.
The minimum is to clean it, dry it, tape over the vents and the vacuum ports, and store it face up on a pallet rather than on the floor. A wooden or foam cover is worth more than the time it takes to make, because the most common damage to a stored tool is something dropped on it.
It is also worth recording the running hours on the tool. A tool with 4,000 hours on it and a tool with 200 are at different points in their texture life, and the record is what lets the re-texture be planned instead of discovered.
Diagnosing a part that has gone soft
When a part loses detail, the instinct is to raise the heater or lengthen the heat time. That works for a while, because a hotter sheet is more formable, and it masks the real problem until the sheet is hot enough to sag into the heater.
The first measurement should be the vacuum at the tool face, not the heater setting. A gauge tee'd into the tool line takes minutes to fit and turns a guess into a number. If the tool is at 0.5 bar and the pump is at 0.85, the answer is the vents or the line, and no amount of heat will fix it.
The second measurement is the sheet temperature at the point of forming, because a heater that has drifted is the other common cause. Those two numbers separate a tool problem from a process problem, and they are both cheap to take.
| Symptom | First check | Likely cause |
|---|---|---|
| Shallow draw | Vacuum at the tool | Clogged vents |
| Soft corners | Vacuum at the tool | Vent or leak |
| Patchy detail | Vent check by area | Local blockage |
| Glossy where matte | Texture against master | Roll or tool wear |
| Burr on the trim edge | Visual | Damaged tool edge |
Table 2 — Symptoms and the first thing to measure
How often should a forming tool be cleaned?
Every eight hours as a starting point, then adjusted from the vacuum reading. A dusty or filled sheet needs it more often; a clean unfilled sheet can go longer.
Can a clogged vent be drilled out?
Sometimes, and it is a last resort. Drilling removes material and can enlarge the hole, which leaves a mark on the part. A solvent soak and air blast first, then a fine pick, then drilling.
Why does the vacuum drop without any leak?
Because the vents are the restriction. A vent that is half blocked passes half the air, and the pump cannot compensate because the restriction is downstream of the gauge.
How do I know the texture is worn?
Compare a current part with a retained master sample under the same light. A gloss reading is the fastest numeric check, because it responds to the rounding of the pattern before the depth changes much.
Does a stored tool need protection?
Yes. Clean it, dry it, tape the vents and ports, and store it face up on a pallet. Most damage to a stored tool comes from something being dropped or stacked on it.
What is the most common cause of a sudden loss of detail?
A clogged vent or a leaking hose, not a heater problem. Measure the vacuum at the tool before changing any process setting.
A forming tool that has gone soft on detail?
Send the symptom and the tool history. We will tell you whether it is vents, texture or the process, and what it takes to bring it back.




 IT
 EN
 ES
 FR
 DE
 PT
 AR
 RU
 JA
 KO
 NL
 TR
 PL
 ID
