
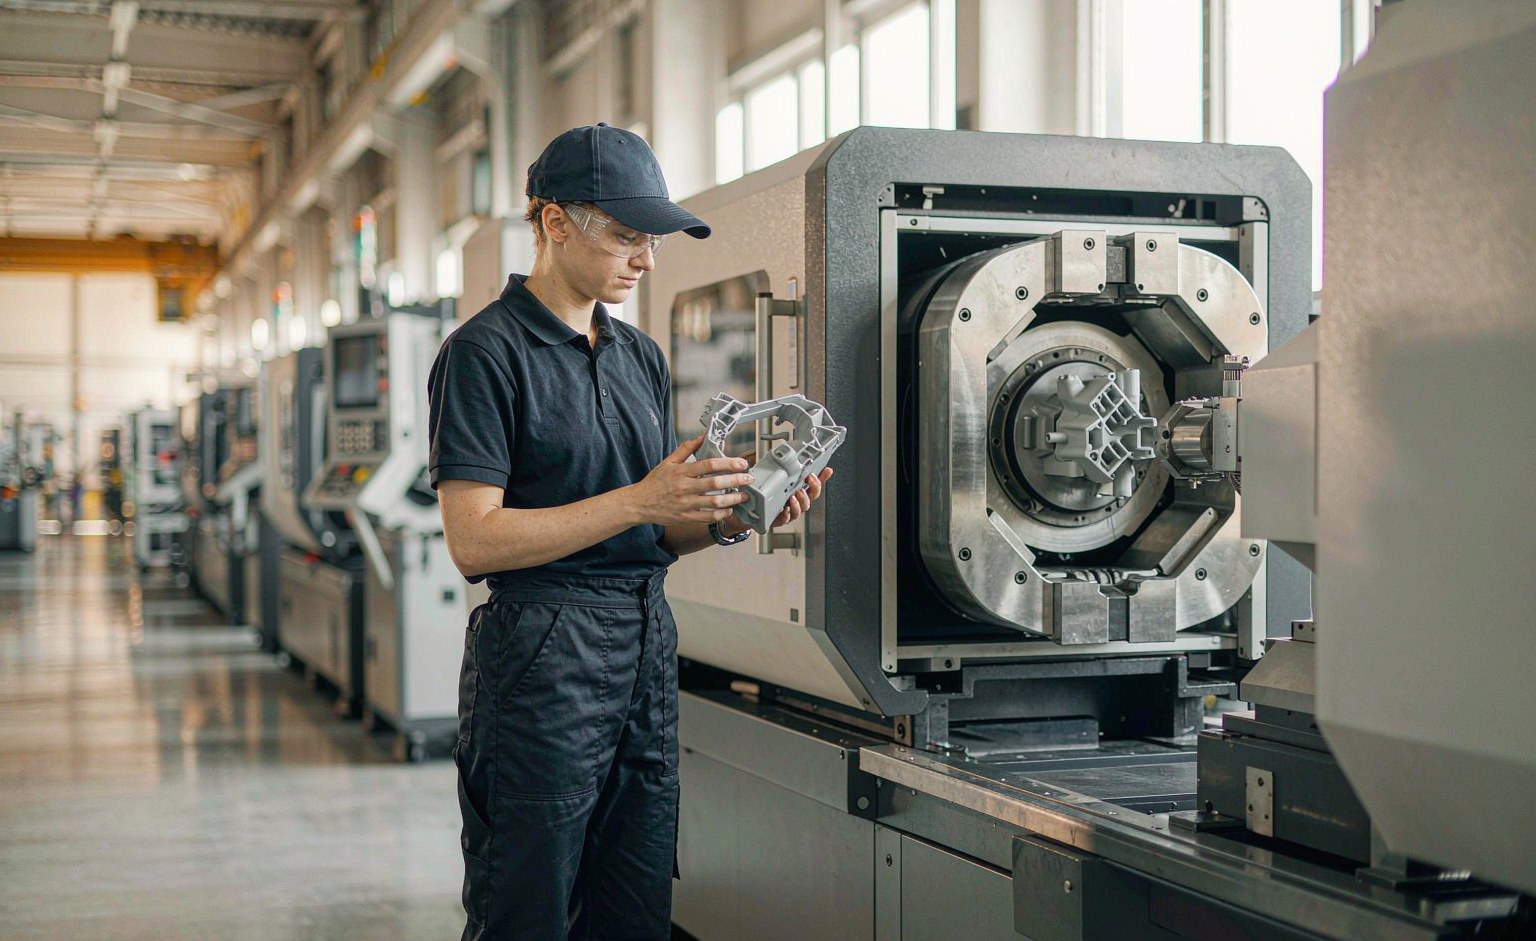
Injection molding is the process you choose when a plastic part has to be dimensionally repeatable, cosmetically clean, and produced in volumes where the tooling investment amortises. It is also the process that generates the most expensive mistakes, because almost every cost is locked in at the design stage — long before the first shot.
This guide is written for the person holding the purchase order, not the person holding the mould. It covers what the process does, what the tooling really costs, which tolerances are worth paying for, and how to tell a competent molder from a broker with a catalogue.
- 1. 1. What custom injection molding is — and when it is the wrong choice
- 2. 2. The process, step by step
- 3. 3. Clamp force: how much tonnage your part actually needs
- 4. 4. Mold types and what drives tooling cost
- 5. 5. Materials: shrinkage, drying and where each one belongs
- 6. 6. DFM rules that decide your part price
- 7. 7. What injection molding really costs
- 8. 8. Tolerances: what to specify, what to stop specifying
- 9. 9. Eight defects you will meet — and their fixes
- 10. 10. Injection molding versus vacuum forming, blow molding and extrusion
- 11. 11. How to vet an injection molding supplier
- 12. 12. Frequently asked questions
- 13. Send us your part and get a DFM review before you commit to tooling
In this guide
1. What custom injection molding is — and when it is the wrong choice
Thermoplastic pellets are melted, forced under pressure into a closed steel cavity, held while they cool, and ejected as a finished part. One cycle. No secondary shaping. The economics come from repetition: the first part can cost $12,000 and the hundred-thousandth can cost $0.42.
That is also the trap. Injection molding rewards volume and punishes uncertainty. It is the wrong choice when:
- You have not frozen the design. Every engineering change after steel is cut is a mould modification, not a file update. Budget 8–15% of the original tool cost per revision, plus two to four weeks of downtime.
- You need fewer than roughly 500–1,000 pieces. Below that, tooling dominates unit cost and vacuum forming or CNC-machined plastic usually wins.
- The part is large, shallow and simple. A 1.2 m × 0.8 m enclosure panel is a $3,000 vacuum forming tool or a $40,000 injection mould. There is no version of that maths where injection wins.
- You need it in three weeks. A production mould is 25–45 days from kickoff, plus T1 sampling and any correction loop.
2. The process, step by step
A single cycle runs 15–60 seconds and repeats perhaps 500,000 times. Every stage has a parameter that ends up in your part.
| Stage | What happens | What it controls in your part |
|---|---|---|
| 1. Drying | Hygroscopic resins (PA, PC, PET, ABS, PMMA) are dried in a desiccant hopper for 2–4 h at 80–120 °C. | Silver streaks, splay marks, hydrolytic degradation — the single most common cause of cosmetic rejects. |
| 2. Plasticising | The screw rotates, shearing and melting pellets against the barrel wall; melt accumulates ahead of the screw. | Melt homogeneity, colour dispersion, and the actual melt temperature your shrink rate depends on. |
| 3. Injection | The screw advances as a ram, filling the cavity at 40–120 mm/s. | Weld line strength, flow marks, short shots. |
| 4. Packing / holding | Pressure is held (typically 30–60% of injection pressure) while the gate freezes. | Sink marks, voids, dimensional weight — this stage decides whether your part is heavy or light. |
| 5. Kühlung | Water in the mould pulls heat out. Roughly 60–70% of the cycle time lives here. | Cycle time, warpage, residual stress, ejection temperature. |
| 6. Ejection | Pins push the part off the core; the mould closes and the cycle restarts. | Ejector pin marks, drag marks, part sticking. |
Cycle structure for a typical 2 mm ABS part on a 250-tonne machine.
3. Clamp force: how much tonnage your part actually needs
Buyers rarely ask this, and it is the first thing a molder checks. Clamp force must exceed the force trying to push the mould open — cavity pressure multiplied by projected area.
Worked example: a 200 × 150 mm flat housing with one cavity projects 300 cm². At 0.5 t/cm² that is 150 tonnes — so a 180-tonne machine, not a 250-tonne one. Put it in a 2-cavity tool and you need 300 tonnes. This is why cavity count and machine size are negotiated together, and why a molder quoting a 4-cavity tool on a small press is telling you something about their floor.
4. Mold types and what drives tooling cost
Tooling is the largest line item in your first order, and the easiest to under-specify. Three decisions dominate.
Steel grade
| Grade | Hardness | Service life | Where it belongs |
|---|---|---|---|
| P20 / 718H | 30–34 HRC | 100k–300k shots | Standard production tools, PP/ABS/PE consumer parts. |
| NAK80 | 38–42 HRC | 300k–500k | High-polish cosmetic surfaces, transparent parts, optical-class finishes. |
| S136 / 1.2083 | 48–52 HRC | 500k–1M+ | Corrosive resins (PVC, POM, flame-retardant grades), medical. |
| H13 / 8407 | 48–54 HRC | 1M+ | Glass-filled engineering resins, high-wear gates and inserts. |
Mould steel selection. Service life assumes normal maintenance; abrasive fillers can halve it.
Runner system
A cold runner is cheaper to build and wastes material in the sprue and runners on every shot. A hot runner adds $3,000–$15,000 to the tool but eliminates that waste and shortens cycles — it pays back quickly on engineering resins, and is usually mandatory for multi-cavity tools where you cannot afford to regrind.
Cavitation
Two cavities cost roughly 1.6× a single cavity, four cost about 2.4×. But unit price does not fall proportionally, because machine time per part only improves if the press is large enough to carry the added projected area. Ask for the price at 1, 2 and 4 cavities and check whether the drop justifies the tooling delta at your actual annual volume.
5. Materials: shrinkage, drying and where each one belongs
Shrinkage is not a property you look up — it is a range, and the molder tunes it with packing pressure and mould temperature. What you need is the nominal value for the drawing and the tolerance band to expect.
| Material | Schrumpfung | Drying | Melt temp | Typical use |
|---|---|---|---|---|
| PP | 1.5–2.5% | Not required | 200–250 °C | Living hinges, caps, containers, automotive trim |
| ABS | 0.4–0.7% | 80 °C / 2–3 h | 220–260 °C | Housings, cosmetic covers, tool cases |
| PC | 0.5–0.7% | 120 °C / 4 h | 280–310 °C | Lenses, safety guards, electrical enclosures |
| PA6 / PA66 | 0.8–1.5% (dry) | 80–100 °C / 4 h | 240–290 °C | Gears, brackets, structural parts |
| POM | 1.8–2.2% | Not required | 190–210 °C | Precision gears, clips, bearings |
| PVC-U (rigid) | 0.2–0.6% | 60–70 °C / 1–2 h | 170–190 °C | Fittings, pipe components, profiles |
| PMMA | 0.3–0.6% | 80 °C / 3–4 h | 220–250 °C | Light guides, display lenses, signage |
| TPE / TPU | 1.0–2.0% | 70–80 °C / 2 h | 180–220 °C | Grips, seals, overmoulded soft-touch surfaces |
Indicative processing windows. Always confirm against the specific grade's datasheet — flame retardants and glass fillers shift all four columns.
6. DFM rules that decide your part price
Design for manufacture is not a checklist you run at the end. These six items move part cost more than the resin choice.
Wall thickness
Keep it between 1.2 and 3.0 mm for commodity resins, and uniform wherever possible. Cycle time scales roughly with the square of wall thickness: going from 2 mm to 3 mm more than doubles cooling time. Thick sections also sink. If a design needs stiffness, add ribs, not wall.
Draft
1–2° on vertical walls, 0.5° minimum on textured surfaces plus 1° per 0.025 mm of texture depth. Zero draft means drag marks and, eventually, a scratched cavity.
Radien
Inside corner radius at least half the wall thickness, ideally equal to it. Sharp inside corners are stress concentrators and the first place a part cracks in service.
Ribs
Rib thickness 50–60% of the adjoining wall. A full-thickness rib creates a thick section at the base, which sinks on the cosmetic face opposite. Rib spacing at least 2× wall thickness.
Unterschneidet
Every undercut is either a side action (adds $800–$4,000 to the tool and 3–8 s to the cycle) or a lifter. Redesigning a snap-fit so it strips out of the cavity is usually the single highest-return change in a DFM review.
Gate location
The gate decides weld line position, flow orientation and where the part warps. Put it where a cosmetic mark is acceptable — typically a hidden internal face — and tell your molder which face is the A-surface before they cut steel, not after.
7. What injection molding really costs
Indicative ranges for a China-based supplier, 2026. Treat them as a sanity check, not a quote.
| Item | Typical range | Driven by |
|---|---|---|
| Prototype / bridge tool (1 cavity, P20) | $1,500–$5,000 | Part size, side actions, polish level |
| Production tool, small part (<150 mm) | $4,000–$12,000 | Cavitation, steel grade, hot runner |
| Production tool, medium housing | $12,000–$30,000 | Cavitation, texture, side actions |
| Production tool, large / multi-cavity | $30,000–$90,000+ | Press size, cavitation, complex slides |
| Part price, commodity resin | $0.15–$2.50 | Shot weight, cycle time, cavitation |
| Engineering resin premium | +30–120% | Resin cost, drying, slower cycles |
Indicative only. Freight, duty, mould trials and packaging are usually quoted separately — confirm what is included.
The number buyers consistently forget is total cost of ownership. A tool quoted at $9,000 with a 45-second cycle and 12% scrap is more expensive than a $13,000 tool running 32 seconds at 3% scrap, once you pass roughly 50,000 parts. Ask for cycle time and expected scrap rate in writing, and compare the two together.
8. Tolerances: what to specify, what to stop specifying
Over-tolerancing is the most common way buyers inflate their own price. Every dimension tighter than the process can hold reliably becomes an inspection operation, a rework loop, or a rejected lot.
| Merkmal | Kommerziell | Präzision | Anmerkungen |
|---|---|---|---|
| Moulded dimension, <100 mm | ±0.20 mm | ±0.05 mm | Precision requires SPC and a stable mould temperature controller |
| Moulded dimension, 100–300 mm | ±0.30 mm | ±0.10 mm | Shrinkage variation dominates at this size |
| Moulded dimension, >300 mm | ±0.50 mm | ±0.20 mm | Warpage, not shrinkage, is the limit |
| Mating / assembly features | ±0.10 mm | ±0.05 mm | Tolerance the fit, not the whole part |
| Straightness / flatness | 0.3 mm / 100 mm | 0.1 mm / 100 mm | Specify on the datums that matter |
Typical as-moulded capability. Anything tighter should be a machining operation, and priced as one.
9. Eight defects you will meet — and their fixes
| Defekt | What you see | Root cause and fix |
|---|---|---|
| Short shot | Incomplete fill, rounded edges at the flow end | Insufficient pressure or speed, cold melt, blocked vent. Raise injection speed, check gate size, add venting. |
| Sink marks | Dimples on the cosmetic face opposite a thick section | Under-packing or a wall that is too thick. Increase hold pressure and time; core out the thick section. |
| Weld lines | Visible seam where two flow fronts meet | Low melt or mould temperature at the meeting point. Raise temperatures, relocate the gate, add a overflow well. |
| Silver streaks | Silvery streaks radiating from the gate | Moisture or trapped gas. Dry the resin properly, reduce decompression, improve venting. |
| Flash | Thin fin of material at the parting line | Excess clamp force shortfall or worn parting surface. Increase tonnage, reduce cavity pressure, re-fit the mould. |
| Verzug | Part twists or bows after ejection | Uneven cooling or flow orientation. Balance cooling circuits, extend cooling time, adjust gate position. |
| Burn marks | Black or brown scorch at the flow end | Diesel effect from trapped air. Add vents at the last-fill location, reduce injection speed. |
| Ejector marks | White stress marks or dimples where pins push | Premature ejection or undersized pins. Lower ejection temperature, increase pin area. |
Defect-to-cause map for common thermoplastic moulding. Persistent defects usually trace back to tooling, not settings.
10. Injection molding versus vacuum forming, blow molding and extrusion
These four processes overlap at the edges and are routinely quoted against each other. The honest comparison is about volume, geometry and tooling.
| Faktor | Injection molding | Tiefziehen | Blasformen | Profile extrusion |
|---|---|---|---|---|
| Tooling cost | $$$$ | $ | $$$ | $$ |
| Tooling lead time | 25–45 days | 7–15 days | 30–50 days | 15–30 days |
| Economic volume | 1,000+ | 1–5,000 | 5,000+ | Continuous / by metre |
| Tolerance | ±0.05–0.3 mm | ±0.5–1.0 mm | ±0.3–0.8 mm | ±0.1–0.3 mm |
| Wall thickness | 1.2–3 mm typical | 0.5–12 mm | 0.3–3 mm | 0.5–10 mm |
| Am besten für | Complex, tight, high-volume parts | Large enclosures, thick walls, low volume | Hollow bodies, bottles, tanks | Constant cross-section, continuous length |
Process selection matrix. A part that fits two columns should be quoted in both.
If your part is a constant cross-section — a trim strip, a rail, a tube — extrusion is an order of magnitude cheaper per metre and should not be moulded at all. If it is a large shallow shell under 5,000 pieces, Vakuumverformung will usually beat injection on total cost. For a detailed head-to-head, see our vacuum forming vs injection molding comparison.
11. How to vet an injection molding supplier
Most sourcing failures are not technical. They are a supplier who accepted work outside their real capability. Six questions separate the two.
- "What tonnage range is on your floor?" A shop with 80–250 tonne presses cannot make a 1.5 kg part, no matter what the website says. Ask for a machine list with tonnage and shot capacity.
- "Who cuts the steel — you or a subcontractor?" In-house mould making means faster correction loops and someone accountable when T1 is wrong.
- "Show me a first-article inspection report you issued last month." Not a certificate template. An actual report with actual measured values against a ballooned drawing.
- "What is your scrap rate on a comparable part, and what happens to regrind?" Vague answers here usually mean regrind is going into your cosmetic parts.
- "What is included in the tooling price, and who owns the tool?" Get tool ownership in writing. It should be you, transferable on request.
- "Can I see the process parameter sheet for the part?" A molder who cannot produce a set-up sheet has no process control — they have operators turning knobs until the part looks right.
12. Frequently asked questions
How much does a custom injection mold cost?
For a single-cavity P20 production tool on a part under 150 mm, expect $4,000–$12,000. Medium housings with side actions run $12,000–$30,000, and large multi-cavity tools $30,000–$90,000. Steel grade, cavitation, hot runner and surface polish are the four biggest levers.
What is the minimum order quantity for injection molding?
There is no technical MOQ — a molder will run 200 pieces if you pay for the setup. The economic threshold is usually 1,000–2,000 pieces, below which tooling cost per part exceeds the savings versus vacuum forming or machining.
How long does injection molding take from design to delivery?
Typically 5–8 weeks: 3–7 days for DFM review and mould design sign-off, 25–40 days for tool making, then T1 sampling, 3–7 days for correction if needed, and production. Complex tools with multiple slides add two to three weeks.
What tolerance can injection molding hold?
±0.1 mm is routine on dimensions under 100 mm; ±0.05 mm is achievable with a precision tool, stable mould temperature control and SPC. Above 300 mm, ±0.5 mm is realistic because warpage rather than shrinkage becomes the limiting factor.
Is injection molding suitable for small batches?
Only if the part cannot be made another way. Below roughly 500 pieces, the tooling amortisation dominates and vacuum forming, CNC machining or 3D printing is usually cheaper overall — even though the per-part price looks higher on paper.
Can you produce parts from our existing mold?
Yes. We routinely run customer-owned tools, starting with a mould condition inspection and a dimensional report before the first production run, so any pre-existing wear is documented and agreed before it becomes a dispute.
Send us your part and get a DFM review before you commit to tooling
Upload a STEP file and your target volume. We return a manufacturability review, a tooling recommendation and an indicative part price — including where a different process would be cheaper.





 DE
 EN
 ES
 FR
 PT
 AR
 RU
 JA
 KO
 IT
 NL
 TR
 PL
 ID
