Product straightness issues can compromise the quality, functionality, and safety of manufactured parts, leading to mechanical failures or performance setbacks. In industries like automotive, aerospace, and medical devices, where precision is non-negotiable, understanding and addressing these issues is paramount. This blog dives into the common causes of straightness problems, actionable fixes, and the tools to ensure precision in your manufacturing process.
Straightness issues stem from machine tool errors1, material properties, design flaws, human mistakes, and process-related factors, impacting industries where precision is critical for safety and performance.
What Causes Product Straightness Issues?
Straightness deviations occur when a part fails to align with its intended straight line, often due to factors within the manufacturing ecosystem. Identifying these causes is the first step to mitigating their effects.

Product straightness issues are commonly caused by machine tool errors, material properties2, design flaws, human errors, and process-related factors, leading to deviations that affect part functionality.
Machine Tool Errors
Machine tools like CNC machines are the backbone of precision manufacturing, but they can introduce straightness issues when:
-
Misalignment occurs in guideways or spindles over time.
-
Wear and Tear degrades components like bearings or rails.
-
Thermal Expansion from machining heat distorts tool paths.
-
Vibration during cutting disrupts precision.
Example: A worn spindle bearing in a CNC mill can cause tool wobble, resulting in a curved part.
Machine tool errors are a leading cause of straightness issues in manufacturing.True
Misalignment, wear, and thermal effects directly contribute to deviations in part straightness.
Material-Related Issues
The material itself can be a culprit:

-
Warping from Heat Treatment: Uneven cooling or residual stresses cause bending.
-
Internal Stresses: Unrelieved stresses lead to deformation during machining.
-
Inconsistent Properties: Variations in grain structure or composition affect machining uniformity.
Example: An aluminum part may warp post-heat treatment without proper fixturing.
Material properties significantly impact straightness in manufacturing.True
Warping and internal stresses can cause parts to deviate from straightness during or after processing.
Design Flaws
Poor design choices can set the stage for straightness problems:

-
Inadequate Tolerances:Loose specifications allow excessive deviation.
-
Geometry Prone to Bending: Long, thin parts are more susceptible to flexing.
-
Lack of Support: Insufficient support during machining leads to deflection.
Example: A slender shaft with a high length-to-diameter ratio may bend under its own weight.
Design flaws can make parts more susceptible to straightness issues.True
Inadequate tolerances and bend-prone geometries increase the risk of deviations.
Human Errors
Mistakes by operators or inspectors can introduce issues:

-
Incorrect Setup: Misaligned workpieces skew machining results.
-
Fixturing Mistakes: Poor clamping allows movement during cutting.
-
Inspection Errors: Misinterpreting measurements misses deviations.
Example: An improperly fixtured part on a lathe might develop a taper instead of staying straight.
Human errors are a preventable cause of straightness issues.True
Setup, fixturing, and inspection mistakes can be reduced with training and protocols.
Process-Related Issues
The manufacturing process itself can falter:

-
Inadequate Cutting Parameters: Wrong speeds or feeds cause tool deflection.
-
Tool Wear: Dull tools produce uneven cuts.
-
Improper Techniques: Unsuitable methods for the part geometry lead to errors.
Example: A worn milling tool may deflect, creating a curved surface instead of a straight one.
Process-related factors can directly cause straightness issues.True
Suboptimal parameters and worn tools disrupt precision in machining.
How Can You Fix Product Straightness Issues?
Fixing straightness issues requires targeting their root causes with practical, systematic solutions. Here’s how to tackle each one effectively.

Fixing straightness issues3 involves regular machine maintenance, proper material selection, redesigning parts, operator training, and optimizing processes to ensure precision and consistency.
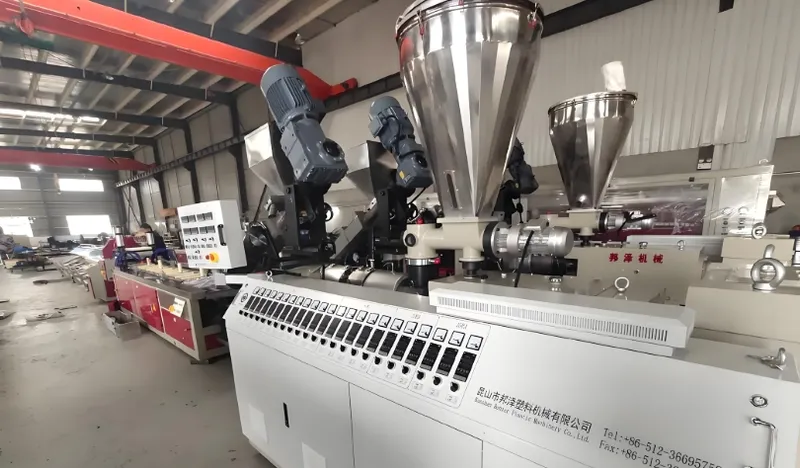
Regular Machine Maintenance
Combat machine tool errors with:
-
Calibration: Regularly align machine components.
-
Wear Monitoring: Replace worn parts proactively.
-
Thermal Management: Use cooling systems to control heat.
-
Vibration Control: Install dampers or mounts.
Example: A predictive maintenance schedule can catch spindle wear before it affects straightness.
Regular maintenance is crucial for preventing machine-related straightness issues.True
Proactive calibration and thermal control minimize errors from machine tools.
Proper Material Selection and Handling
Address material issues by:

-
Material Choice: Opt for thermally stable, stress-resistant materials.
-
Stress Relieving: Apply heat treatment before machining.
-
Fixturing: Secure parts to prevent warping.
Example: Pre-treating steel to relieve stresses can prevent bending during machining.
Proper material selection and handling can prevent straightness issues.True
Choosing suitable materials and relieving stresses reduces deformation risks.
Redesigning Parts
Fix design flaws with:
-
Tighter Tolerances: Specify stricter straightness requirements.
-
Geometry Adjustments: Reduce length-to-diameter ratios or add stiffeners.
-
Support Features: Incorporate machining supports.
Example: Adding ribs to a thin panel increases rigidity, preventing bending.
Redesigning parts can help mitigate straightness issues.True
Adjusted tolerances and geometries reduce susceptibility to deviations.
Operator Training and Quality Checks
Minimize human errors through:
-
Training: Educate operators on setup and fixturing.
-
SOPs: Enforce standardized procedures.
-
Automation: Use automated systems for consistency.
Example: Training on fixture alignment ensures parts stay secure during machining.
Operator training and quality checks are essential for reducing human errors.True
Education and SOPs limit preventable mistakes.
Optimizing Manufacturing Processes
Improve processes by:
-
Parameter Tuning: Optimize speeds and feeds.
-
Tool Maintenance: Replace tools regularly.
-
Advanced Methods: Use high-precision techniques like grinding.
Example: Monitoring tool wear prevents deflection-related straightness issues.
Optimizing manufacturing processes can prevent straightness issues.True
Fine-tuned parameters and tool care enhance precision.
Why is Straightness Critical in Key Industries?
Straightness4 isn’t just a quality metric—it’s a functional necessity in industries where small deviations can have big consequences.

Straightness is vital in automotive, aerospace, and medical device industries, where deviations can lead to mechanical failures, performance drops, or safety risks.
Automotive Industry
Straightness ensures:
-
Engine Parts: Crankshafts must be straight for smooth operation.
-
Suspension: Straight components maintain vehicle stability.
Example: A bent crankshaft causes vibrations, accelerating wear.
Straightness is critical for automotive engine performance.True
Deviations in engine parts can lead to mechanical failures.
Aerospace Industry
Precision is key for:
-
Wing Structures: Straight spars ensure aerodynamic efficiency.
-
Fuselage: Straight sections aid assembly and safety.
Example: A crooked wing spar risks structural failure in flight.
Straightness is essential for aerospace safety and performance.True
Deviations compromise flight dynamics and safety.
Medical Devices
Straightness matters for:
-
Surgical Tools: Precision ensures accurate procedures.
-
Implants: Straightness aids proper healing.
Example: A bent surgical tool could harm patients during surgery.
Straightness is crucial for the functionality of medical devices.True
Deviations can jeopardize patient safety.
How Do Measurement Technologies Impact Straightness Control?
Accurate measurement is vital for detecting and correcting straightness issues. Different tools offer unique advantages and trade-offs.

Technologies like CMMs and laser interferometers vary in cost, accuracy, and application, influencing how manufacturers manage straightness.
Comparison of Measurement Technologies
Here’s how common tools stack up:
| Technology | Pros | Cons |
|---|---|---|
| Coordinate Measuring Machines (CMMs)5 | High accuracy, versatile, multi-feature measurement | Costly, slow for large parts, needs skilled operators |
| Laser Interferometers | Precise, non-contact, great for long distances | Expensive, complex setup, line-of-sight required |
| Straightedges | Cheap, simple, quick checks | Less accurate, subjective, basic use only |
Example: CMMs excel for complex aerospace parts, while straightedges suit quick shop-floor checks.
The choice of measurement technology affects straightness control.True
Accuracy and cost differences influence detection and correction capabilities.
What are Some Practical Tools to Solve Straightness Issues?
Practical tools like checklists and guides can streamline efforts to maintain straightness.

Design Checklist for Straightness
Ensure designs prevent issues:
-
Select processes that meet precision needs.
-
Plan inspection methods and frequencies.
-
Include corrective options like re-machining.
Example: A checklist ensures critical features have tight tolerances.
A design checklist can prevent straightness issues from the start.True
Proactive design considerations reduce deviation risks.
Process Selection Guide
Choose the right process:

-
Precision Needs: CNC machining7 for high accuracy.
-
Cost vs. Accuracy: Balance budget and quality.
-
Fixturing: Ensure secure part holding.
Decision Tree: High precision needed? → Use CNC. Adequate fixturing? → Proceed; if not, redesign.
A process selection guide aids in maintaining straightness.True
Evaluating needs and capabilities optimizes process choice.
Conclusion
Straightness issues in manufacturing arise from machine tools, materials, designs, human errors, and processes, but they’re not insurmountable. Regular maintenance, smart material choices, thoughtful redesigns, operator training, and process optimization8 can keep parts straight and functional. In precision-critical fields like automotive, aerospace, and medical devices, addressing these issues ensures safety and performance.
-
Machine tool errors can significantly impact product quality. This resource will help you understand their effects and how to mitigate them. ↩
-
Material properties are key to achieving precision in manufacturing. Discover how they influence straightness and learn best practices. ↩
-
Understanding the causes of straightness issues is crucial for improving manufacturing precision and quality. Explore this resource for in-depth insights. ↩
-
Understanding the significance of straightness can enhance quality control and operational efficiency in critical sectors. ↩
-
Explore how CMMs can improve accuracy and efficiency in manufacturing processes, ensuring high-quality outputs. ↩
-
Explore GD&T to understand how it enhances design precision and prevents manufacturing issues, ensuring quality outcomes. ↩
-
Discover the advantages of CNC machining for achieving high accuracy in manufacturing processes, crucial for quality control. ↩
-
Learn about process optimization techniques that can enhance efficiency and reduce errors in manufacturing, leading to better results. ↩


