 تخطي إلى المحتوى
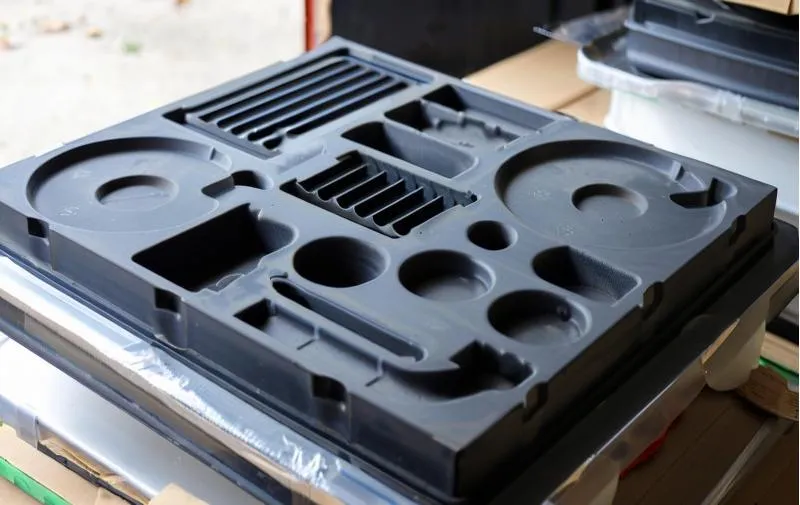
حلول التشكيل بالتفريغ الهوائي للجدار الرقيق
استكشف حلول التفريغ الهوائي الفعالة ذات الجدران الرقيقة. أطلق العنان للابتكار والدقة لتلبية احتياجاتك من حقن البلاستيك.
دليل التشكيل بالتفريغ الهوائي للجدار الرقيق (المقياس الرقيق) المخصص
مقدمة في التشكيل بالتفريغ الهوائي للجدار الرقيق
التشكيل بالتفريغ الهوائي للجدار الرقيق هو عملية تصنيع يتم فيها تشكيل صفيحة بلاستيكية ساخنة على قالب باستخدام ضغط التفريغ، مما ينتج عنه أجزاء ذات جدران رقيقة نسبيًا. تعد هذه الطريقة مناسبة بشكل خاص للنماذج الأولية والإنتاج بكميات منخفضة إلى متوسطة الحجم، مما يوفر توازنًا بين التكلفة والسرعة.
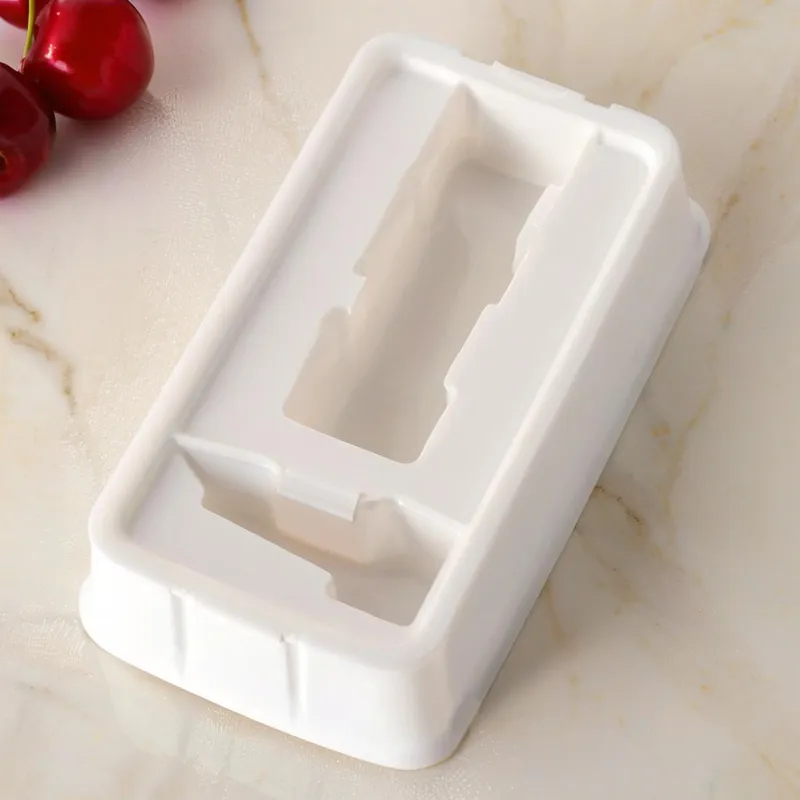
التشكيل بالتفريغ، وغالبًا ما يُطلق عليه التشكيل بالتفريغ الهوائي للجدار الرقيق عند التركيز على إنتاج أجزاء ذات جدران رقيقة، وهي تقنية تشكيل حراري تقوم بتسخين لوح بلاستيكي حتى يصبح مرنًا، ثم تستخدم التفريغ الهوائي لسحبه بإحكام على سطح القالب. وتُعرف هذه العملية ببساطتها وقدرتها على تحمل التكاليف، حيث تخلق مكونات خفيفة الوزن بسماكة موحدة بشكل عام يمكن أن تكون شفافة أو غير شفافة حسب المادة. إنها خيار ممتاز للمصنعين الذين يحتاجون إلى إنتاج فعال للعناصر ذات الجدران الرقيقة مثل صواني التغليف أو ألواح السيارات أو أغطية الأجهزة الطبية، خاصةً عندما لا تكون الآلات المعقدة أو أدوات الضغط العالي غير مجدية.
على عكس الطرق الأكثر تعقيدًا مثل القولبة بالحقن، يتميز التشكيل بالتفريغ بالتفريغ عن غيره من الطرق المعقدة مثل التشكيل بالحقن، يتميز التشكيل بالتفريغ بالتفريغ بانخفاض حواجز الدخول، مما يتطلب أدوات أقل تكلفة ومعدات أبسط. وهذا ما يجعلها مثالية للشركات الصغيرة أو الشركات الناشئة أو أي شخص يقوم بتصميم نماذج أولية جديدة دون الالتزام بتكاليف إنتاج كبيرة الحجم مقدمًا.
كيفية معالجة تشكيل الجدار الرقيق بالتفريغ خطوة بخطوة؟
عملية تشكيل الجدران الرقيقة بالتفريغ عبارة عن سلسلة مبسطة ودقيقة من الخطوات المصممة خصيصًا لإنتاج أجزاء ذات جدران رقيقة وموحدة. وفيما يلي تفصيل مفصل:
1. تدفئة:
يتم تسخين صفيحة بلاستيكية رقيقة، مثل ABS أو البوليسترين بين 120 درجة مئوية و180 درجة مئوية، مما يجعلها لينة ومرنة.
2. وضع القالب:
يتم وضع الصفيحة المسخّنة بعناية فوق قالب مصنوع من الألومنيوم أو البوليمرات المطبوعة ثلاثية الأبعاد، مما يضمن الدقة.
3. تطبيق التفريغ:
تسحب المكنسة الكهربائية البلاستيك بإحكام على القالب، مما يؤدي إلى تشكيله مع منع التمدد الزائد الذي قد يضعف الجزء.

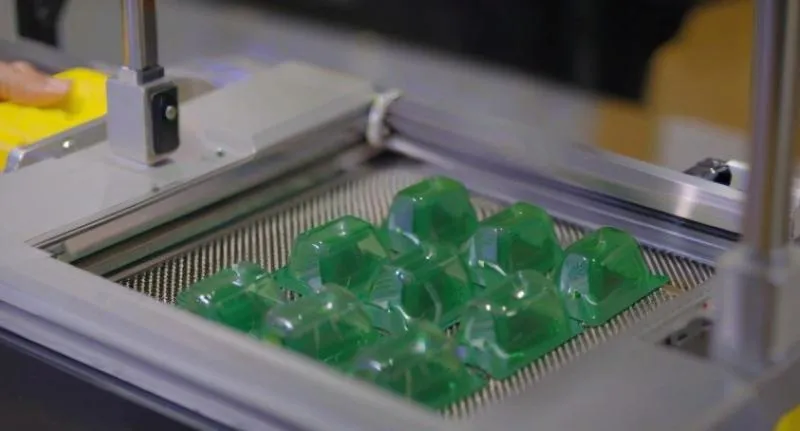
5. التشذيب:
تتم إزالة المواد الزائدة باستخدام أجهزة التوجيه بنظام التحكم الرقمي باستخدام الحاسب الآلي أو القطع اليدوي، يليها الصنفرة للحصول على تشطيب ناعم ومصقول.
4. التبريد:
تعمل المراوح أو الرذاذ على تبريد البلاستيك بسرعة، مما يضمن تثبيت الشكل المُشكّل بشكل صحيح مع تقليل أي مشاكل في الالتواء.
هذه العملية فعالة، وغالبًا ما تستغرق بضع دقائق فقط في كل دورة، ولكنها تتطلب اهتمامًا دقيقًا بمراحل التسخين والتفريغ للحفاظ على النحافة والقوة المطلوبة. وفيما يلي جدول يلخص الخطوات:
| الخطوة | الوصف |
|---|---|
| التدفئة | يتم تسخين الصفيحة البلاستيكية الرقيقة إلى حالة مرونة (120 درجة مئوية - 180 درجة مئوية). |
| وضع القالب | يتم محاذاة الصفيحة المسخّنة فوق قالب (ألومنيوم أو مطبوع ثلاثي الأبعاد). |
| تطبيق التفريغ | يسحب التفريغ الصفيحة على القالب لتشكيل جدران رقيقة (0.5 مم - 2 مم). |
| التبريد | يتم تبريد الجزء باستخدام المراوح أو الضباب لتصلب الهيكل ذي الجدران الرقيقة. |
| التشذيب | تتم إزالة المواد الزائدة، ويتم تشطيب الحواف للحصول على الجزء النهائي ذي الجدران الرقيقة. |
مزايا وقيود التشكيل بالتفريغ الهوائي للجدار الرقيق
يوفر التشكيل بالتفريغ الهوائي للجدار الرقيق مزايا متميزة ولكنه ينطوي أيضًا على تحديات يجب أخذها في الاعتبار. إليك نظرة متعمقة:
1. المزايا:
① الفعالية من حيث التكلفة: تعتبر تكاليف الأدوات منخفضة نسبيًا، مما يجعلها ميسورة التكلفة لإنتاج أجزاء رقيقة الجدران بكميات صغيرة إلى متوسطة (250-3000 وحدة).
② أجزاء خفيفة الوزن: وباستخدام الحد الأدنى من المواد، تخلق هذه العملية مكونات خفيفة للغاية ومثالية للتطبيقات التي يحسّن فيها تقليل الوزن من الكفاءة، مثل لوحات عدادات السيارات أو أجزاء مقصورة الطائرات.
③ الإنتاج السريع: تكون الدورات سريعة - غالبًا ما تكون أقل من 10 دقائق من التسخين إلى التشذيب - مما يتيح سرعة التحول السريع للنماذج الأولية أو احتياجات الإنتاج العاجلة.
④ كفاءة المواد: يقلل تشكيل الجدران الرقيقة بالتفريغ من البلاستيك إلى الحد الأدنى من استخدام البلاستيك، مما يقلل من التكاليف والنفايات على حد سواء، مع إمكانية إعادة تدوير المواد الخردة في كثير من الأحيان.
2. القيود:
① اتساق سُمك الجدار: قد يكون من الصعب الحفاظ على سمك موحد عبر المقاطع الأعمق، مما قد يؤدي إلى ظهور بقع رقيقة أو نقاط ضعف هيكلية إذا لم تتم إدارتها بعناية.
② الأشكال الهندسية البسيطة فقط: تتفوق هذه العملية مع الأشكال الأساسية ولكنها تواجه صعوبات في التصاميم المعقدة، مثل تلك التي تحتوي على تجاويف سفلية أو تفاصيل معقدة، مما يحد من تنوعها.
③ ليس للأحجام الكبيرة: في حين أنها اقتصادية بالنسبة لعمليات التشغيل الأصغر، إلا أنها تصبح أقل تنافسية للإنتاج على نطاق واسع مقارنة بطرق مثل القولبة بالحقن بسبب احتياجات التشطيب اليدوي.
④ تشطيب ثانوي: غالبًا ما يتطلب تقليم الأجزاء رقيقة الجدران وتمليسها عمالة إضافية، مما يزيد من الوقت والتكلفة الإجمالية.
3. المقارنة:
| المزايا | القيود |
|---|---|
| انخفاض تكاليف الأدوات | تحدي ضمان سمك الجدار الموحد |
| مكونات خفيفة الوزن | تقتصر على الأشكال البسيطة |
| دورات إنتاج سريعة | أقل كفاءة في عمليات التشغيل بكميات كبيرة |
| تقليل نفايات المواد | يتطلب تشذيب وتشطيب إضافي |
ما هي المواد المستخدمة في تشكيل الجدار الرقيق بالتفريغ الهوائي؟
في التشكيل التفريغي للجدار الرقيق، يشيع استخدام مجموعة متنوعة من المواد البلاستيكية الحرارية نظرًا لقدرتها على التسخين والتمدد والتشكيل في أشكال دقيقة. تشمل المواد الرئيسية ما يلي:
| المواد | الخصائص والتطبيقات |
|---|---|
| ABS (أكريلونيتريل بوتادين ستايرين) | متينة ومقاومة للصدمات وسهلة التشكيل. مثالية لقطع غيار السيارات، والسلع الاستهلاكية، والأغلفة الإلكترونية. |
| HIPS (بوليسترين عالي التأثير) | خفيف الوزن وفعال من حيث التكلفة وجيد للتغليف والحاويات التي تستخدم لمرة واحدة والنماذج الأولية. أقل مقاومة للحرارة من ABS. |
| كلوريد البوليفينيل المتعدد الفينيل (PVC) | خيارات صلبة أو مرنة. مقاوم للمواد الكيميائية ومثبط للهب؛ يستخدم في المعدات الطبية واللافتات والبناء. |
| بولي إيثيلين تيريفثاليت جلايكول (PETG) | تجمع بين الوضوح والمتانة والمقاومة الكيميائية. شائع في تغليف المواد الغذائية والأجهزة الطبية وشاشات العرض. |
| بولي كربونات (PC) | قوة عالية وشفافية ومقاومة للحرارة. تستخدم للأغطية الواقية والإضاءة والمكونات الفضائية. |
| البولي بروبلين (PP) | مرنة ومقاومة للمواد الكيميائية ومقاومة للإجهاد. مناسب للمفصلات الحية والحاويات وقطع غيار السيارات. |
| أكريليك (PMMA) | نقاء بصري ممتاز ومقاومة للأشعة فوق البنفسجية. مثالية للعرض والعدسات وعناصر الزينة. |
| البولي إيثيلين عالي الكثافة (HDPE) | صلبة ومقاومة للمواد الكيميائية ومقاومة للرطوبة. يُستخدم للحاويات الصناعية والأجزاء التقنية. |
عوامل الاختيار:
يعتمد اختيار المواد على متطلبات التطبيق مثل القوة والمرونة والاستقرار الحراري والمقاومة الكيميائية والتكلفة. وغالبًا ما يعطي تشكيل الجدران الرقيقة الأولوية للمواد ذات خصائص التدفق الجيد (مثل PETG، ABS) للحصول على أجزاء دقيقة وخفيفة الوزن دون تمزق.
اعتبارات التصميم الرئيسية للتشكيل بالتفريغ الهوائي للجدار الرقيق
يتطلب التصميم للتشكيل بالتفريغ الهوائي للجدار الرقيق إرشادات محددة لضمان أن تكون الأجزاء رقيقة الجدران عملية وقابلة للتصنيع:
① زوايا السحب: دمج زوايا تتراوح بين 5° و10° للقوالب الأنثوية و3° و5° للقوالب الذكرية للسماح بإزالتها بسهولة دون الإضرار بالجدران الرقيقة.
② سُمك الجدار: استهدف سمكًا موحدًا (0.5 مم - 2 مم) لتجنب نقاط الضعف؛ فقد يحدث التمدد غير المتساوي إذا لم يتم التخطيط له بعناية.
③ تجنب السحوبات العميقة: حافظ على أعماق السحب ضحلة - أقل من 75% من أصغر عرض علوي للقطعة - لمنع التخفيف أو التمزق المفرط.
④ ميزات مستديرة: استخدم أنصاف أقطار كبيرة (3 مم كحد أدنى) وزوايا ملساء لتقليل الإجهاد والتشقق في الجدران الرقيقة.
⑤ الحد من القطع السفلية: قلل من الشقوق السفلية أو الزوائد المتدلية، حيث إنها تعقد عملية تحرير القالب وقد تتطلب أدوات إضافية.
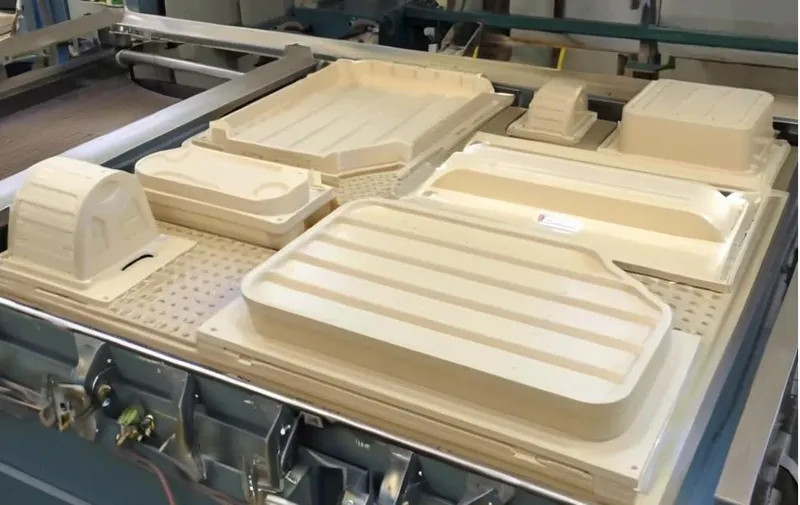
تطبيقات التشكيل بالتفريغ الهوائي للجدار الرقيق
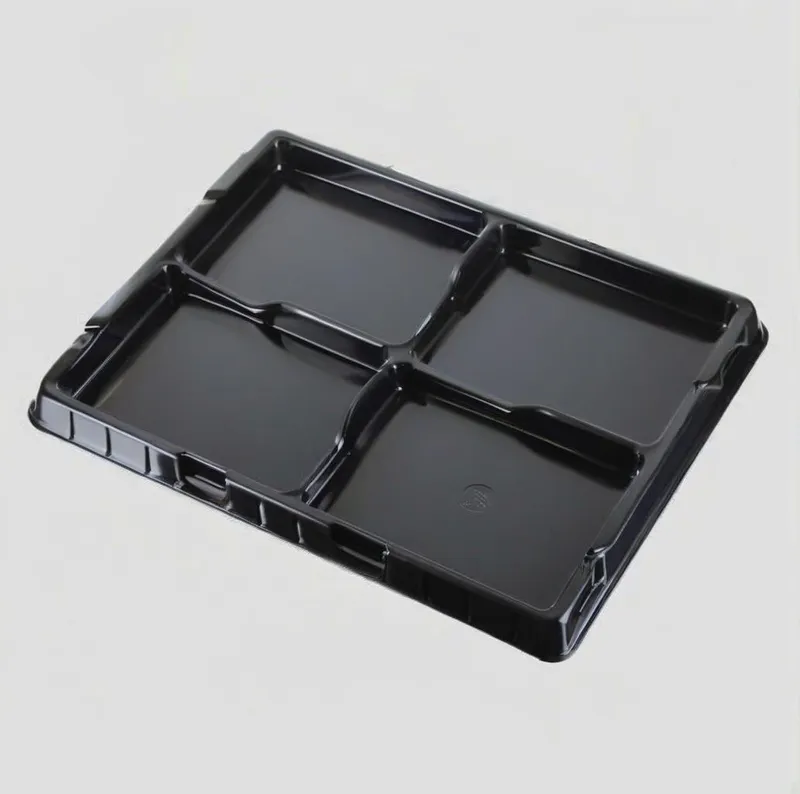
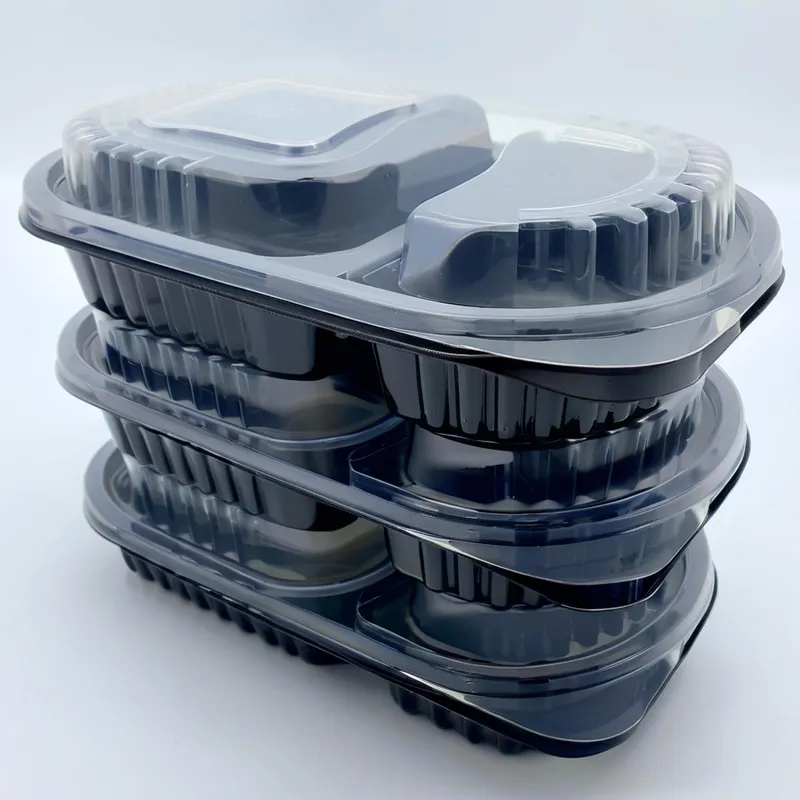
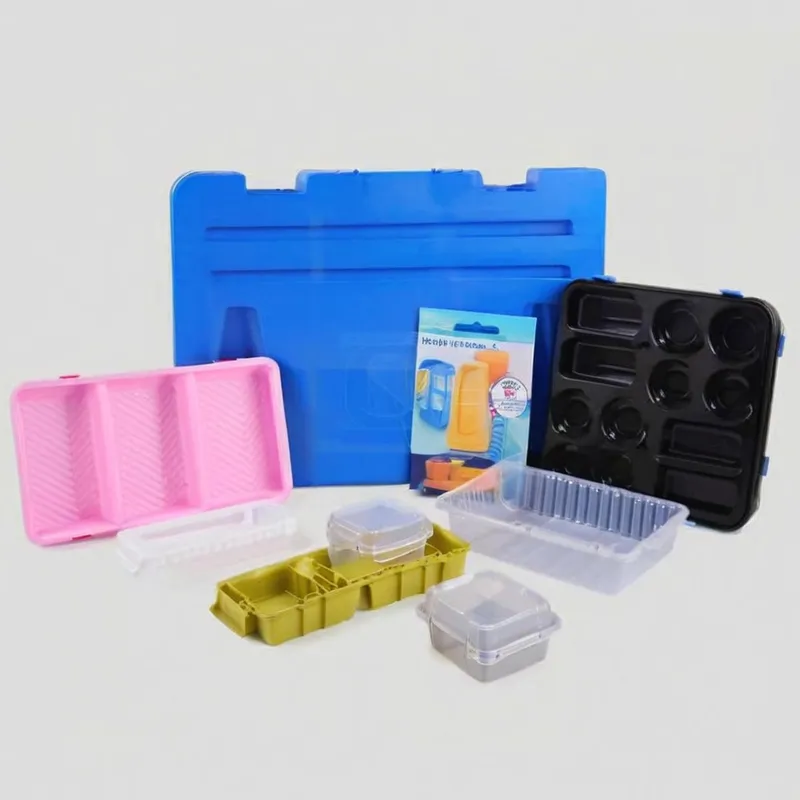
إن التشكيل بالتفريغ الهوائي للجدار الرقيق هو عملية تصنيع متعددة الاستخدامات وفعالة من حيث التكلفة تُستخدم لإنتاج مكونات بلاستيكية خفيفة الوزن ومتينة ودقيقة. وتشمل تطبيقاتها مختلف الصناعات نظرًا لكفاءتها في إنشاء أشكال معقدة بأقل قدر من النفايات المادية. تشمل التطبيقات الرئيسية ما يلي:
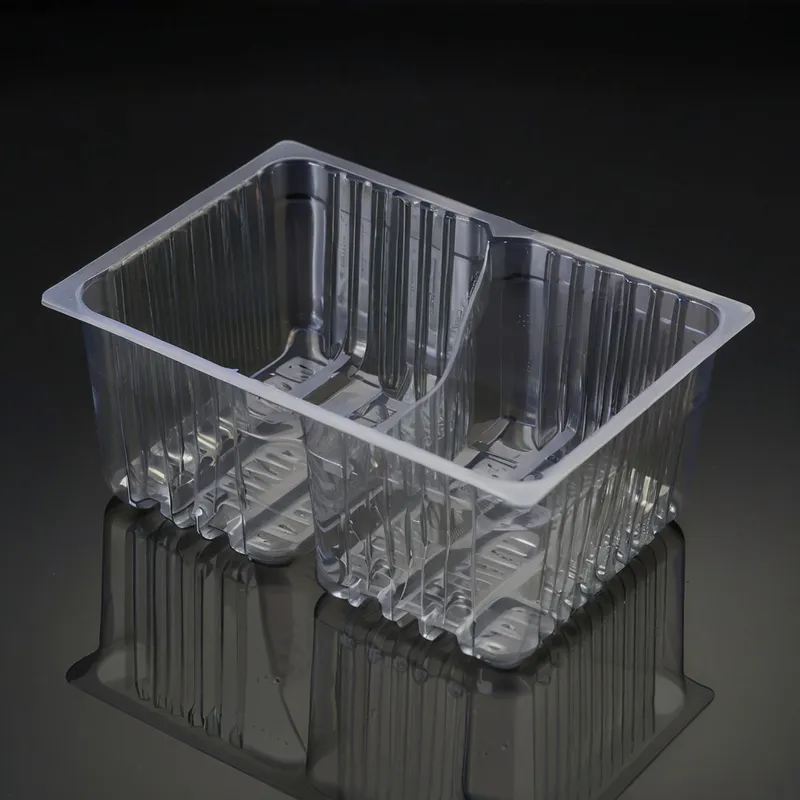
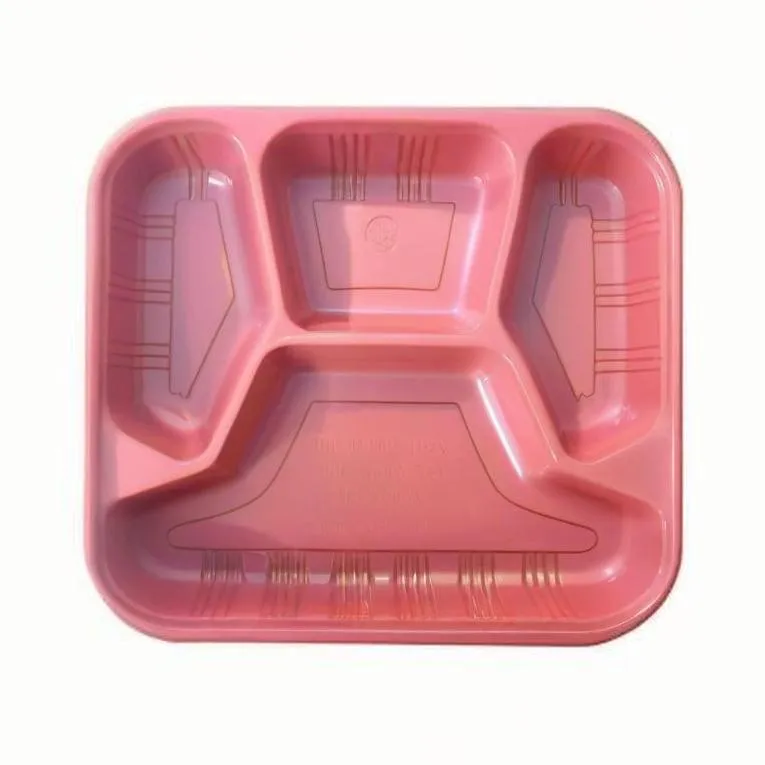
1. التعبئة والتغليف:
① تغليف المواد الغذائية: الصواني والحاويات الصدفية والأكواب التي تستخدم لمرة واحدة.
② عبوات نفطة: للأدوية أو الإلكترونيات أو السلع الاستهلاكية.
③ عبوات البيع بالتجزئة: حاويات مخصصة لمستحضرات التجميل أو الألعاب أو الإلكترونيات.
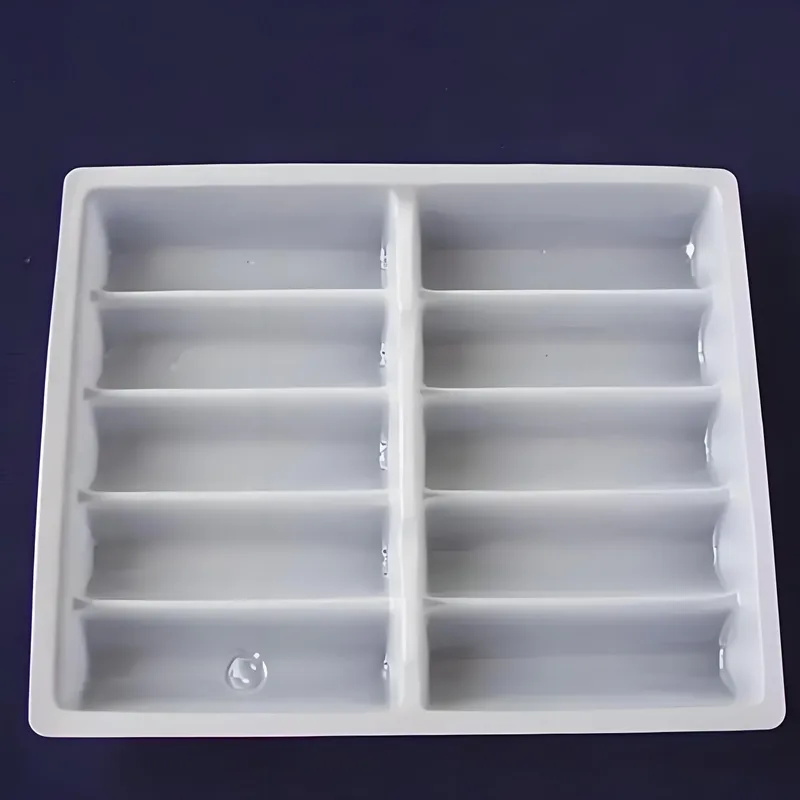
2. السلع الاستهلاكية:
① أدوات المائدة التي تستخدم لمرة واحدة: الأطباق والأوعية وأدوات المائدة.
② الأدوات المنزلية: حاويات التخزين أو بطانات الثلاجات أو ألواح الاستحمام.
③ عبوات مستحضرات التجميل: عبوات رقيقة الجدران والأغطية والعلب المدمجة.
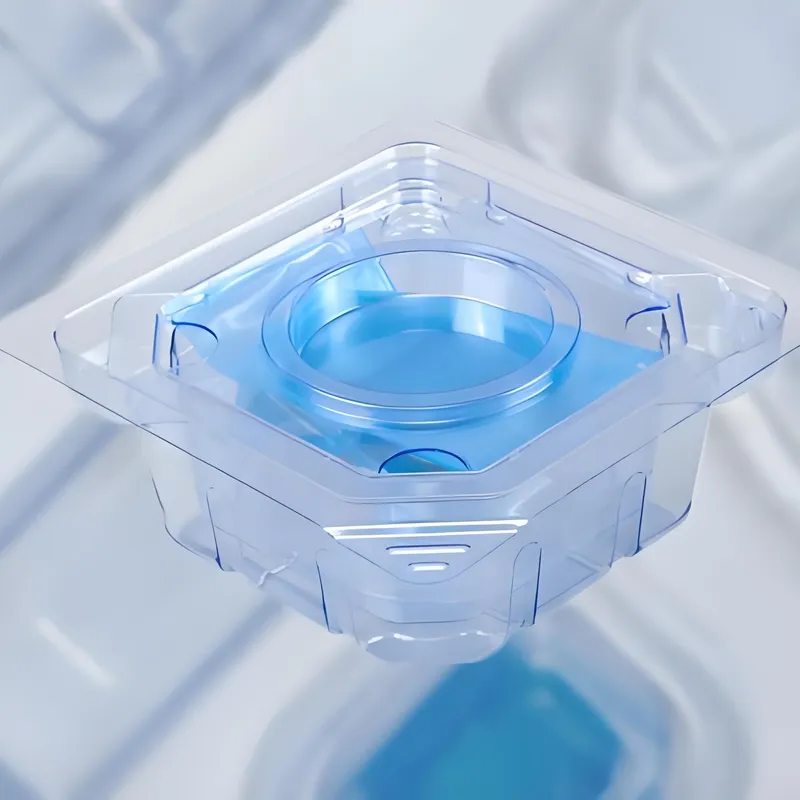
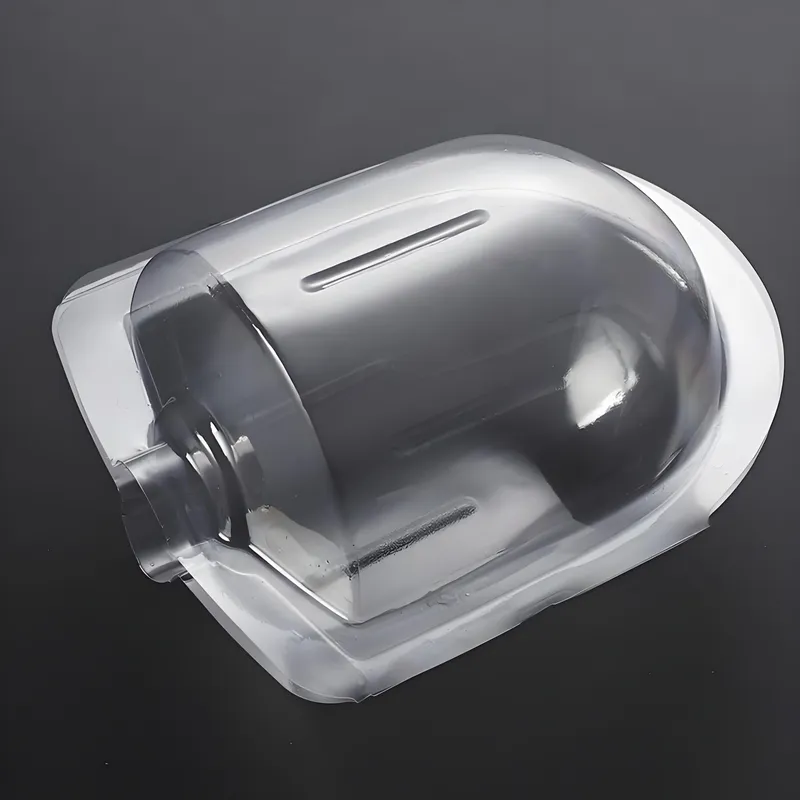
3. الطب والرعاية الصحية:
① صواني معقمة: للأدوات الجراحية أو عبوات الأجهزة الطبية.
② مكونات يمكن التخلص منها: أكواب العينات أو منظمات الأقراص أو الأغطية الواقية.
4. الزراعة:
① صواني إكثار النباتات: صواني إكثار النباتات رقيقة الجدران وقابلة لإعادة الاستخدام.
② أغطية واقية: للمعدات أو المحاصيل.

حلول التشكيل بالتفريغ الهوائي للجدار الرقيق
اكتشف حلول التشكيل الحراري المتينة وعالية الدقة مع دعم التصميم المخصص وتنوع المواد. اطلب عرض أسعار اليوم!
دليل التشكيل بالتفريغ الهوائي للجدار الرقيق (المقياس الرقيق) المخصص
- الأتمتة في التشكيل بالتفريغ الهوائي للجدار الرقيق
- التحديات والحلول في التشكيل بالتفريغ الهوائي للجدار الرقيق
- كيف يمكن توسيع نطاق الإنتاج باستخدام التشكيل بالتفريغ الهوائي للجدار الرقيق؟
- التشكيل بالتفريغ الهوائي الرقيق مقابل التشكيل بالتفريغ الهوائي الثقيل
- قوالب التشكيل الحراري ذات المقاييس الرقيقة عالية الجودة والمتسقة
- ما هي الأنواع المختلفة لقوالب التشكيل الحراري الرقيقة؟
الأتمتة في التشكيل بالتفريغ الهوائي للجدار الرقيق
تُحدث الأتمتة تحولاً في عملية تشكيل الجدران الرقيقة بالتفريغ، مما يعزز الكفاءة والاتساق. إليك كيفية دمج التكنولوجيا الحديثة في العملية:
① المناولة الآلية للمواد: تقوم الروبوتات بتحميل الصفائح البلاستيكية في الماكينة وإزالة الأجزاء الجاهزة، مما يقلل من العمل اليدوي ويسرّع من زمن الدورة.
② التشذيب باستخدام الحاسب الآلي: بعد التشكيل، تقوم ماكينات التحكم الرقمي بالكمبيوتر (CNC) بقص المواد الزائدة بدقة من الأجزاء رقيقة الجدران لضمان حواف نظيفة وقابلية التكرار.
③ فحوصات الجودة الداخلية: تراقب المستشعرات الآلية درجة حرارة الصفيحة وضغط التفريغ وأبعاد القِطع في الوقت الفعلي، وتحدد المشكلات قبل تفاقمها.
④ وحدات التحكم المنطقية القابلة للبرمجة (PLCs): تدير هذه الأنظمة العملية بأكملها - التسخين والتشكيل والتبريد - بمعايير محددة مسبقًا، مما يقلل من الأخطاء البشرية.
بالنسبة لتشغيل متوسط الحجم من 1000 قطعة، يمكن للأتمتة خفض وقت الإنتاج بمقدار 20-30% مع تحسين الاتساق، مما يجعلها عامل تغيير في الصناعات ذات الطلب العالي.
التحديات والحلول في التشكيل بالتفريغ الهوائي للجدار الرقيق
على الرغم من أن التشكيل بالتفريغ الهوائي للجدار الرقيق يوفر العديد من الفوائد، إلا أنه يأتي مع تحديات يجب على المصنعين معالجتها:
1. التخفيف غير المتكافئ:
① التحدي: يمكن أن يؤدي السحب العميق إلى تمدد المادة أكثر من اللازم، مما يؤدي إلى إضعاف بعض المناطق.
② الحل: استخدم أدوات المساعدة على السدادة التي تقوم بتمديد الصفيحة مسبقًا بشكل متساوٍ قبل أن يسحبها المكنسة الكهربائية إلى القالب.
2. الالتواء:
① التحدي: يمكن أن تتشوه الأجزاء الرقيقة أثناء تبريدها بسبب الضغوط الداخلية.
② الحل: تحسين معدلات التبريد باستخدام المراوح أو رذاذ الماء واستخدام التَرْكِيبات للحفاظ على شكل الجزء أثناء التبريد.
3. تفاصيل محدودة:
① التحدي: يواجه التشكيل بالتفريغ الهوائي صعوبات في الميزات المعقدة مقارنةً بالقولبة بالحقن.
② الحل: الجمع مع التشكيل بالضغط أو المعالجة الآلية بعد المعالجة للحصول على تفاصيل أدق.
كيف يمكن توسيع نطاق الإنتاج باستخدام التشكيل بالتفريغ الهوائي للجدار الرقيق؟
يتطلب التدرج من النموذج الأولي إلى الإنتاج الكامل في تشكيل الجدران الرقيقة بالتفريغ بالتفريغ تخطيطًا استراتيجيًا. إليك كيفية انتقال المصنعين بسلاسة:
① النماذج الأولية: ابدأ بالقوالب المطبوعة ثلاثية الأبعاد أو الخشبية منخفضة التكلفة لاختبار التصميمات. قد تصل تكلفة قالب نموذج أولي واحد إلى $150.
② الجري الصغير: انتقل إلى قوالب الألومنيوم للدفعات من 100-500 وحدة. هذه القوالب متينة ومع ذلك فهي ميسورة التكلفة، وتوازن بين التكلفة والجودة.
③ إنتاج كميات كبيرة: بالنسبة للوحدات التي تزيد عن 1000 وحدة، تزيد القوالب متعددة التجاويف (تشكيل عدة أجزاء في وقت واحد) من الإنتاج. ترتفع تكاليف الأدوات، ولكن تنخفض تكاليف القطعة الواحدة بشكل كبير.
④ تحسين العملية: ضبط أوقات التسخين، وقوة التفريغ، والتشذيب لزيادة الإنتاجية إلى أقصى حد دون التضحية بالجودة.
التشكيل بالتفريغ الهوائي الرقيق مقابل التشكيل بالتفريغ الهوائي الثقيل
إن التشكيل بالتفريغ بالتفريغ ذو المقياس الرقيق والتشكيل بالتفريغ ذو المقياس الثقيل هما نوعان مختلفان من عملية التشكيل الحراري، ويتميزان في المقام الأول بسماكة الصفائح البلاستيكية المستخدمة وتطبيقاتها.
1. سُمك المادة:
① مقياس رقيق: تتضمن صفائح بلاستيكية أرق من 0.060 بوصة (1.5 مم)، وغالبًا ما يتم توريدها على شكل لفائف للمعالجة المستمرة.
② مقياس ثقيل: يستخدم صفائح يتراوح سمكها من 0.060 بوصة (1.5 مم) إلى 0.500 بوصة (12.7 مم) أو أكثر سمكًا، وعادةً ما يتم قصها حسب الحجم وتغذيتها بشكل فردي.
2. التطبيقات:
① مقياس رقيق: تُستخدم عادةً في المنتجات كبيرة الحجم وخفيفة الوزن التي تستخدم لمرة واحدة مثل صواني التغليف، والأغلفة الصدفية، وعبوات الفقاعة، وحاويات الطعام.
② مقياس ثقيل: تُستخدم للأجزاء الهيكلية المتينة مثل مكونات السيارات (مثل لوحات العدادات) وأغطية الأجهزة الطبية والأغطية الصناعية.
3. خصائص العملية:
① مقياس رقيق: تتميز بأوقات دورات أسرع بسبب خصائص التسخين والتبريد السريع للمادة الرقيقة. وغالبًا ما تدمج التشذيب والتكديس الآلي لتحقيق الكفاءة.
② مقياس ثقيل: يتطلب فترات أطول للتسخين والتبريد، مما يؤدي إلى إنتاج أبطأ ولكنه يتيح أشكالاً أكثر تعقيدًا وقوة أكبر للقطع.
4. المزايا والعيوب:
① مقياس رقيق:
- المزايا: فعّالة من حيث التكلفة للإنتاج بكميات كبيرة، وخفيفة الوزن، وتولد الحد الأدنى من النفايات.
- العيوب: تقتصر على تصاميم أبسط وأجزاء أقل متانة.
② مقياس ثقيل:
- المزايا: تنتج قطعًا قوية وطويلة الأمد مع مرونة أكبر في التصميم (على سبيل المثال، القطع السفلية والتركيبات التفصيلية).
- العيوب: ارتفاع تكاليف المواد والأدوات، ومعدلات إنتاج أبطأ.
قوالب التشكيل الحراري ذات المقاييس الرقيقة عالية الجودة والمتسقة
إن تحقيق جودة عالية وقوالب تشكيل حراري رقيقة ذات مقاييس رقيقة ومتسقة أمر بالغ الأهمية لإنتاج أجزاء موحدة، خاصةً في عمليات التشغيل بكميات كبيرة. تشمل العوامل الرئيسية التي تساهم في جودة القالب ما يلي:
1. اختيار المواد:
① ألومنيوم: يُفضّل استخدامه في قوالب الإنتاج بسبب متانته وتوصيله الممتاز للحرارة وقدرته على الحفاظ على تفاوتات تحمل ضيقة على مدار آلاف الدورات.
② مركب/إيبوكسي: تُستخدم للنماذج الأولية أو الطلبيات القصيرة، حيث تقدم بديلاً أقل متانة ولكن بأسعار معقولة.
2. دقة التصميم:
① أدوات CAD/CAM: يتم تصميم القوالب باستخدام التصميم بمساعدة الحاسوب (CAD) وتصنيعها آليًا عن طريق التصنيع بمساعدة الحاسوب (CAM) لتحقيق الدقة والتكرار.
② زوايا السحب وأنصاف الأقطار: يضمن دمج زوايا السحب (3-5 درجات) وأنصاف الأقطار الملساء سهولة تحرير القِطع ومنع ترقق المواد.
3. أنظمة التبريد:
① قنوات التبريد: توفر القنوات المدمجة تحكماً موحداً في درجة الحرارة، مما يقلل من أزمنة الدورات ويضمن جودة القطعة المتسقة.
② الإدارة الحرارية: التبريد الفعال يمنع الاعوجاج ويحافظ على ثبات الأبعاد في الأجزاء ذات المقاييس الرقيقة.
4. تشطيب السطح:
① مصقول/مصقول: ينتج عن القالب المصقول قطعًا لامعة، بينما تُنتج الأسطح غير اللامعة أو المنقوشة تشطيبات غير لامعة أو منقوشة.
② التنفيس: تسمح فتحات التنفيس الموضوعة بشكل استراتيجي بخروج الهواء، مما يضمن توافق البلاستيك تمامًا مع القالب دون عيوب.
5. تقنيات التصنيع:
① التصنيع باستخدام الحاسب الآلي: يضمن التصنيع الآلي عالي الدقة دقة ميزات القوالب، وهو أمر حيوي لتحقيق الاتساق في عمليات التشغيل الكبيرة.
② تصميمات معيارية: تتيح الحشوات القابلة للتبديل إجراء تغييرات سريعة في التصميم دون استبدال القالب بأكمله.
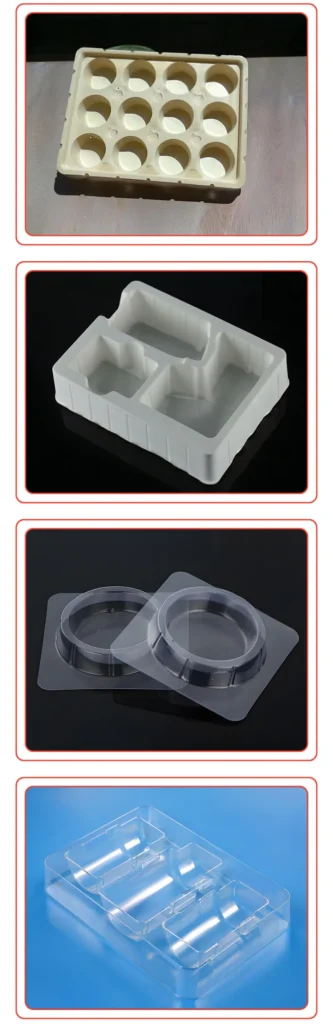
ما هي الأنواع المختلفة لقوالب التشكيل الحراري الرقيقة؟
توجد عدة أنواع من قوالب التشكيل الحراري ذات المقاييس الرقيقة، كل منها مصمم خصيصًا لتلبية احتياجات الإنتاج والميزانيات ومتطلبات القطع:
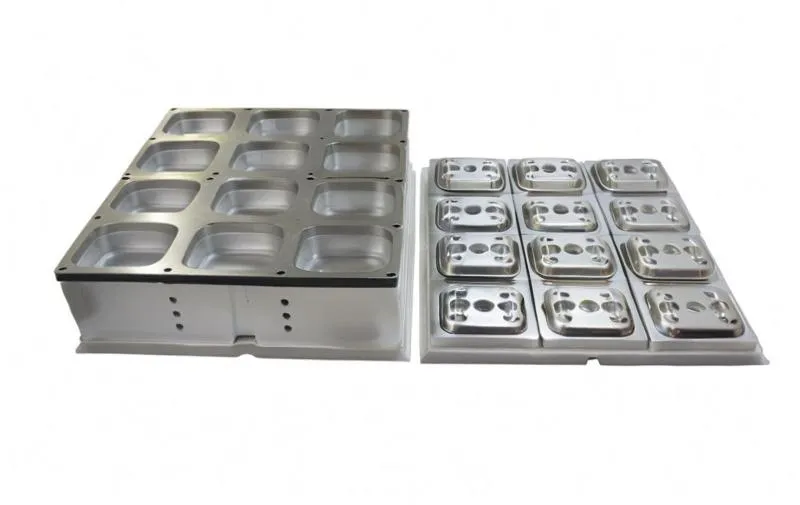
1. قوالب الألومنيوم:
مصنوعة من الألومنيوم عالي الجودة، وهي الخيار المفضل لقوالب الإنتاج.
- الاستخدامات: إنتاج كميات كبيرة من العبوات والصواني والحاويات.
- الإيجابيات: متينة وممتازة في نقل الحرارة، وقادرة على تقديم تفاصيل دقيقة.
- السلبيات: تكلفة أولية أعلى.
2. القوالب المركبة:
هذه القوالب المصنوعة من راتنجات الإيبوكسي أو الألياف الزجاجية أخف وزناً وأقل تكلفة.
- الاستخدامات: النماذج الأولية أو الإنتاج على المدى القصير.
- الإيجابيات: ميسورة التكلفة وسريعة الإنتاج.
- السلبيات: أقل متانة، وعادةً ما تدوم من 100-500 دورة.
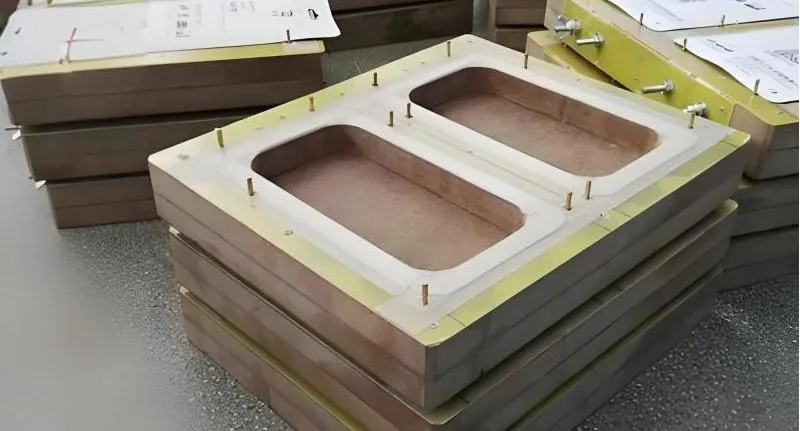
3. قوالب خشبية:
مصنوعة من الخشب الصلب أو الخشب الرقائقي لتلبية احتياجات التشكيل الأساسية.
- الاستخدامات: قطع لمرة واحدة أو نماذج أولية مبكرة.
- الإيجابيات: غير مكلف وسريع الإنشاء.
- السلبيات: عرضة للاهتراء وغير مناسب للإنتاج.
4. قوالب مطبوعة ثلاثية الأبعاد:
يتم إنتاجه باستخدام بوليمرات أو راتنجات مقاومة للحرارة عبر الطباعة ثلاثية الأبعاد.
- الاستخدامات: النماذج الأولية السريعة أو القِطع المخصصة منخفضة الحجم.
- الإيجابيات: مرونة الإنتاج السريع ومرونة التصميم.
- السلبيات: متانة ومقاومة محدودة للحرارة.
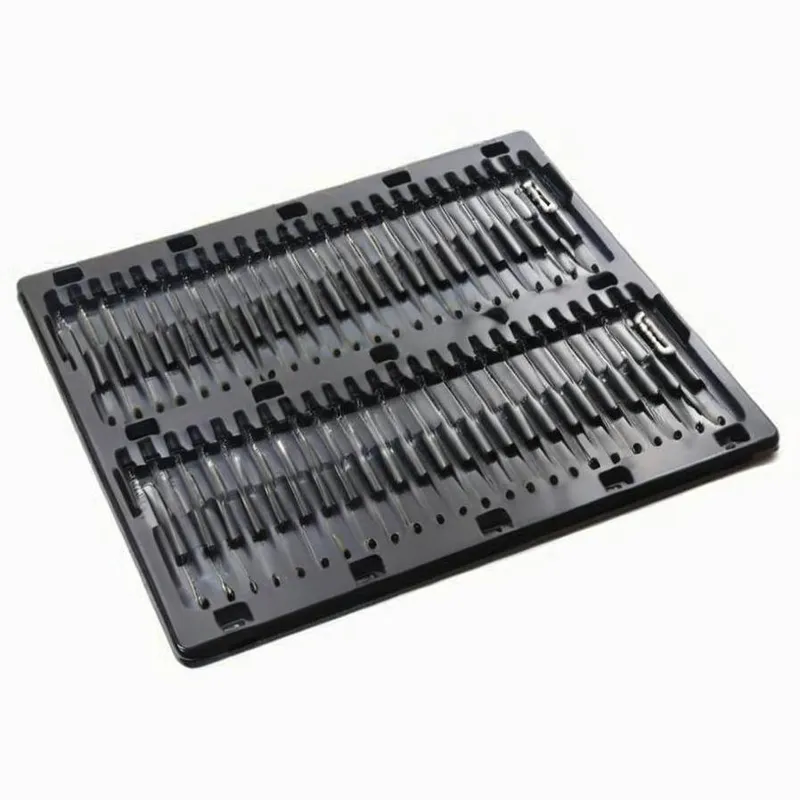
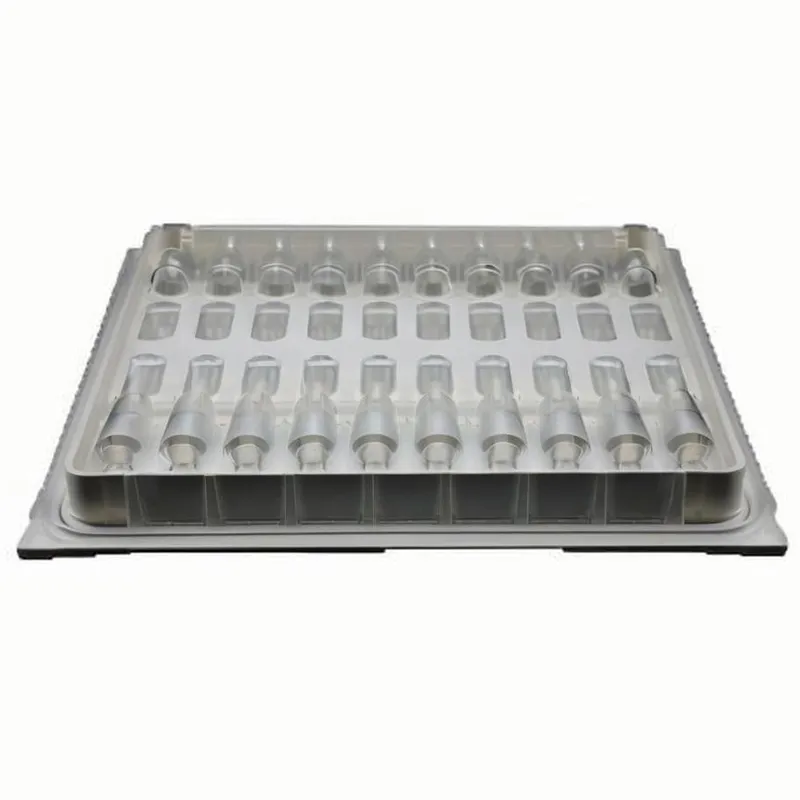
5. قوالب متعددة التجاويف:
تتميز بتجاويف متعددة لتشكيل عدة أجزاء في وقت واحد من صفيحة واحدة.
- الاستخدامات: الإنتاج بكميات كبيرة لتحقيق الكفاءة.
- الإيجابيات: يعزز الإنتاج ويقلل من تكاليف القطعة الواحدة.
- السلبيات: تصميم معقد ومكلف.
الأسئلة الشائعة للعميل
البدء مع أبلاستيك
هل لديك أسئلة؟ لدينا إجابات.
نحن متخصصون في البثق والتشكيل بالتفريغ والتشكيل بالنفخ وصناعة القوالب الدقيقة، ونقدم حلولاً مخصصة لتلبية احتياجاتك التصنيعية المتنوعة.
نحن نعمل مع مختلف الصناعات، بما في ذلك السيارات والإلكترونيات والسلع الاستهلاكية والتعبئة والتغليف، مع التركيز على الشراكات بين الشركات وتقديم الحلول في مجالات البثق والتشكيل الحراري والقولبة بالنفخ وصناعة القوالب الدقيقة.
نعم، نحن نصمم حلولنا لتناسب متطلباتك الفريدة.
تواصل معنا
لا تتردد في مراسلتنا عبر البريد الإلكتروني أو ملء النموذج أدناه للحصول على عرض أسعار.
البريد الإلكتروني: uplastech@gmail.com

