- 1. I. Basic Cognitive Level: Establishing Conceptual Framework
- 2. II. Application Analysis Level: Solving User Decision-Making Problems
- 3. III. Technical Deep Dive Level: Meeting Professional Reader Needs
- 4. IV. Practical Tools Level: Enhancing Content Operability
- 5. V. Extension Level: Building a Knowledge Network
I. Basic Cognitive Level: Establishing Conceptual Framework
Let's start by building a solid understanding of what plaster thermoforming molds are.
Clear Definitions
- Thermoforming:

- Full Technical Name: Thermoforming Process
- Common Aliases: Vacuum forming (a specific type of thermoforming), drape forming, pressure forming.
- Core Principle: A manufacturing process where a plastic sheet is heated to a pliable forming temperature, formed to a specific shape in or on a mold, and trimmed to create a usable product. The forming is typically achieved using vacuum, air pressure, or mechanical force.
-
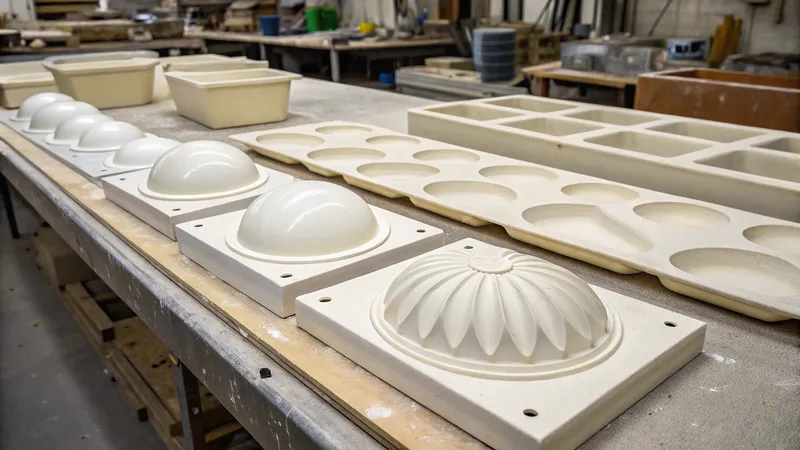
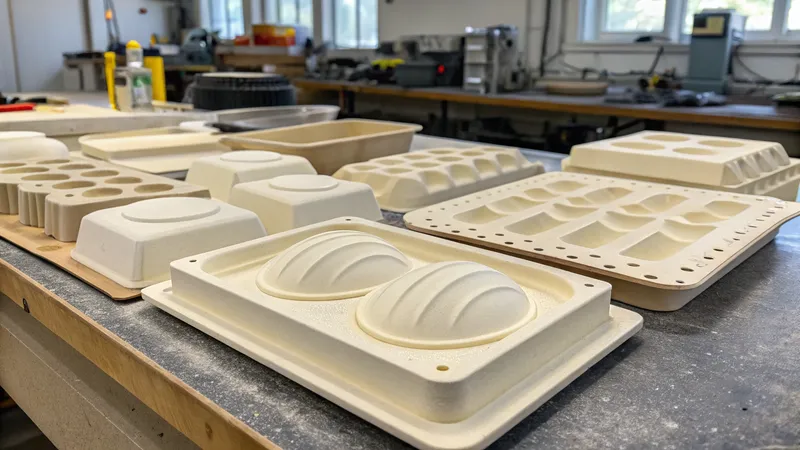
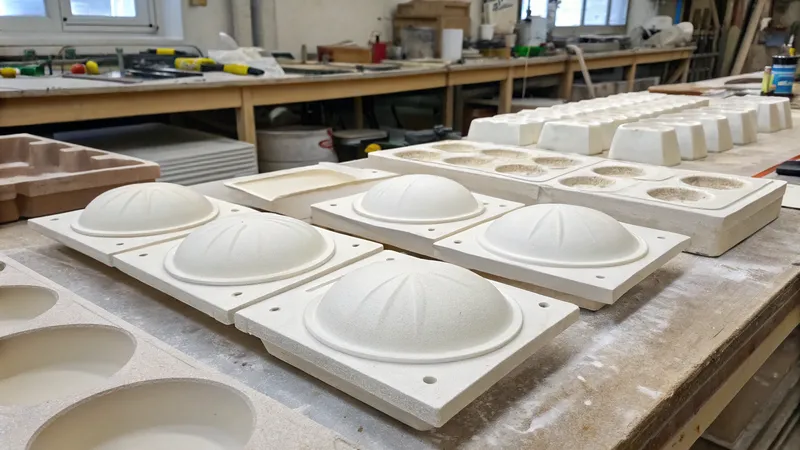
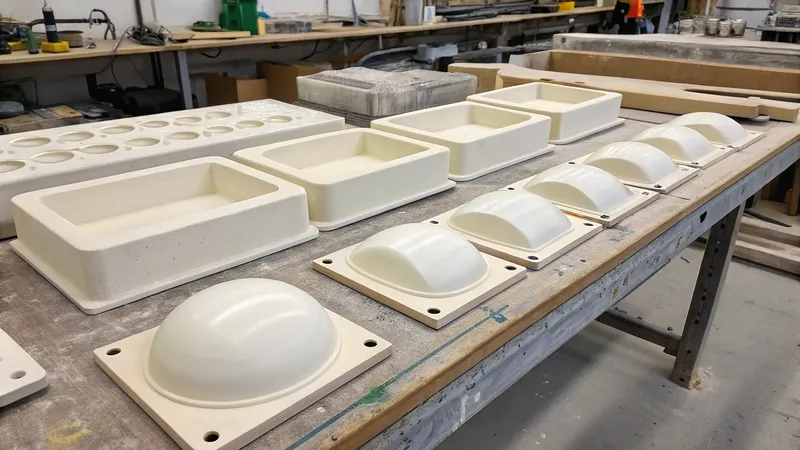
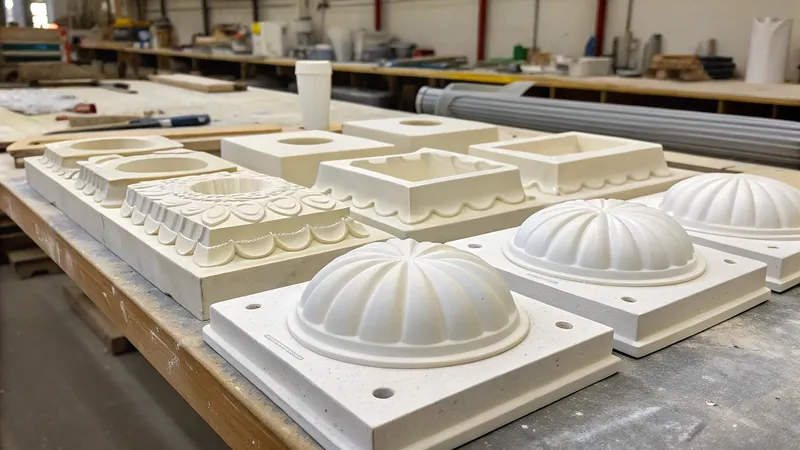
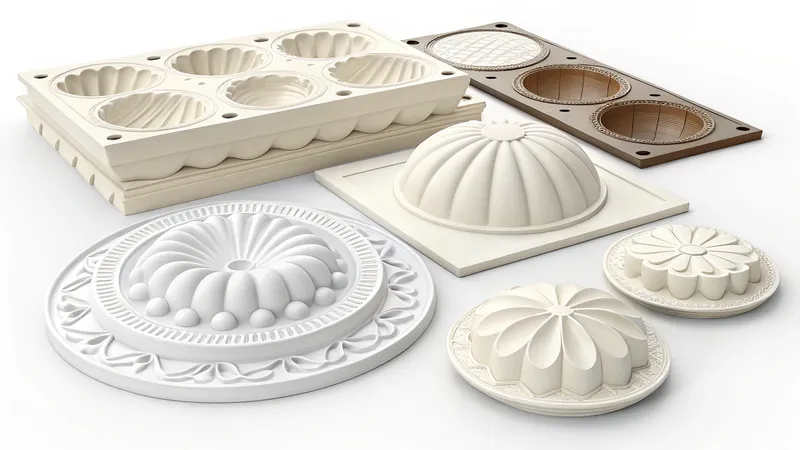
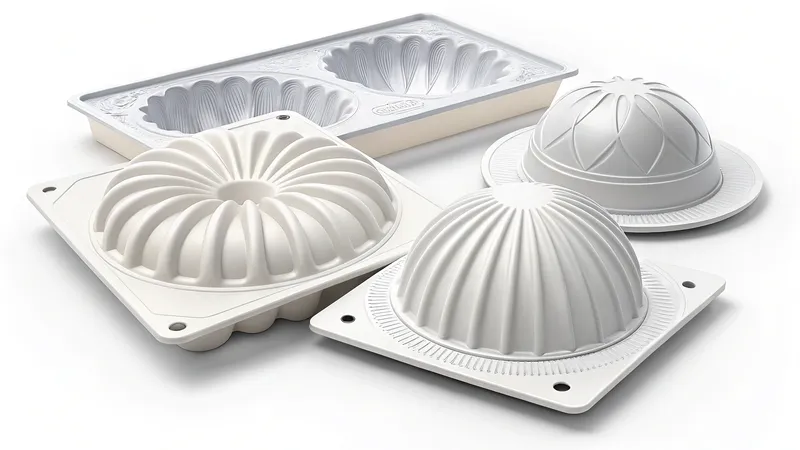
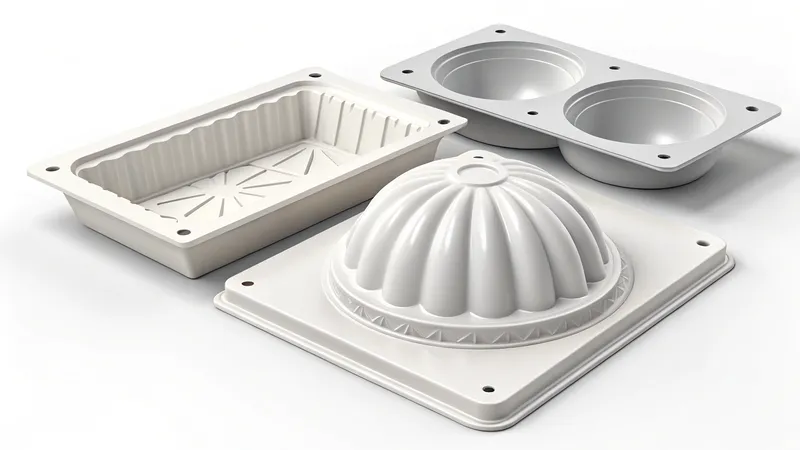
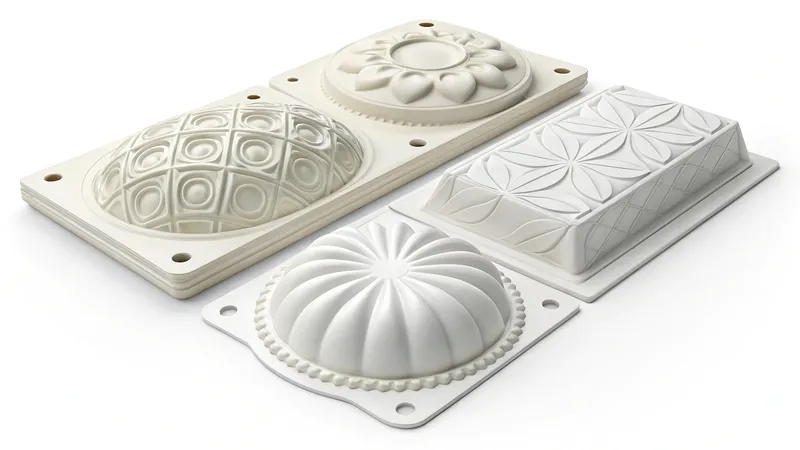
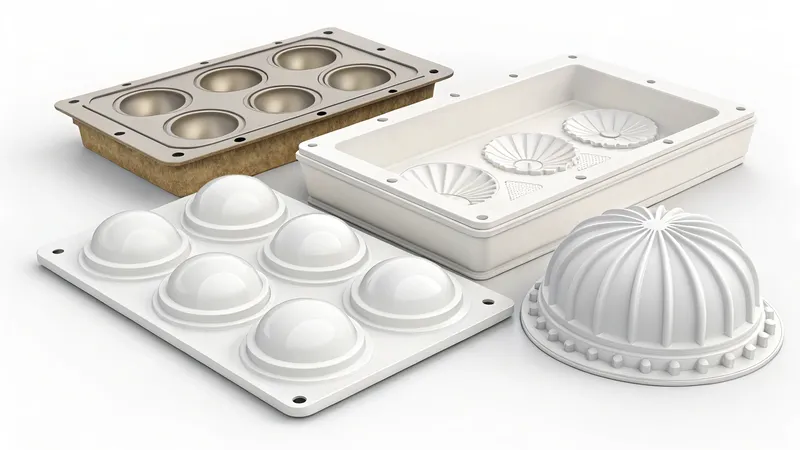
Plaster Mold (for Thermoforming)1:
- Full Technical Name: Gypsum Cement Mold for Thermoforming Applications
- Common Aliases: Plaster of Paris mold, POP mold, gypsum mold.
- Core Principle: A mold made primarily from plaster (typically Calcium Sulfate Hemihydrate) used as the positive (male) or negative (female) form over which a heated thermoplastic sheet is shaped. It's valued for its low cost and ease of creation for prototypes and short runs.
-
Master Pattern/Plug: The original object or model from which the plaster mold is cast. This can be made from various materials like wood, clay, 3D printed plastic, or even an existing object.
Classification
Plaster thermoforming molds can be classified in several ways:
-
By Process (Type of Mold):
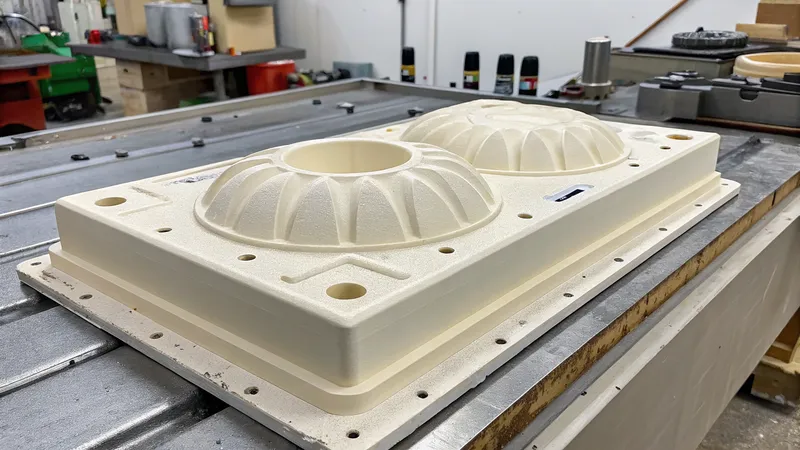
- Positive Mold (Male Mold/Drape Forming): The heated plastic sheet is draped over the convex mold. The inner surface of the plastic part takes the shape of the mold.
- Negative Mold (Female Mold/Cavity Mold): The heated plastic sheet is drawn into the concave mold cavity. The outer surface of the plastic part takes the shape of the mold.
-
By Material (Focus on Plaster):
- Standard Plaster of Paris: Most common for DIY and basic prototypes.
- High-Strength Gypsum Cements (e.g., Hydrocal, Ultracal): Offer better durability, finer detail, and smoother surfaces than standard plaster.
-
By Application Lifecycle:
- Prototyping Molds: For initial design verification, form-fit-function testing.
- Low-Volume Production Molds: For very short runs where tooling cost is a major constraint.
- Hobbyist/Educational Molds: For learning and small personal projects.
II. Application Analysis Level: Solving User Decision-Making Problems
Understanding when and why to use plaster molds is key.
Typical Application Scenarios
Plaster molds are ideal for:
-
Rapid Prototyping2: Quickly creating physical models of new designs for visual appraisal, ergonomic testing, or basic functional checks (e.g., custom enclosures for electronics, packaging mock-ups).
-
Custom One-Off Parts: Creating unique items where only one or a few are needed (e.g., costume parts, custom trays, art projects).
-
Educational Purposes: Teaching the principles of thermoforming and mold making due to low cost and relative safety.
-
Low-Budget Startups3: Testing product ideas without significant investment in metal tooling.
-
Simple Geometries: Parts with gentle curves, no sharp internal corners, and adequate draft angles.
Industry/Product Examples:
-
Product Design: Casings for small electronics, custom organizers.
-
Hobby & Craft: Masks, model components, decorative items.
- Food Industry (Prototyping): Molds for chocolate or soap (though food-grade considerations are paramount if used directly). For thermoforming, it would be for packaging prototypes like blister packs or trays.
Pros and Cons Comparison
| Feature | Plaster Molds | Wood/MDF Molds | 3D Printed Molds (e.g., PLA, ABS, PETG) | Aluminum Molds (Tooling) |
|---|---|---|---|---|
| Cost | Very Low | Low to Moderate | Moderate | High |
| Ease of Making | Relatively Easy, some skill required | Moderate, requires woodworking tools/skills | Easy (if 3D printer access & skills) | Complex, requires machining expertise |
| Durability | Low (fragile, prone to chipping) | Moderate (can warp with heat/moisture) | Moderate (can soften with heat) | Very High |
| Detail Level | Moderate (can capture good detail if sealed) | Good | Very Good (depends on printer resolution) | Excellent |
| Heat Resistance | Poor (can degrade over many cycles) | Poor to Moderate | Poor to Good (depends on material) | Excellent |
| Production Vol. | Very Low (prototypes, <10-50 parts) | Low (<50-100 parts) | Low to Moderate (can be higher with infill) | High (1000s to millions) |
| Surface Finish | Can be porous, requires sealing/sanding | Good, can be sealed/painted | Layer lines may be visible, requires finishing | Excellent |
| Lead Time | Fast (hours to a day) | Moderate (days) | Fast (hours to days) | Long (weeks to months) |
III. Technical Deep Dive Level: Meeting Professional Reader Needs
Let's get into the nitty-gritty of creating a plaster mold.
Process Full Workflow Breakdown
-
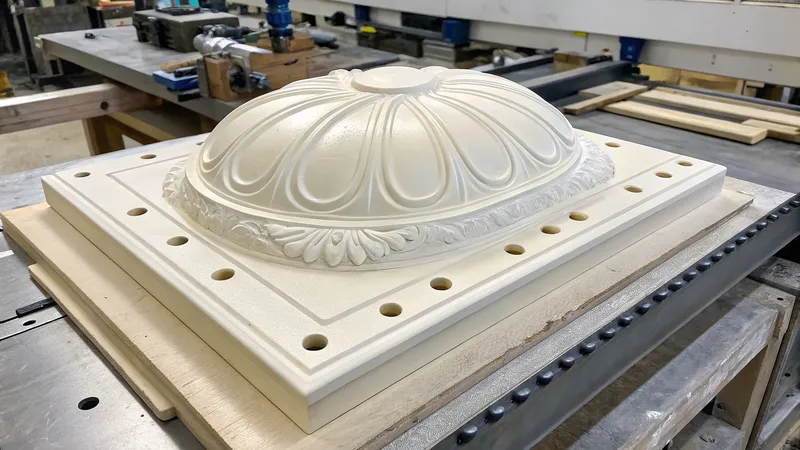
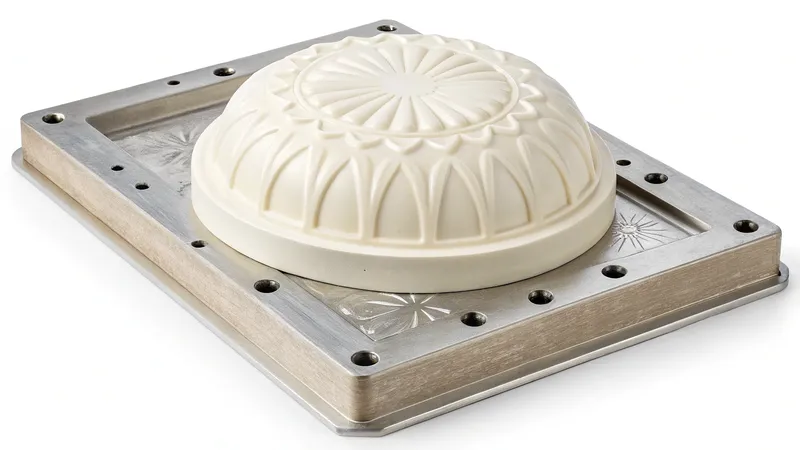
Design the Part & Master Pattern (Plug):
- Design your final part. Remember to incorporate draft angles4 (typically 3-5 degrees minimum) on vertical surfaces to allow easy removal of the thermoformed part from the mold.
- Create a "master pattern" or "plug." This is a physical representation of your desired part. It can be made from clay, wood, dense foam, 3D printed plastic, or even an existing object.
- Key Parameter: Ensure the master pattern is smooth and accurately reflects the final desired shape.
-
Prepare the Master Pattern:
- Seal Porous Masters: If your master is porous (e.g., wood, unsealed 3D print, some foams), seal it with paint, varnish, or epoxy resin to prevent plaster from sticking or moisture absorption.
- Apply Release Agent: Coat the master pattern thoroughly with a mold release agent5 (e.g., petroleum jelly thinned with mineral spirits, specialized mold release spray, or even a thick soap solution). This is crucial for easy separation of the plaster mold from the master.
- Key Parameter: Achieve a thin, even coating of release agent.
- Build a Containment Box (Formwork):
- Construct a box or frame around your master pattern to contain the liquid plaster. This can be made from wood, melamine, LEGOs, or even sturdy cardboard sealed with tape.
- Ensure there's enough space (e.g., 1-2 inches or 2.5-5 cm) around all sides and above the highest point of the master pattern for adequate mold thickness.
- Seal any joints in the box with clay or hot glue to prevent plaster leakage.
- Key Parameter: Box must be watertight and sturdy enough to hold the weight of the plaster.
-
Mix the Plaster:
- Choose Plaster: Plaster of Paris is common. For better strength, consider gypsum cements like Hydrocal or Ultracal.
- Water-to-Plaster Ratio: Follow the manufacturer's instructions meticulously. Generally, you add plaster powder to water, not water to plaster. Start with the recommended amount of cool, clean water in a mixing container. Gradually sift in the plaster powder until it forms islands on the surface. Let it "slake" (absorb water) for a few minutes.
- Mixing: Mix thoroughly but gently to avoid introducing too many air bubbles. Aim for a smooth, pancake batter-like consistency.
- Key Parameter: Correct water-to-plaster ratio6 is critical for strength and setting time.
-
Pour the Plaster:
- Pour the mixed plaster slowly into one corner of the containment box, allowing it to flow over and around the master pattern. This helps minimize trapped air bubbles.
- Once poured, gently tap or vibrate the sides of the containment box to help any trapped air bubbles rise to the surface.
- Key Parameter: Avoid air entrapment.
-
Cure and Demold:
- Let the plaster set completely. This can take anywhere from 30 minutes to several hours, depending on the plaster type and ambient conditions. The plaster will heat up as it cures (exothermic reaction) and then cool down.
- Once fully set and cooled, carefully disassemble the containment box.
- Gently pry the plaster mold away from the master pattern. Work slowly and carefully to avoid breaking the mold or damaging the pattern.
- Key Parameter: Patience during demolding is essential.
-
Dry and Finish the Plaster Mold:
- The plaster mold will still contain significant moisture. It needs to be thoroughly dried before use in thermoforming. Air dry in a warm, dry place for several days, or use a low-heat oven (e.g., 120-150°F / 50-65°C) for several hours, ensuring it doesn't crack.
- Smooth Imperfections: Sand any rough spots or imperfections on the mold surface.
- Seal the Mold Surface: Plaster is porous. Seal the forming surface with a heat-resistant sealant (e.g., high-temperature paint, epoxy resin, or even shellac for very low temp plastics) to create a smooth, non-porous surface and improve mold life. This also prevents the plastic from sticking.
- Drill Vent Holes: For vacuum forming, drill small vent holes (0.5mm - 1.5mm) through the mold in deep draw areas, internal corners, and any features where air could get trapped. This allows the vacuum to pull the plastic tightly against the mold.
- Key Parameters: Mold must be completely dry. Vent holes are crucial for successful vacuum forming.
Material Compatibility Explanation
- Plaster: Generally compatible with most common thermoformable plastics (PETG, HIPS, PVC, ABS, Acrylic) for prototyping purposes7.

-
Thermoplastics:
- PETG/HIPS: Good choices for plaster molds due to lower forming temperatures and good detail replication.
- ABS/Acrylic: May require higher temperatures; ensure your plaster mold is well-dried and sealed. Repeated use with higher temp plastics will degrade the plaster faster.
-
Impact:
- Porosity: Unsealed plaster absorbs moisture and can create a rough surface on the part. Steam released during heating can also interfere with forming. Sealing is essential.
- Low Thermal Conductivity8: Plaster doesn't dissipate heat well, which can lead to longer cycle times as the formed plastic part takes longer to cool.
- Fragility: Plaster can chip or crack, especially with thin sections or sharp corners, or during repeated use.
IV. Practical Tools Level: Enhancing Content Operability
Let's provide some actionable tools.
Design Checklist for Plaster Thermoforming Molds
Before creating your master pattern and mold:
-
Draft Angles: Are all vertical surfaces angled (3-5° min) for easy part release?
-
Radiused Corners: Are all internal and external corners rounded (avoid sharp corners)? Sharp corners are hard to form and stress points.
-
Wall Thickness (of final part): Understand that plastic will thin as it stretches over the mold, especially in deep draw areas. Design accordingly.
-
Undercuts: Avoid undercuts unless you're planning a multi-part plaster mold (more complex). Simple single-piece molds cannot have undercuts.
-
Mold Base: Does the mold have a flat, stable base?
-
Vent Hole Locations (for vacuum forming): Have potential air trap locations been identified for vent holes? (Mark them on the master).
-
Master Pattern Smoothness: Is the master pattern as smooth as possible? Imperfections will transfer.
-
Release Agent Plan9: Have you chosen and sourced an appropriate release agent?
-
Sealing Plan: Have you chosen a sealant for the final plaster mold?
Process Selection Decision-Making (Simplified)
Is a Plaster Thermoforming Mold Right for My Project?
-
Primary Goal?
- A) Quick Visual/Form Prototype: → Plaster is a good candidate.
- B) Functional Testing with multiple cycles: → Consider more durable options (e.g., wood, 3D print, or consult ZetarMold for tooling).
- C) Low-Volume Production (e.g., 10-50 parts): → Plaster might work if parts are simple and quality demands aren't extreme.
- D) Medium to High-Volume Production: → Plaster is NOT suitable. (Contact ZetarMold for injection molding or other production methods).
-
Part Complexity?
- A) Simple shapes, gentle curves, no undercuts: → Plaster is a good candidate.
- B) Complex details, sharp corners, undercuts: → Plaster is difficult. Explore 3D printing for the mold or other methods.
-
Budget for Mold?
- A) Very Low: → Plaster is a strong contender.
- B) Moderate to High: → Explore more durable and precise options.
-
Required Durability of Mold?
- A) Few pulls needed: → Plaster is fine.
- B) Many pulls or robust handling needed: → Plaster is not ideal.
General Idea: If you answered 'A' to most questions above, plaster is likely a good fit for your initial stage. If you have 'B', 'C', or 'D' answers, especially for production volume, it’s time to explore more robust solutions like those ZetarMold offers.
V. Extension Level: Building a Knowledge Network
Understanding how plaster thermoforming fits into the broader manufacturing landscape.
Related Technology Navigation
-
Upstream Technologies (Creating the Master Pattern):
- CAD Software: (e.g., SolidWorks, Fusion 360, AutoCAD) For designing the part and master.
- 3D Printing: (FDM, SLA, SLS) Increasingly common for creating master patterns quickly and accurately.
- CNC Machining10: For creating precise master patterns from wood, tooling board, or foam.
- Manual Sculpting/Carving: Traditional methods using clay, wood, foam.
-
Core Process:
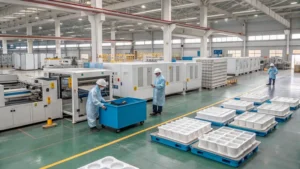
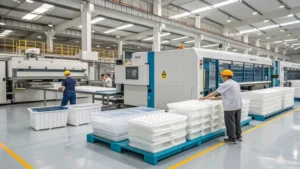
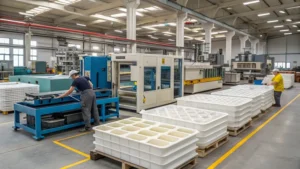
- Thermoforming Machines11: Vacuum formers, drape formers, pressure formers.
-
Downstream Technologies (Post-Thermoforming):
- Trimming: (Die cutting, CNC routing, manual cutting) To remove excess plastic from the formed part.
- Finishing: Painting, assembly, labeling.
-
Alternative/Progressive Mold-Making Technologies:
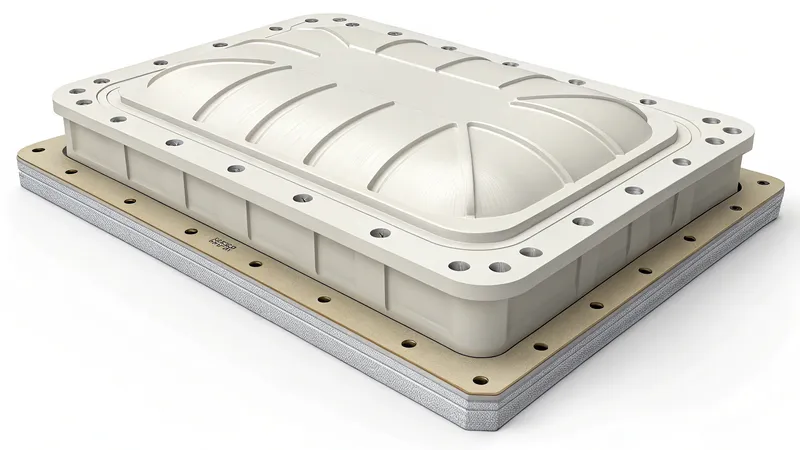
- Wood/MDF Molds: Step up in durability from plaster.
- Epoxy/Urethane Tooling Board Molds: CNC machined for higher accuracy and durability than wood.
- 3D Printed Molds (Directly for Thermoforming)12: Using high-temp resins or filaments.
- Silicone Rubber Molds: (A ZetarMold specialty!) Excellent for casting resins, foams, and some low-temp forming, known for flexibility and detail. Not typically for high-temp thermoforming itself, but related in mold-making principles.
- Aluminum/Steel Tooling: The industry standard for high-volume, high-precision thermoforming and injection molding (ZetarMold's core business for plastic parts).
We hope this in-depth guide empowers you to decide if plaster thermoforming molds are a viable option for your project's early stages. Remember, this method shines for rapid iteration and proof-of-concept models.
-
Explore this link to understand the advantages of plaster molds in thermoforming, including cost-effectiveness and ease of use. ↩
-
Discover how rapid prototyping can accelerate your product design process and improve your design iterations. ↩
-
Learn about affordable prototyping methods that can help startups test their ideas without breaking the bank. ↩
-
Understanding draft angles is crucial for effective mold design, ensuring easy part removal and high-quality production. ↩
-
Exploring mold release agents can enhance your knowledge of mold making, ensuring successful separation and better results. ↩
-
Learning about the water-to-plaster ratio is essential for achieving strong and durable plaster molds, impacting your final product quality. ↩
-
Exploring this resource will provide insights into how prototyping can enhance your thermoforming projects and improve outcomes. ↩
-
Understanding the impact of low thermal conductivity can help you optimize your thermoforming process for better efficiency and results. ↩
-
This link will guide you in selecting the right release agent, ensuring successful mold release and quality in your thermoformed parts. ↩
-
Learn about CNC machining and its critical role in creating precise master patterns for various applications. ↩
-
Explore this link to understand the various thermoforming machines and their applications in manufacturing processes. ↩
-
Discover how 3D printed molds are revolutionizing thermoforming with precision and efficiency. ↩