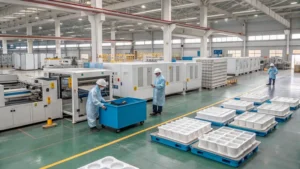
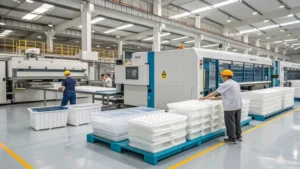
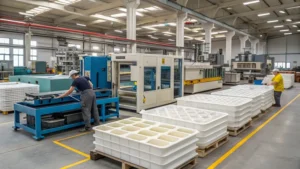
Vacuum forming and compression molding1 are two widely used manufacturing processes that shape materials into functional products, but they differ significantly in their methods, materials, and applications. Whether you're designing lightweight packaging or durable automotive components, understanding these processes can help you choose the right one for your project.
Vacuum forming2 uses a vacuum to shape heated thermoplastic sheets3 over a mold, ideal for large, shallow parts like trays and signage. Compression molding applies heat and pressure to cure materials like thermosets and rubber in a closed mold, producing strong, complex parts such as gaskets and electrical connectors.
This blog post will break down the differences between vacuum forming and compression molding, covering their definitions, materials, processes, applications, and key distinctions. With detailed explanations, a comparison table, and practical insights, you’ll gain a clear understanding of how these techniques work and when to use them.
Vacuum forming is more cost-effective for high-volume production than compression molding.False
Vacuum forming is typically more cost-effective for low to medium production volumes due to lower tooling costs, while compression molding excels in medium to high volumes where durability is key.
Compression molding can handle a wider range of materials compared to vacuum forming.True
Compression molding works with thermosets, rubber, and composites, while vacuum forming is limited to thermoplastics.
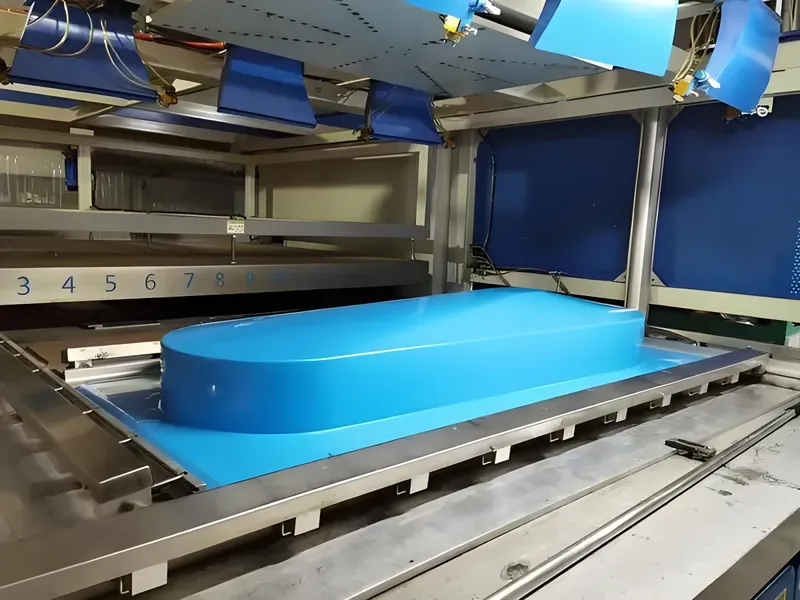
What is Vacuum Forming?
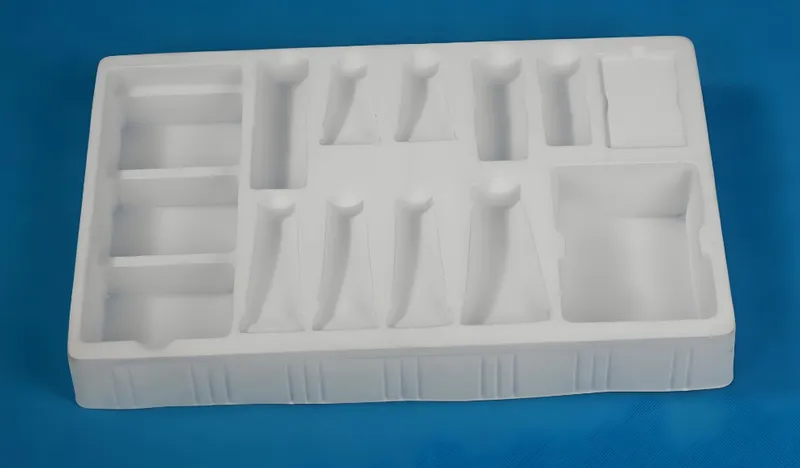
Vacuum forming is a straightforward and economical process that transforms thermoplastic sheets into large, lightweight parts. It’s a go-to method for industries needing quick setups and affordable tooling, such as packaging and prototyping.
Vacuum forming heats a thermoplastic sheet until it’s pliable, then uses a vacuum to pull it over a mold, creating products like packaging trays, automotive interiors, and signage.
Common Materials Used in Vacuum Forming
Vacuum forming relies on thermoplastics—materials that can be reheated and reshaped multiple times. Here are some popular choices:
-
ABS (Acrylonitrile Butadiene Styrene): Durable and rigid, perfect for automotive parts.
-
Acrylic (PMMA): Clear and strong, used in signage and displays.
-
PVC (Polyvinyl Chloride): Flexible and affordable, common in packaging.

-
PET (Polyethylene Terephthalate): Heat-resistant, ideal for food containers.
-
Polystyrene: Lightweight and cheap, great for disposable items.
These materials come in sheets, typically 0.5 mm to 6 mm thick, depending on the part’s needs.
Vacuum forming can be used with thermosetting plastics.False
Vacuum forming is designed for thermoplastics, as thermosets harden permanently and can’t be reshaped.
Steps in the Vacuum Forming Process
The vacuum forming process4 is simple yet effective:
-
Material Selection: Choose a thermoplastic sheet based on the part’s requirements.
-
Heating: Warm the sheet in an oven (120°C–200°C) until it’s soft and stretchy.
-
Forming: Position the sheet over a mold and apply a vacuum (28–29 inches of mercury) to pull it into shape.
-
Cooling: Let the part cool and solidify, often with fans or water cooling.
-
Trimming: Remove the part from the mold and trim excess material with tools like CNC machines.
This quick process makes vacuum forming ideal for prototyping and low-volume runs.
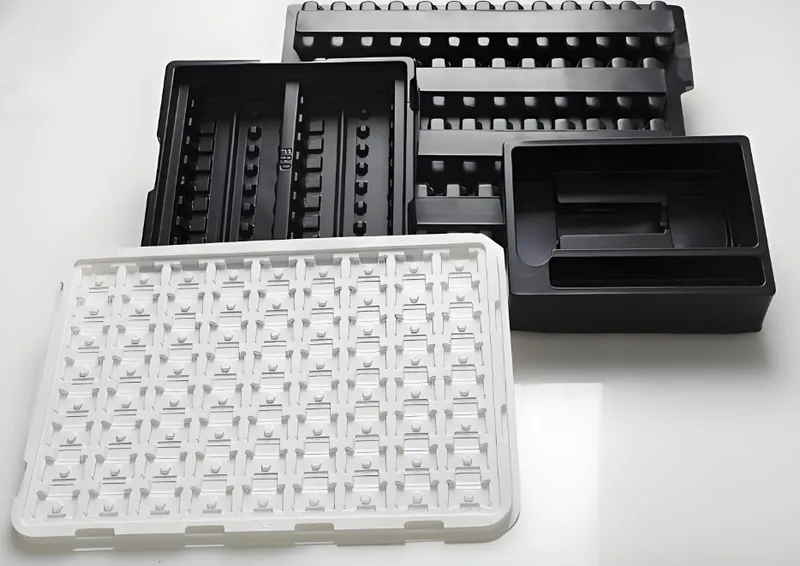
Applications of Vacuum Forming
Vacuum forming shines in applications requiring large, simple parts:

-
Packaging: Blister packs, trays, and clamshells for food and electronics.
-
Signage: Bold, durable signs for retail and advertising.
-
Automotive: Interior parts like dashboards and door panels.
-
Consumer Goods: Protective covers and prototypes.
It’s especially cost-effective for short runs due to its low tooling costs.
What is Compression Molding?
Compression molding is a robust process that creates strong, detailed parts by curing materials under heat and pressure. It’s a favorite in industries needing high-performance components, like automotive and aerospace.
Compression molding places material into a heated mold, then uses pressure and heat to shape and cure it, producing durable parts like seals, gaskets, and electrical housings.

Common Materials Used in Compression Molding
Compression molding works with a broader range of materials, including:
-
Thermosetting Plastics5: Phenolics, epoxies, and polyesters—strong and heat-resistant.
-
Rubber6: Silicone, EPDM, and natural rubber—flexible and resilient.
-
Composites7: Fiberglass and carbon fiber—light yet tough.
These materials are often pre-measured as granules, powders, or preforms for precision.
Compression molding can be used with thermoplastics.True
Though rare, compression molding can adapt to certain thermoplastics, but it’s primarily for thermosets and rubber.
Steps in the Compression Molding Process
Compression molding follows a detailed workflow:

-
Material Prep: Measure the material to fit the mold cavity accurately.
-
Loading: Place the material into the open mold, ensuring even spread.
-
Pressing: Close the mold and apply heat (150°C–200°C) and pressure (1,000–2,000 psi) to shape and cure it.
-
Curing: Hold the heat and pressure until the material sets (2–10 minutes).
-
Demolding: Open the mold and remove the cured part.
-
Finishing: Trim excess flash with cutting tools.
This method takes longer than vacuum forming but delivers superior strength.
Applications of Compression Molding
Compression molding is perfect for high-strength, complex parts:

-
Automotive: Gaskets, seals, and engine components.
-
Electrical: Connectors and housings for tough environments.
-
Rubber Goods: O-rings and vibration dampeners.
-
Aerospace: Lightweight, durable parts for planes and spacecraft.
It’s best for medium to high volumes where quality trumps speed.
What are the Key Differences Between Vacuum Forming and Compression Molding?
The differences between these processes boil down to materials, methods, part complexity, and production scale. Here’s a detailed breakdown:

Materials
-
Vacuum Forming: Uses thermoplastics (e.g., ABS, PVC) that can be reshaped.
-
Compression Molding: Uses thermosets8 (e.g., phenolics), rubber, and composites that cure permanently.
Process
- Vacuum Forming: Heats a sheet and uses a vacuum to form it over a mold—fast and low-pressure.

- Compression Molding: Presses material in a closed mold with heat and high pressure—slower but stronger.
Part Complexity
-
Vacuum Forming: Suits large, shallow parts with basic shapes (e.g., trays).
-
Compression Molding: Handles small, intricate parts with thick walls (e.g., connectors).
Production Volume
-
Vacuum Forming: Great for low to medium runs due to cheap, quick tooling.
-
Compression Molding: Ideal for medium to high runs where durability justifies longer cycles.
Comparison Table: Vacuum Forming vs. Compression Molding
| Aspect | Vacuum Forming | Compression Molding |
|---|---|---|
| Materials | Thermoplastics (ABS, PVC, etc.)9 | Thermosets, rubber, composites |
| Process | Vacuum shapes heated sheet | Heat and pressure cure material10 |
| Part Complexity | Large, simple, shallow parts | Small, complex, detailed parts11 |
| Production Volume | Low to medium | Medium to high |
| Tooling Costs | Lower | Higher |
| Cycle Time | Shorter | Longer (due to curing) |
| Strength | Moderate | High |
This table sums up the trade-offs, guiding your choice based on project needs.
How to Choose Between Vacuum Forming and Compression Molding?
Picking the right process depends on your priorities. Here’s a quick guide:

-
Part Size and Shape:
-
Large and simple? Go with vacuum forming.
-
Small and complex? Choose compression molding.
-
-
Production Scale:
-
Prototypes or short runs? Vacuum forming saves money and time.
-
Large, consistent batches? Compression molding delivers quality.
-
-
Material Needs:
-
Flexible thermoplastics? Vacuum forming is your match.
-
Strong thermosets or rubber? Compression molding fits the bill.
-
-
Budget and Timeline:
-
Tight budget or deadline? Vacuum forming is faster and cheaper upfront.
-
Long-term durability? Compression molding is worth the investment.
-
Fun fact: Vacuum forming can craft massive parts like kayaks, while compression molding excels at tiny, tough pieces like rubber seals!
Conclusion
Vacuum forming and compression molding each bring unique strengths to the table. Vacuum forming offers a fast, affordable way to produce large, lightweight parts from thermoplastics, perfect for packaging and prototypes. Compression molding, with its ability to create strong, complex parts from thermosets and rubber, suits demanding applications in automotive and electrical fields.
-
Discover the intricacies of compression molding, its advantages, and how it differs from other manufacturing processes. ↩
-
Explore this link to understand the vacuum forming process, its applications, and benefits in various industries. ↩
-
Learn about thermoplastic sheets, their properties, and their role in processes like vacuum forming and compression molding. ↩
-
Exploring the vacuum forming process will provide insights into its efficiency and versatility in various industries. ↩
-
Explore the advantages of Thermosetting Plastics to understand their applications and benefits in various industries. ↩
-
Learn about the role of rubber in compression molding and its unique properties that enhance product performance. ↩
-
Discover the benefits of composites in manufacturing, including their strength-to-weight ratio and versatility. ↩
-
Learn about thermosets, their properties, and their applications in manufacturing, which is crucial for understanding material choices. ↩
-
Explore the benefits of thermoplastics in manufacturing, including their versatility and ease of processing. ↩
-
Understanding the curing process can enhance your knowledge of material properties and production efficiency. ↩
-
Discover various techniques for creating intricate parts, which can improve your design and manufacturing strategies. ↩